The bone ring technique is a relatively new concept in the field of implantology, allowing the simultaneous placement of an implant with bone augmentation. The implant is placed through an autologous or allograft bone ring to enhance the stability of the graft that immediately follows. This can then be augmented over with a bovine bone and porcine collagen membrane to build further volume. The case below illustrates this technique and highlights its advantages in the right cases.
Case presentation
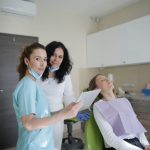
A 34-year-old patient presented with concerns about her central incisors, which had been traumatised when she was a child. They had always caused problems with persistent infections, but had become worse over time. The patient was keen to replace both the central incisors and was seeking a permanent solution.
A comprehensive clinical assessment was conducted to reveal good general oral hygiene and no relevant medical history. The UR1 had been root treated some years previously.
All possible treatment options were discussed with the patient, including no treatment, continued management of issues as they presented, extraction with a bridge and extraction with dental implants. Having already expressed an interest for a fixed solution, implants were her first choice. The surgical and restorative procedures were planned and explained in detail and informed consent obtained to proceed.
Treatment
Impressions were taken and used to fabricate an Essix retainer with the central incisors included. This would provide a temporary restoration for the next three months while the extraction sockets and surrounding soft tissue healed. The UR1 and UL1 were extracted atraumatically and the Essix retainer was fitted.
3 months later the patient returned to the practice for simultaneous bone grafting and implant placement. Upon examination, the soft tissue was pink and healthy and the ridge looked good too. A 3-sided, full-thickness flap was raised and, though difficult to see from the previous photos, there was a through and through defect from buccal to the palatal bone at the proposed UL1 implant site was clear. The through-and-through defect can be seen in the images.
The options at this point were to augment using various materials and techniques, including the use of bone plates, block grafting and a bone ring. The latter solution was chosen for this case as it would make building the palatal and buccal walls simpler, allowing the implant to be placed into the existing apical bone for primary stability.
A large incisal canal was identified. This is challenging to treat as you have to work around it and create a stable environment for the implant.
The implant site was prepared using the trephine drill from the Botiss bone ring kit. It’s important to flatten the base of the site to enable the bone ring to sit flush for more accurate implant and bone graft placement. The allogenic bone ring was trimmed in length accordingly for this site to 7mm, after being hydrated in saline for 20 minutes. The bone ring was tried in the mouth at the UL1 site to ensure there was no micro movement and check that the height was equal to the adjacent bone peaks.
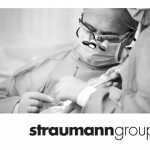
A 3.3 x 12mm SLActive® Bone Level Tapered implant (Straumann) was placed through the bone ring and torqued to 60Ncm. A second implant was placed into the UR1 following the typical placement protocols.
Simple GBR was then performed to build up bone volume around the UL1 and to treat the small buccal dehiscence at the UR1. Cerabone bovine graft material was placed over the site to increase buccal volume. This was secured with a Jason membrane and stabilised with periosteal horizontal mattress sutures. Passive primary closure is crucial using horizontal mattress and interrupted sutures to achieve stability of the clot and good healing of the site.
The patient was given all the standard post-operative oral hygiene instructions and the importance of maintaining health during the healing period and beyond was emphasised. The site looked healthy at two weeks post-op.
Six months later she returned to the practice, the implants were uncovered and impression copings fitted for the impression to be taken. Two screw-retained crowns were fabricated by the laboratory and fit into the mouth.
Conclusion
The patient was delighted with the outcome of this treatment. She achieved the permanent solution she needed for teeth that had caused her problems for many years.
The key advantages of the bone ring technique demonstrated in this case were that we can use the implant to secure the bone ring during the surgical appointment, providing excellent primary stability. Also, avoiding the need to harvest the bone graft from the patient’s chin improves their experience and minimises their recovery time. In the right cases, it can be hugely successful.
Case images
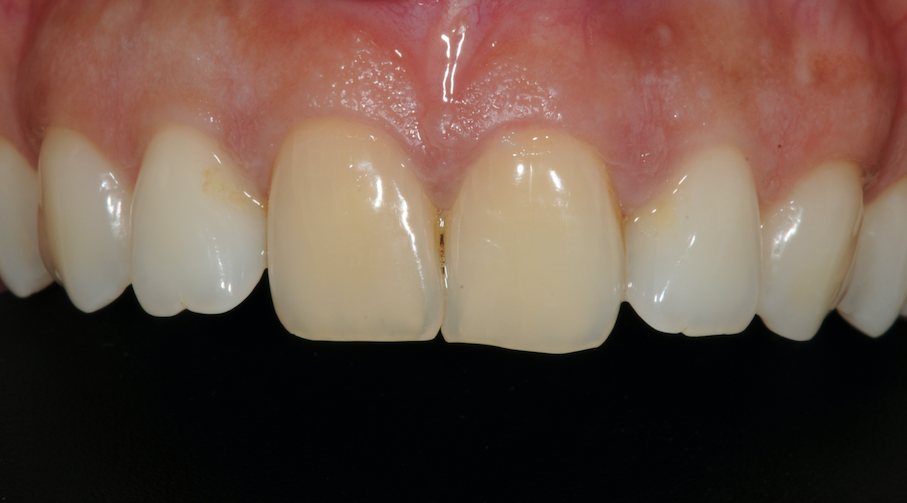
Figure 1-Patient presentation

Figure 2-Extractions

Figure 3-Essix retainer with central incisors
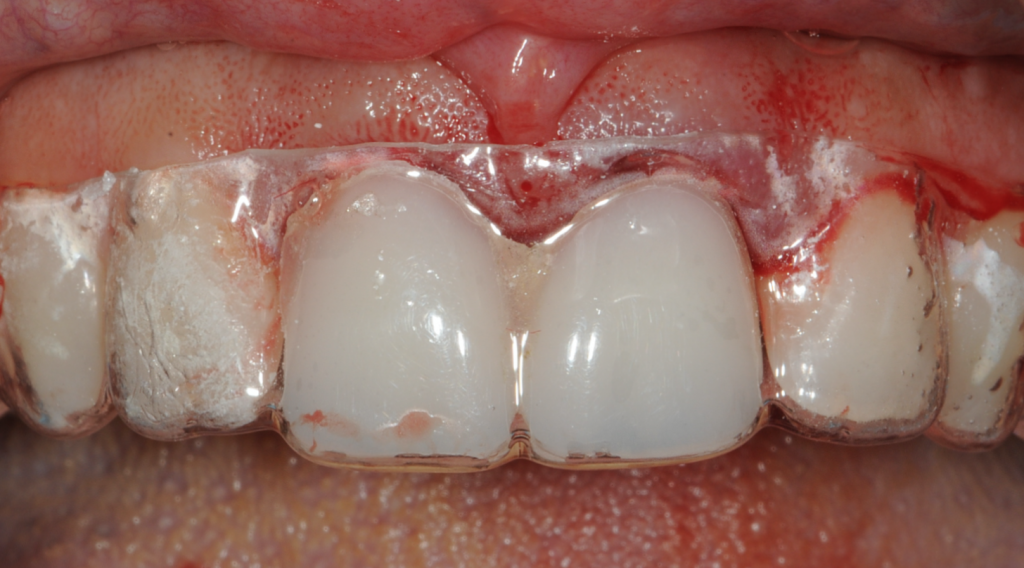
Figure 4-Essix retainer fitted
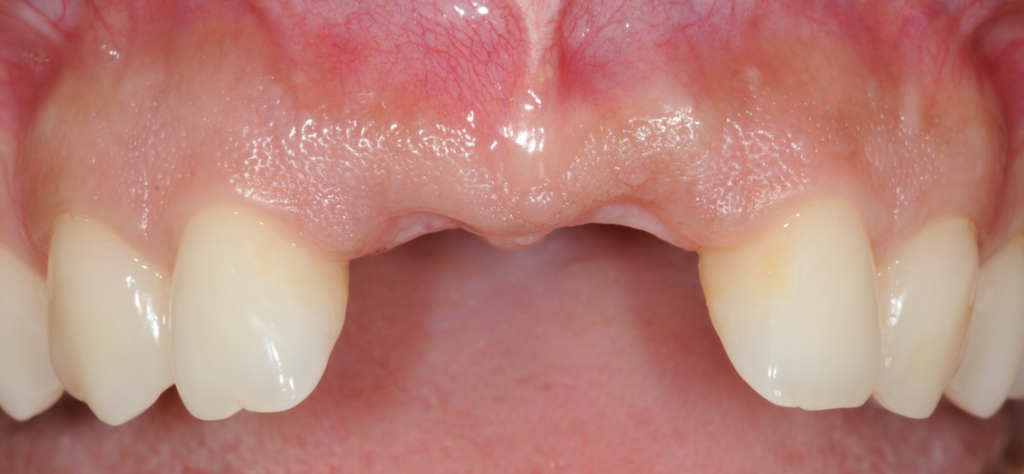
Figure 5-Healed sites
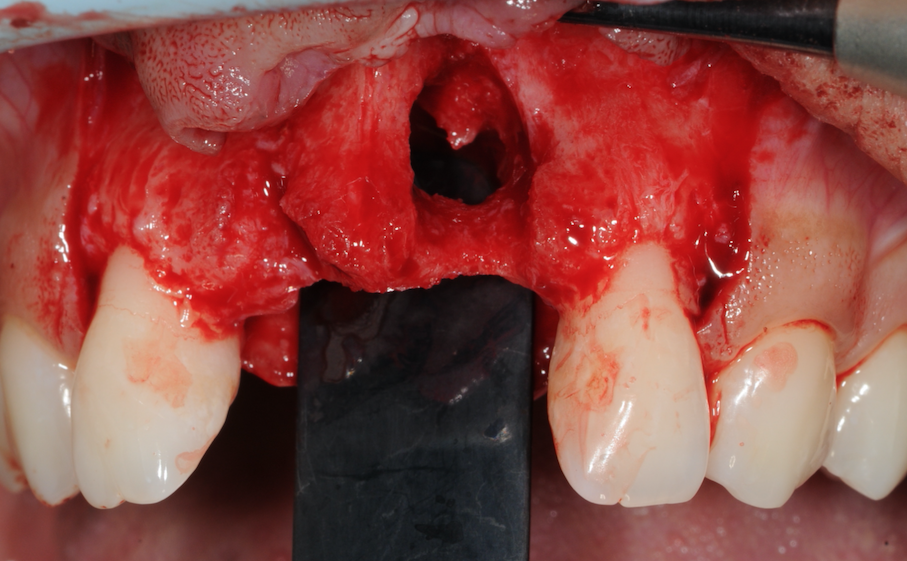
Figure 6-Through and through defect identified
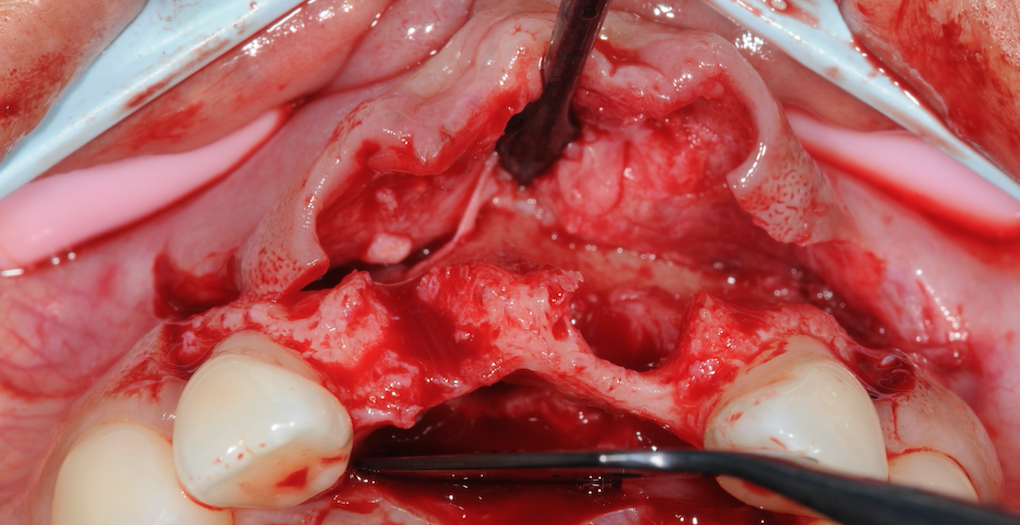
Figure 7-Missing buccal bone and large incisive canal
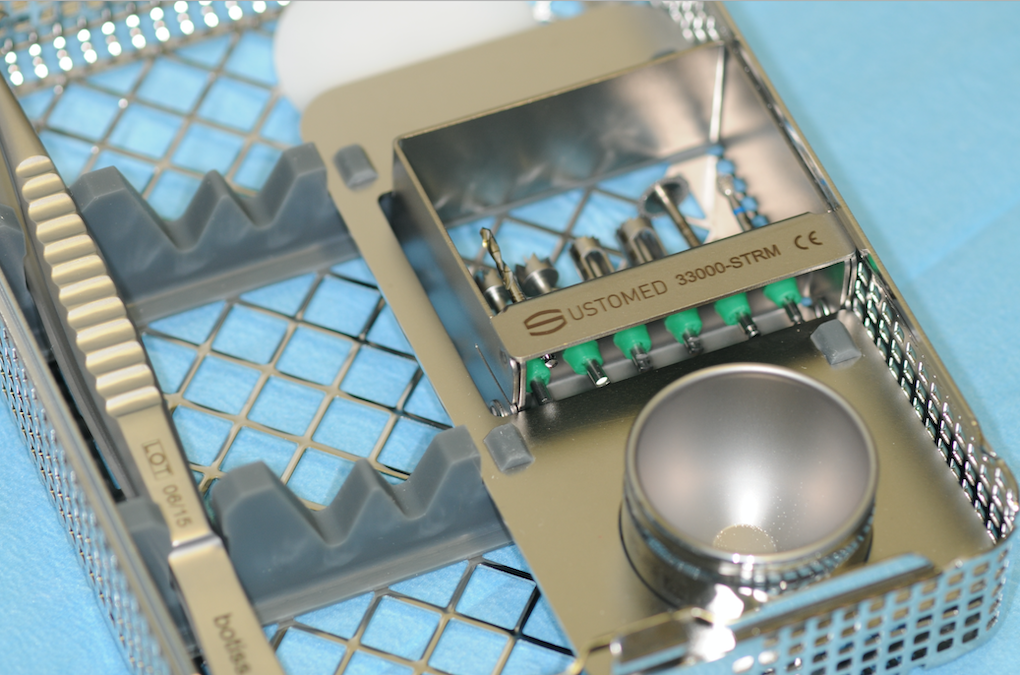
Figure 8a-Botiss Bone Ring kit

Figure 8b-Botiss Bone Ring kit
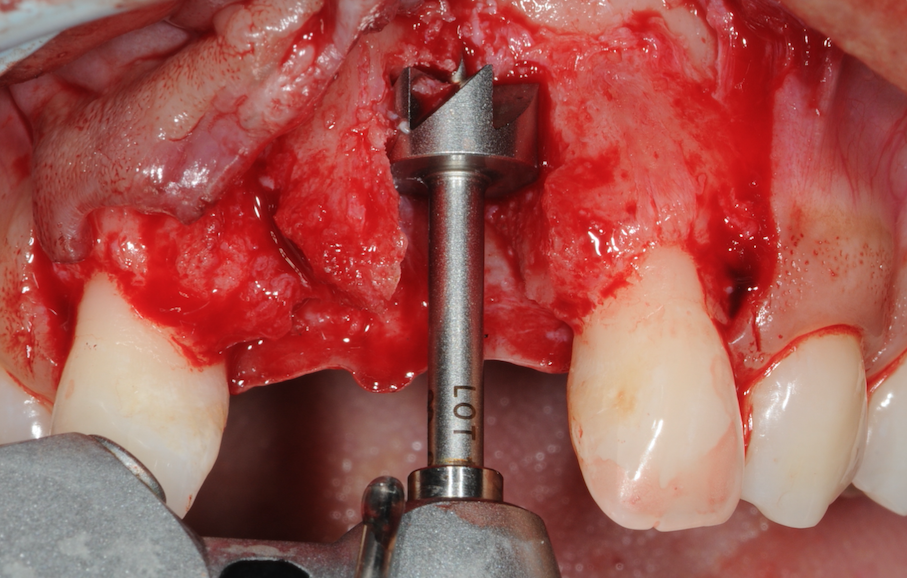
Figure 9-Flattening of the base
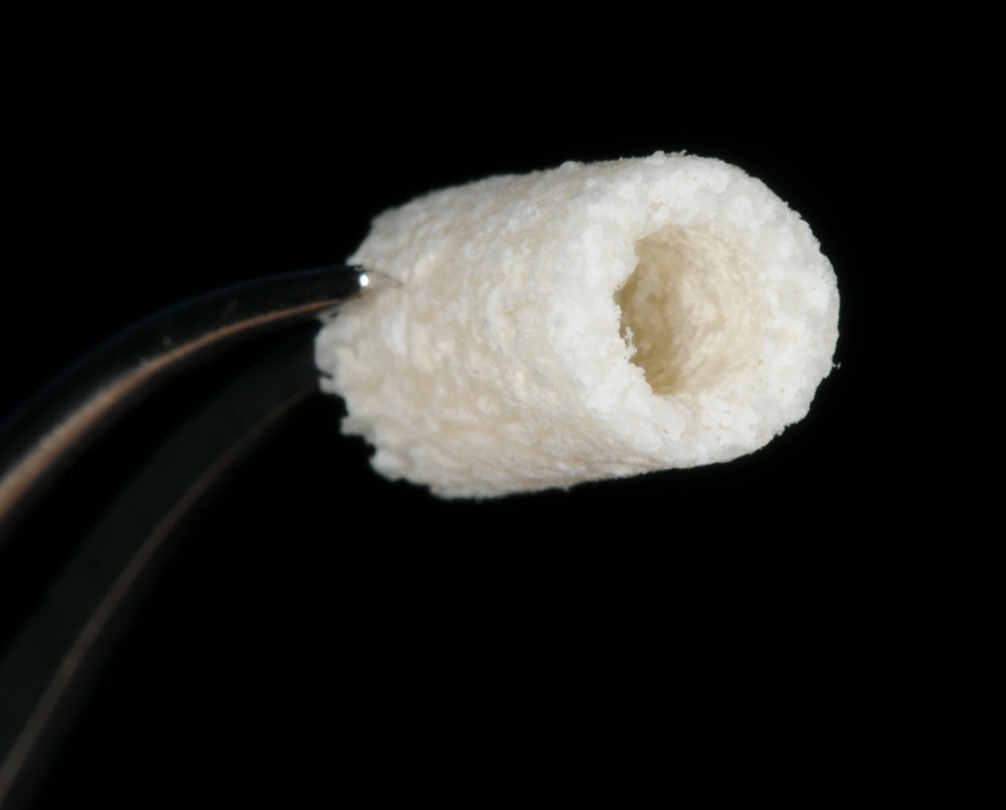
Figure 10-Allogenic bone ring 7mmx10mm
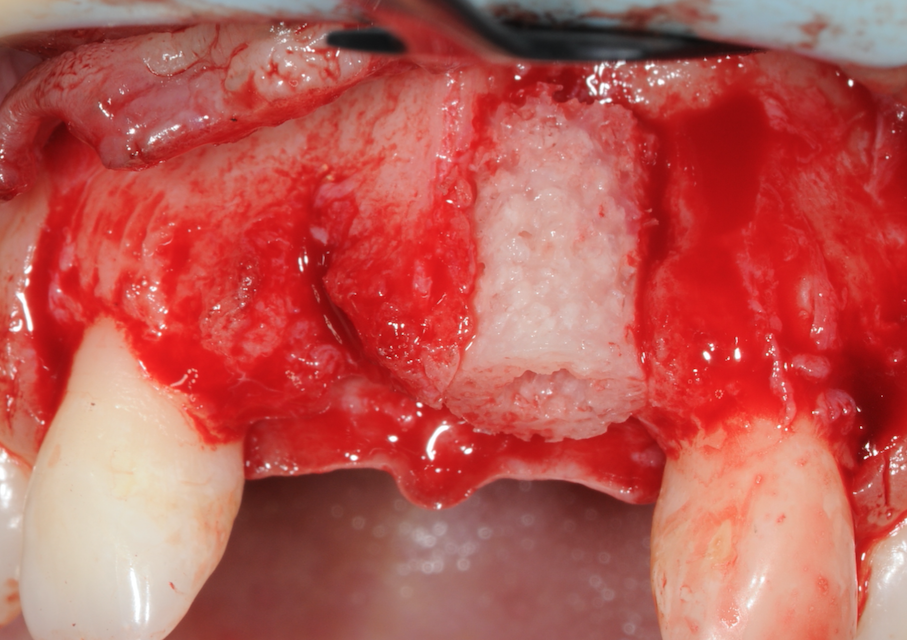
Figure 11-Bone ring placed and checked for stability
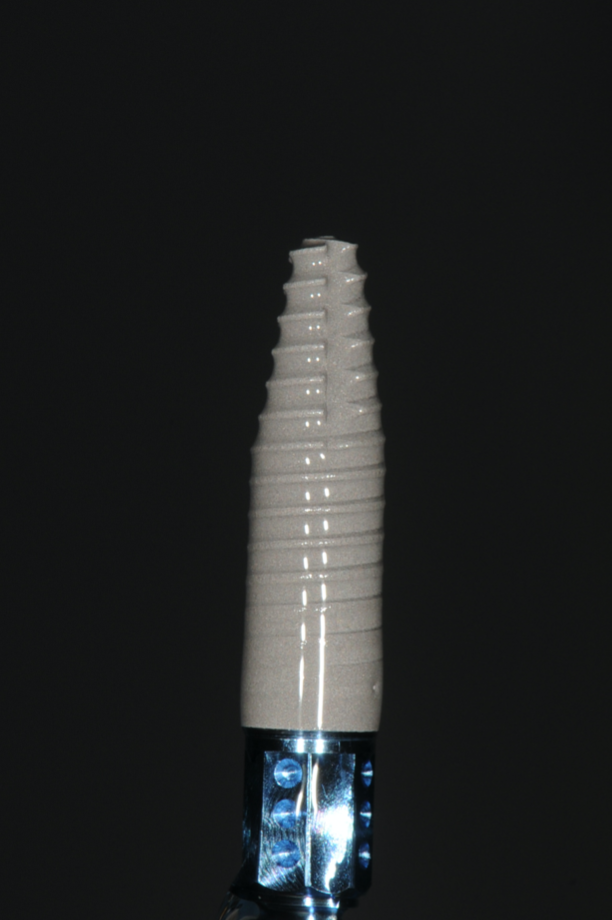
Figure 12-Straumann BLT SLActive implant
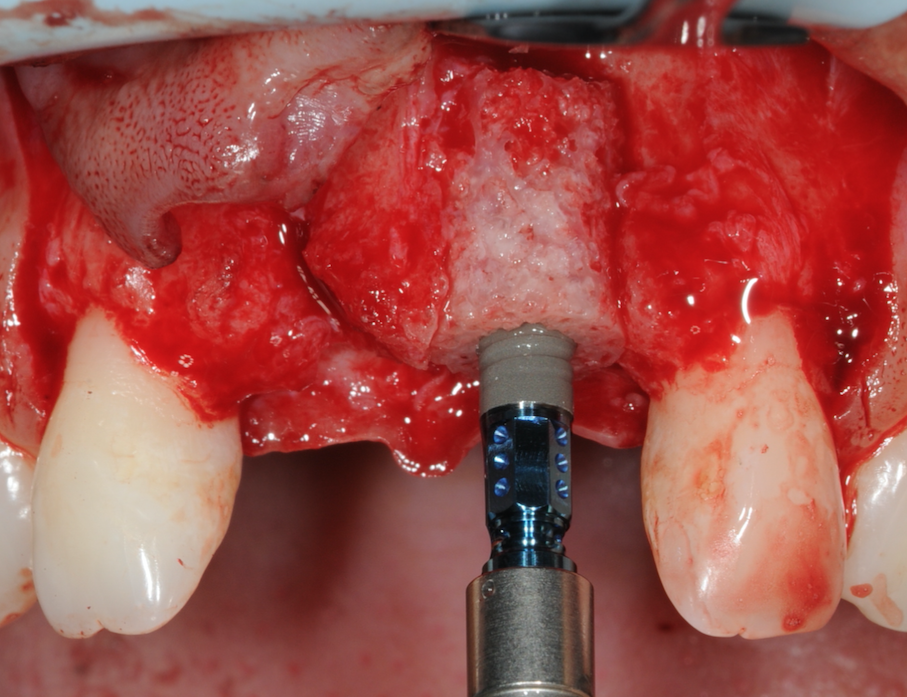
Figure 13-Implant placed through Bone Ring
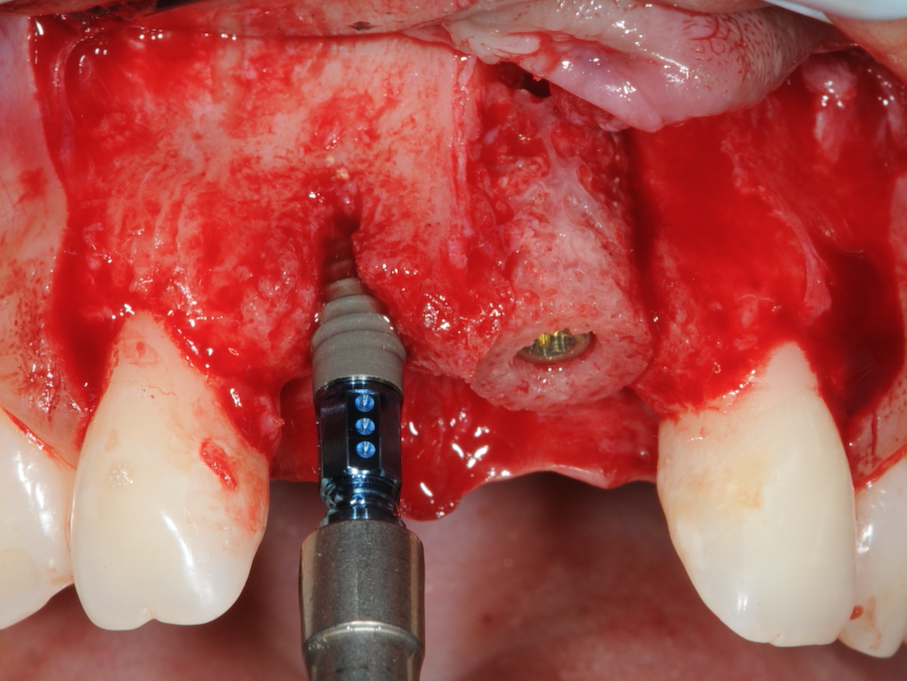
Figure 14-Implant placed at UR1 site
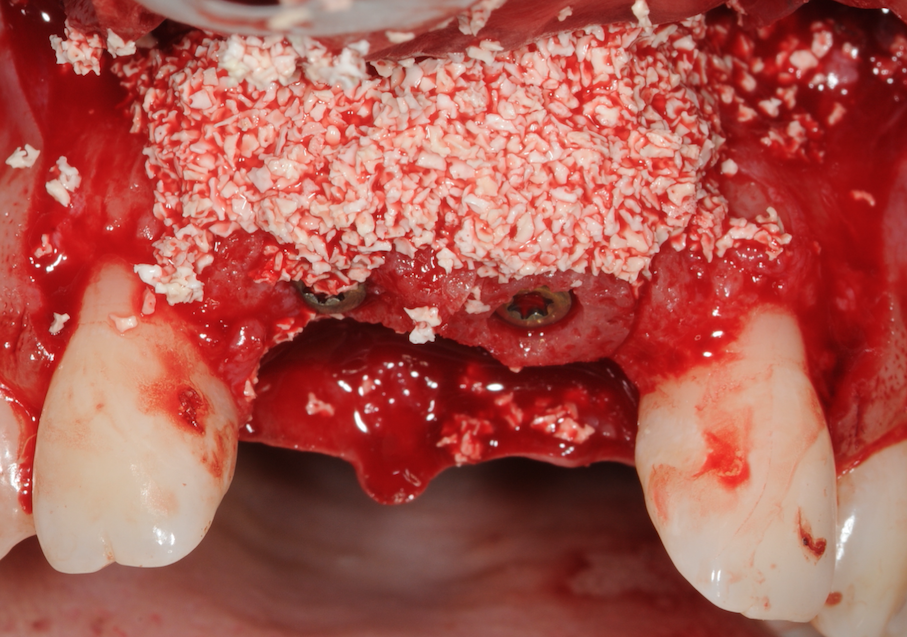
Figure 15-Bone grating material placed over site
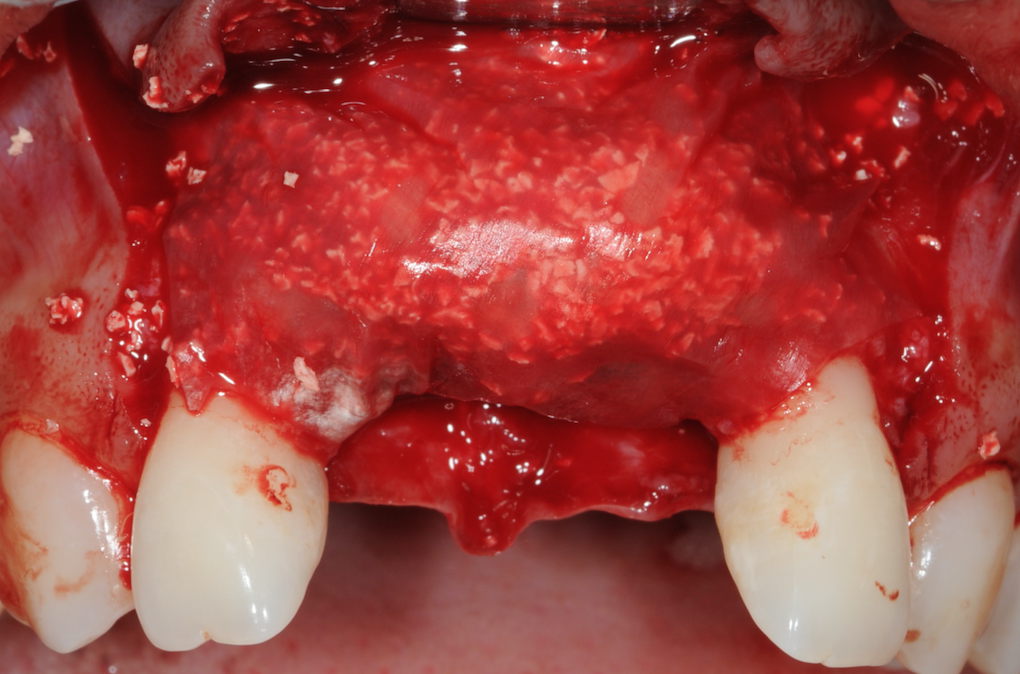
Figure 16-Jason membrane placed
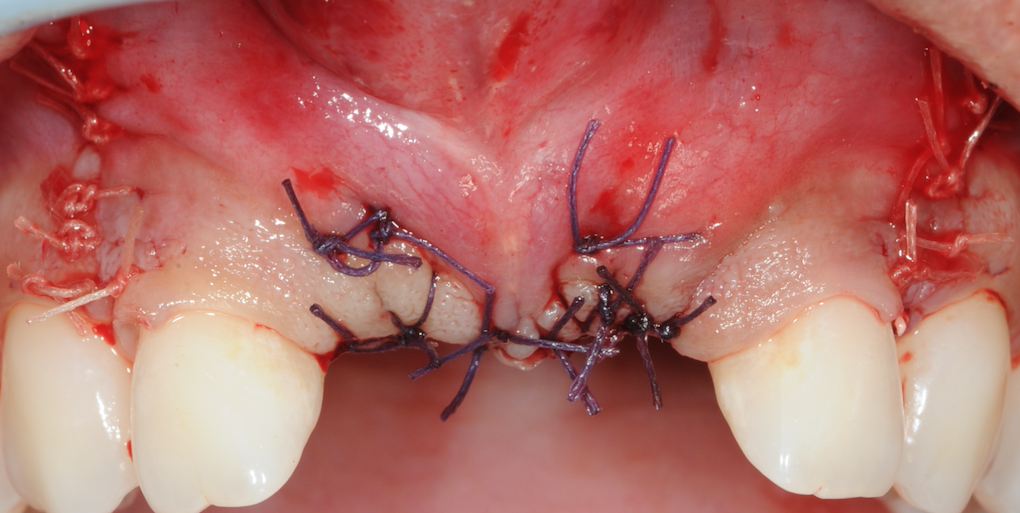
Figure 17-Site sutured for passive closure
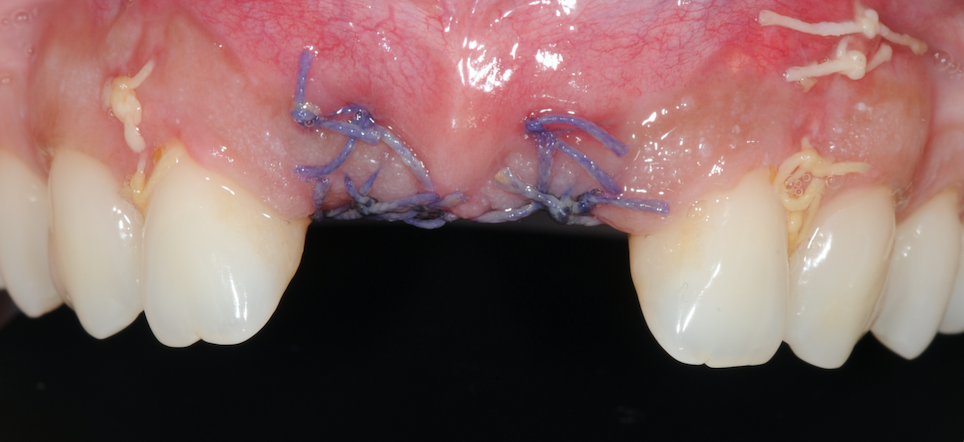
Figure 18-2 weeks post-op
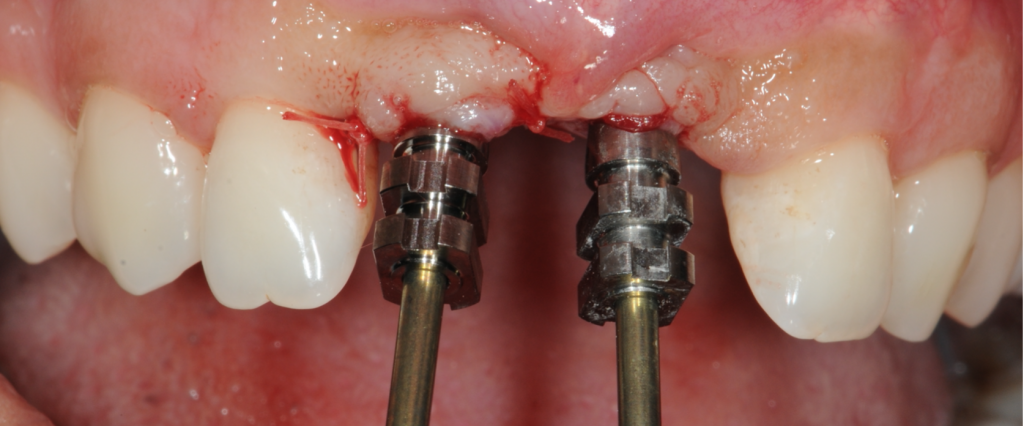
Figure 19-Post healing, impression copings placed
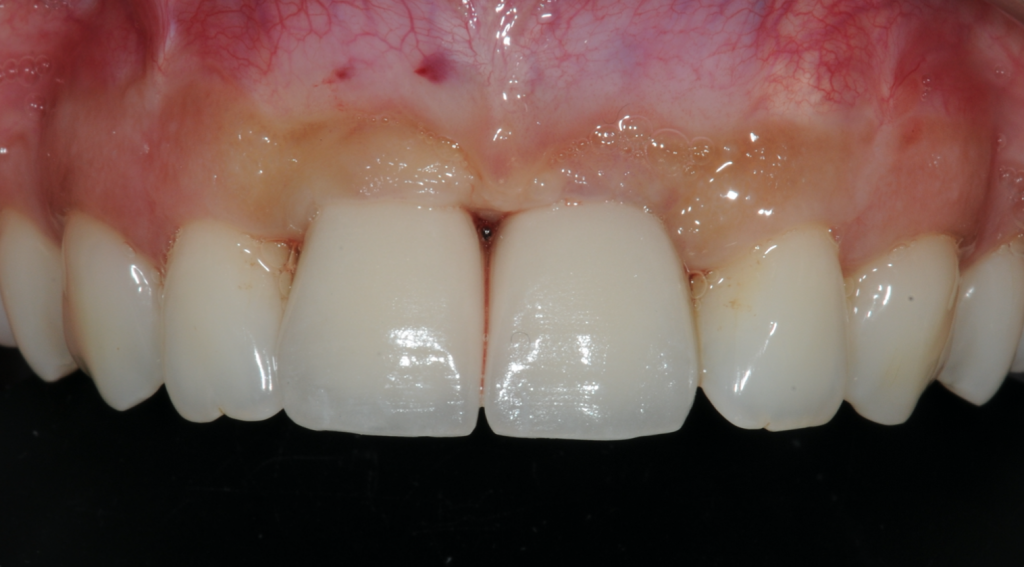
Figure 20-Final outcome
For more information about the Straumann® BLX implant system, visit www.straumann.com/en/dental-professionals/products-and-solutions
Author:
Dr Amit Patel in a Specialist in Periodontics. Alongside his private practice Birmingham Dental Specialist, he also works as and Honorary Clinical Lecturer at the University of Birmingham Dental School. His special interests are dental implants, regenerative and aesthetic periodontics.


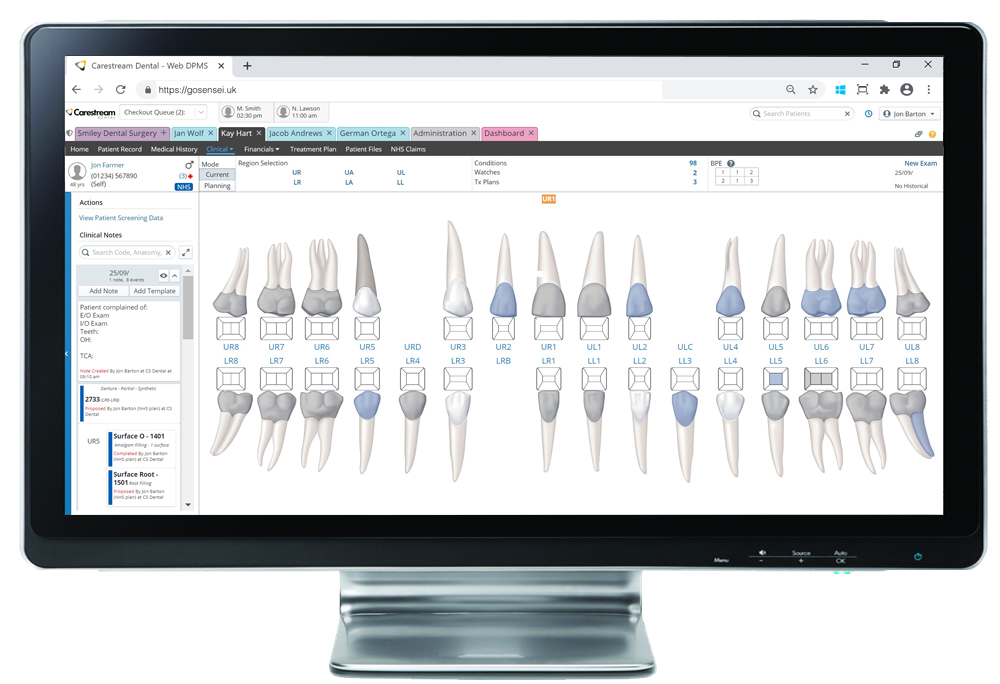
 Acting as a trusted digital mentor, Sensei Cloud is optimised to analyse your practice data, report on key performance indicators (KPIs), and provide actionable steps that you can take to boost revenue. It combines an intuitive design with powerful imaging, practice management and clinical workflow capabilities in one cloud-based platform that can be accessed from anywhere, at any time, for ultimate flexibility. With enhanced security and recovery tools to protect your data and ensure its integrity, Sensei Cloud is also easily scalable to facilitate continued practice growth without having to invest in new IT infrastructure.