Closing multiple diastemas
News Promotional FeaturesPosted by: Dental Design 10th September 2020

A patient was referred to the clinic following a course of home tooth whitening looking for options to close his multiple anterior diastemas. There was an uncomplicated enamel dentine fracture on the upper left lateral incisor from an accident several years previous. Fig1-2
The patient had no relevant medical history and following a full comprehensive examination was found to be in a state of good oral health with excellent oral hygiene and stable joints. The upper left lateral tested positive to vitality testing and had no apical areas on radiographic examination.
It was discussed with the patient that without redistributing the spaces orthodontically, or increasing the number of teeth to be treated (including mesial tooth preparation of the upper laterals), the proportions of the lateral incisors compared to the centrals would be outside of the ideal. An alternative option would be to leave micro diastemas and small black triangles distal to the lateral incisors in order to maintain acceptable tooth shape and proportion.
To illustrate what this would look like, a direct intraoral mock-up was carried out with composite being added to the upper laterals and canines with no etch or bonding agent. Fig 3-4 This has the benefit of not only showing the patient an idea of the end result for consent, but also allows the operator to check the new desired length of the teeth in excursion, checking for interference.
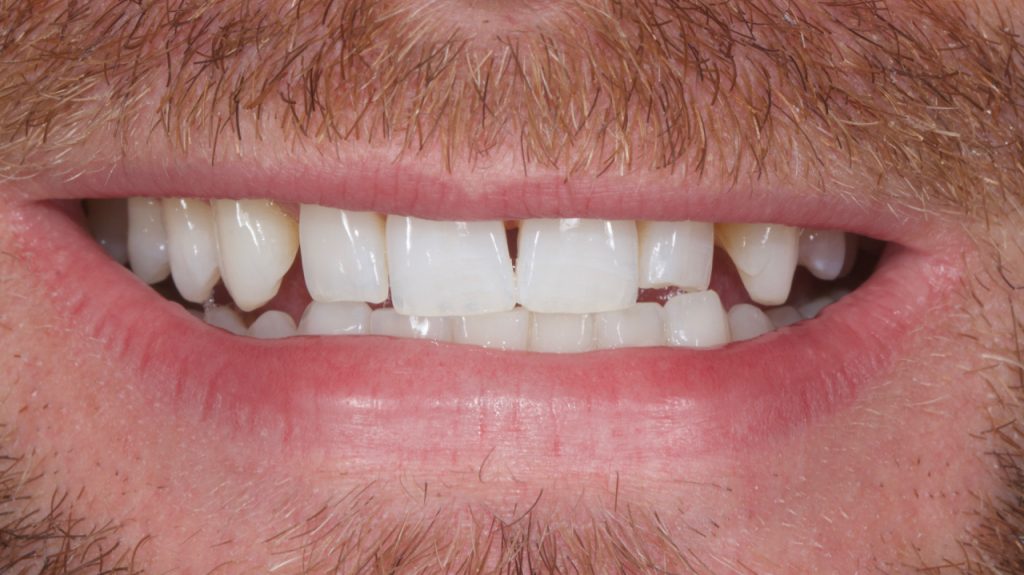
Figure 1
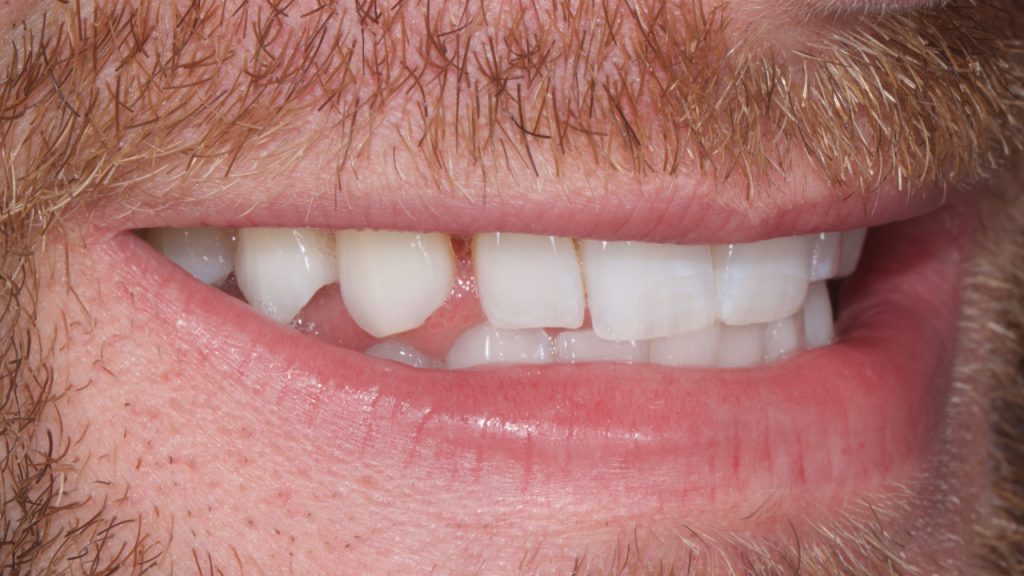
Figure 2
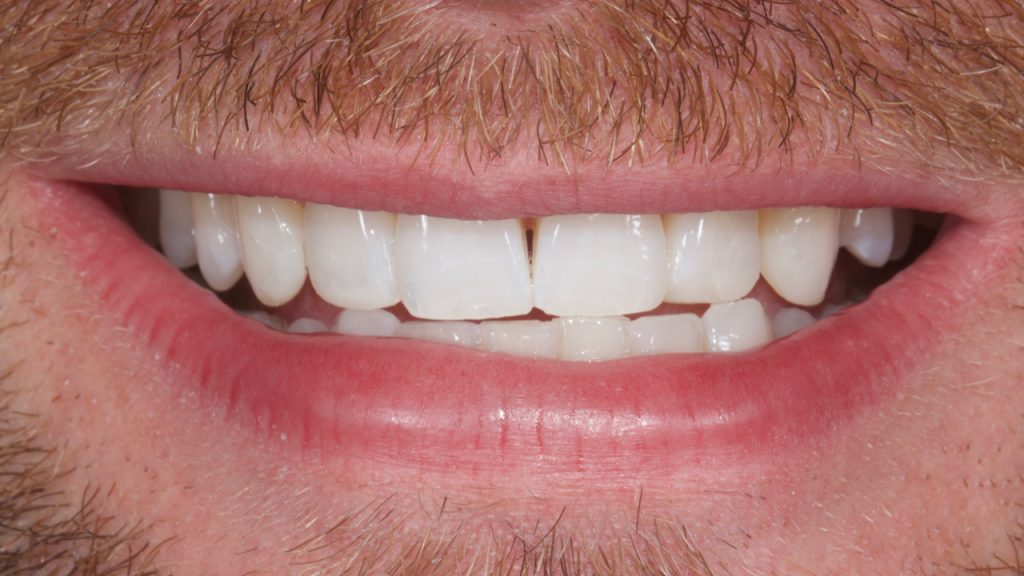
Figure 3
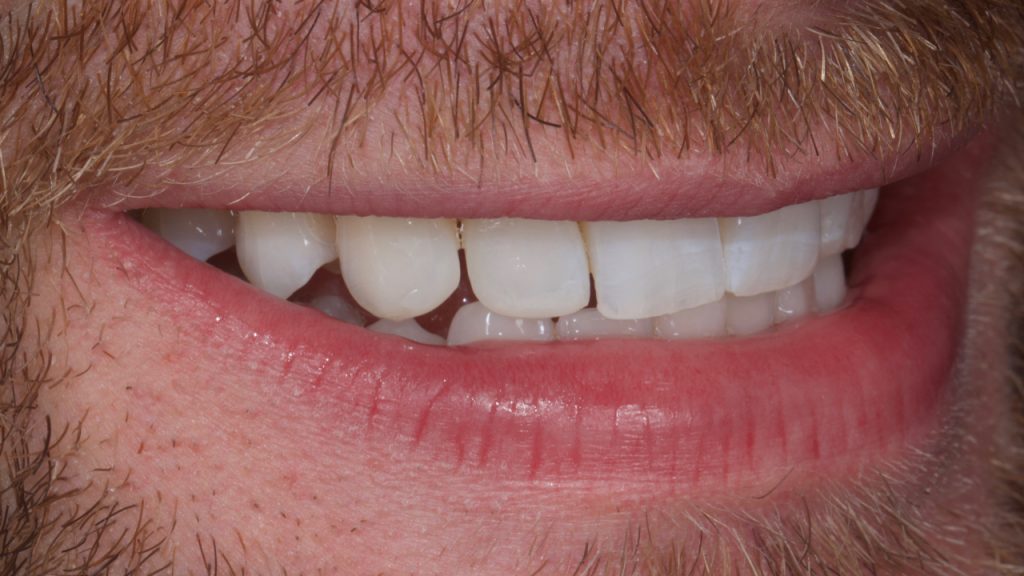
Figure 4
Although initially sceptical of the idea, once the patient was able to visualise the residual diastemas, he was pleased with the outcome and did not wish to undergo pre-restorative orthodontic alignment.
Options of both direct composite and ceramic veneer were discussed. Composite would look its best for 5-7 years and would only require minimal tooth preparation while ceramic veneers would look their best for 10-12 years but require more tooth reduction.
The patient opted for composite in this instance with the view to reassess material choice when the time came for their replacement. It was also decided to leave the midline black triangle for now for monetary reasons as this could always be revisited further down the line.
Diagnostics
An intraoral scan was taken of the intraoral mock up (Trios, 3Shape), as well as a facebow record (Artex, Amann Girrbach) to allow for a refined wax-up design by the dental technician. A well-defined wax-up, especially on the palatal and incisal aspect, is essential in fabricating a putty matrix for composite bonding. While the labial aspect of the wax-up will not aid in creating the palatal shell, it will act as a visual reference for the ideal primary and secondary anatomy when layering, shaping and polishing the final enamel layer of composite.
Treatment
Shade selection must be the first thing undertaken at the start of the bonding appointment. Once the lips are retracted, desiccation occurs very quickly and can result in too light a material shade being selected.1 Common mistakes include taking the tooth shade following intraoral photographs with lip retractors, or after rubber dam isolation. Because of this, at the end of the appointment the bonded areas will actually look darker than the natural tooth and it is good practice to warn the patient of this at the beginning, assuring them that the colour should settle when the teeth rehydrate over the next 24-48 hours.
When selecting the desired change, the operator must overcome several other variables. There is a wide variation of hue, chroma, value, opacity and opalescence of the same shades of composite between different brands. This is further complicated by the fact that commercial shade guides most commonly used in practice, are designed to be matched with ceramic and not resin. Blindly following these shade guides can very often lead to unsatisfactory results. One workaround is to construct a custom-made shade guide from the composite you are using, however, this is a laborious and costly exercise. Another technique, the composite try-button was utilised in this case and discussed in this article. This technique involves placement of small composite ‘buttons’ of the desired composite on a hydrated tooth to check for suitability.2 Masses of ‘enamel’ composite (1mmx1mm) are placed in the mid third of the tooth where the enamel is thickest and masses of ‘dentine’ composite are placed gingivally, where enamel is thinnest and dentine is most easily visualised. These are then cured and a cross-polarised photograph (polar eyes filter, Bio-emulation) is taken in RAW to remove specular reflections. This photograph is then put though a basic photo editing software (iPhoto) to de-saturate (remove any colour). This enables the operator to select the dentine and enamel mass with the most appropriate value, as the eye is drawn to incorrect value more than any other component of ‘colour’. Fig 5
Following shade selection, the upper arch was isolated from first molar to first molar with rubber dam and floss ties. Floss ties were used to further retract the gingivae giving greater access to the whole tooth surface. A small enamel bevel was placed on the upper right lateral and a slightly deeper enamel-dentine bevel was placed on the fractured edge of the upper left lateral. Fig 6 The purpose of the bevel is to aid in the concealment of the composite addition.
The enamel was conditioned with 29μ aluminium oxide to remove any residual biofilm or oil contamination from the handpiece (AquaCare, Velopex International) and etched for 20s with phosphoric acid 37% (H3PO4). Fig 7 After rinsing and air drying, the palatal matrix was then fit checked against the prepared teeth. In order to achieve good contact with the tooth, care must be taken to trim the extension of the matrix to ensure the rubber dam does not impede the seating. Fig 8 While seated, a sharp probe is used to mark the point where the most palatal aspect of each tooth meets the putty. This will aid in the placement of the uncured palatal composite into the matrix against the palatal surface, as it allows the clinician to visualise the amount required.
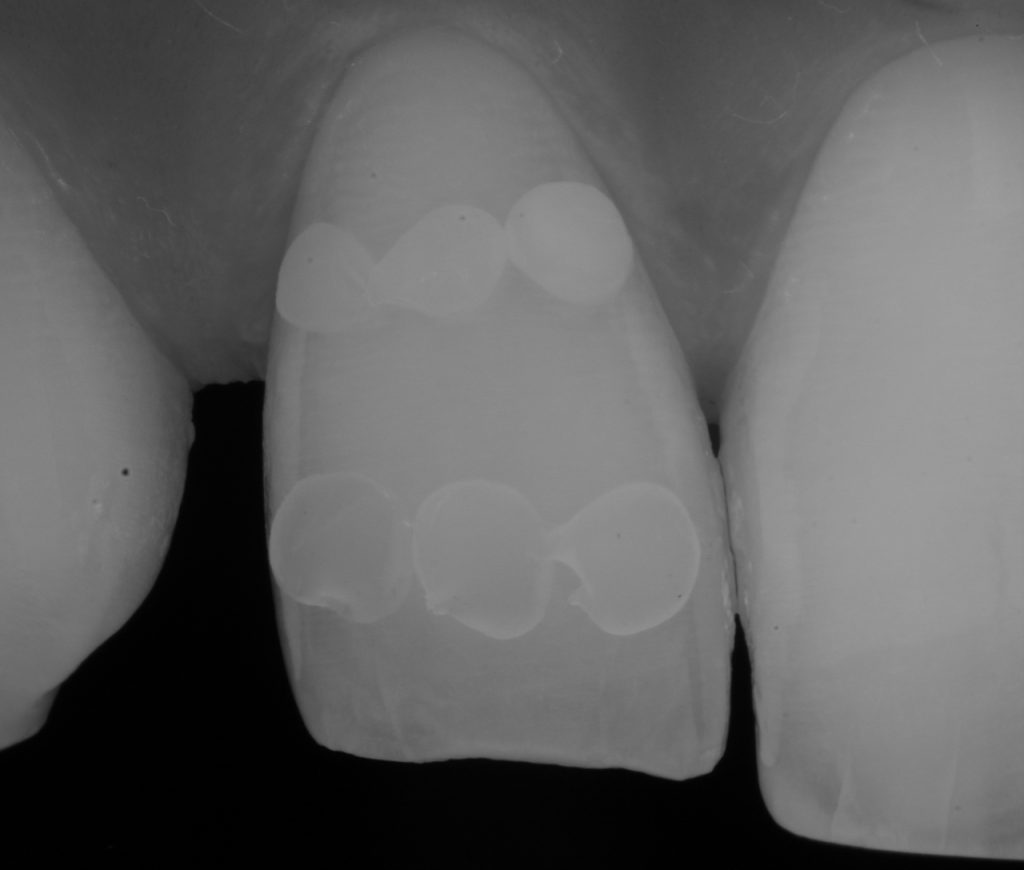
Figure 5
Figure 6
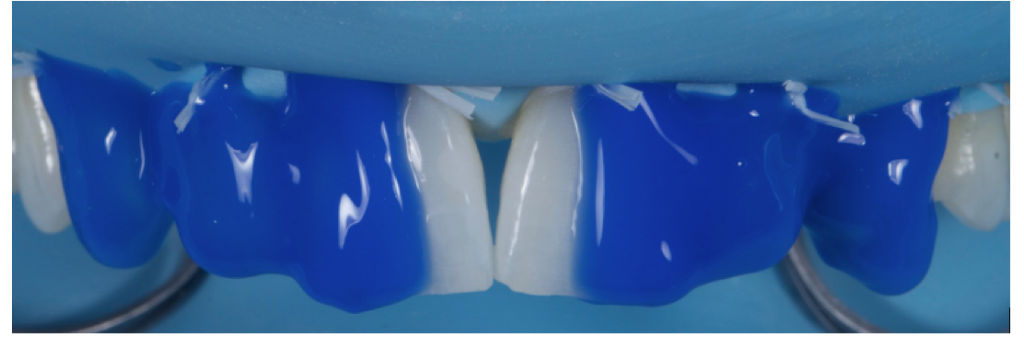
Figure 7
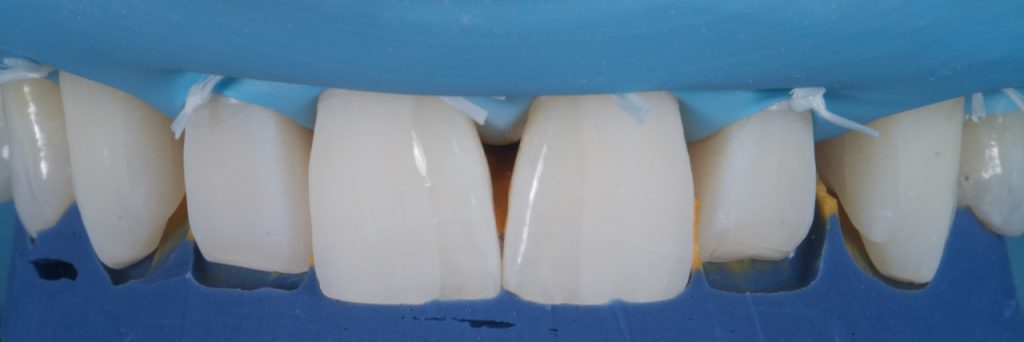
Figure 8
Prior to composite application, a single bottle universal bonding agent was placed (Scotchbond™ Universal Adhesive from 3M™ Oral Care) and cured. Uncured composite is placed into the matrix and adapted to be thin enough to visualise the putty though the material. The mass of composite used here should be selected to replicate the area of the incisal edge. In this case, it was desirable to create an ‘amber’ effect so an appropriate achromatic enamel shade was selected (AT shade, Filtek™ Supreme XTE universal restorative from 3M™ Oral Care). The matrix with the uncured composite is then placed in the mouth and the composite adapted to the tooth. This is best achieved with a fine brush. Once happy with the adaptation of composite to tooth, and with the matrix still in place, each shell is cured for 20s. Following cure, the matrix must be very carefully removed without fracturing the fragile palatal shells. Depending on operator skill, each tooth can be built singularly or, if sufficiently practised, all palatal shells can be placed at one time. Fig 9-10
There are many well-documented techniques for closing diastemas. When dealing with multi-layered restorations, the following is what works best in the author’s hands.
In order to create the mesial and distal walls, a vertically orientated posterior matrix band (B200, Garrison) was placed between the teeth and secured with a trimmed wedge. A mass on the selected enamel shade (A2E shade, Filtek™ Supreme XTE universal restorative from 3M™ Oral Care) was then adapted against the matrix with a brush and thin probe before curing Fig 11-12 (Photos from a similar case). Once the matrix was removed, the desired outline shape of the tooth was created with negative space in which the dentine and internal effects can be easily layered.
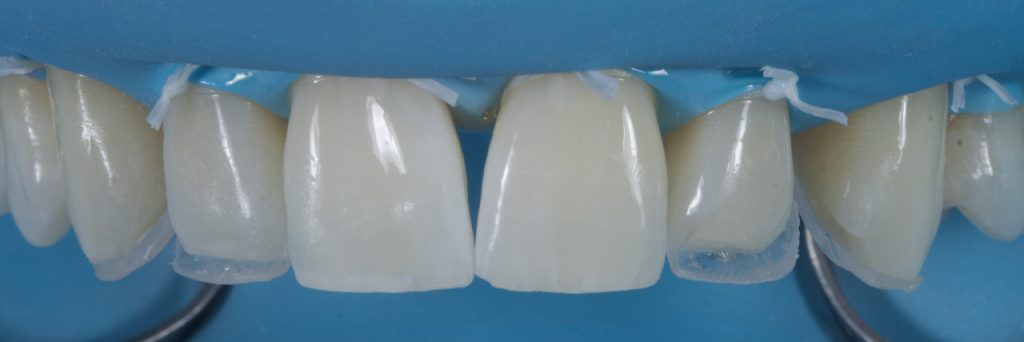
Figure 9
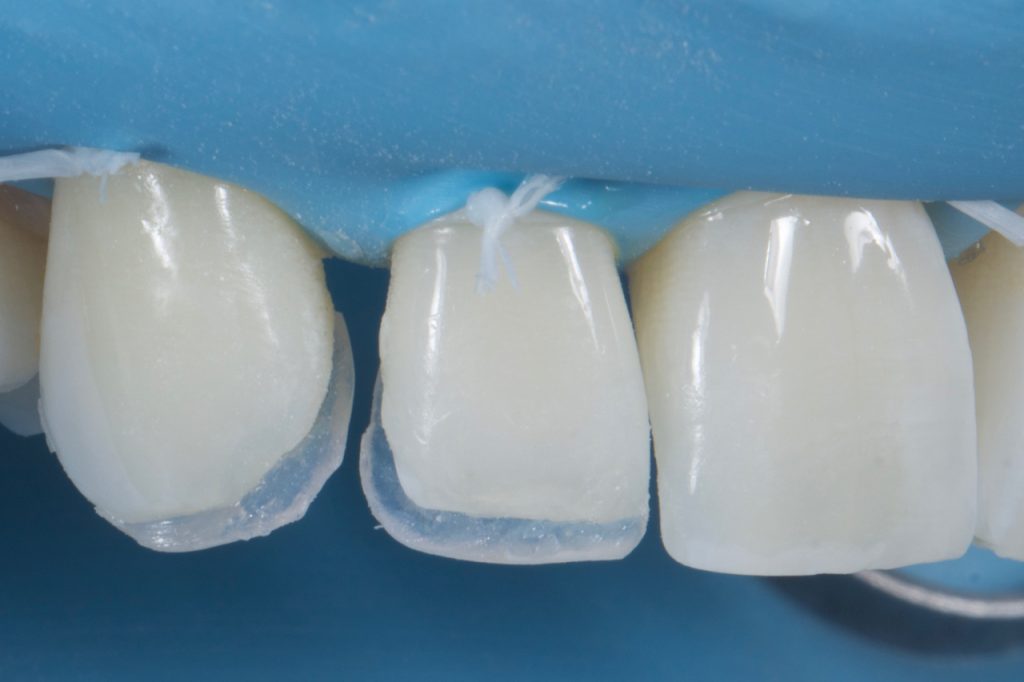
Figure 10
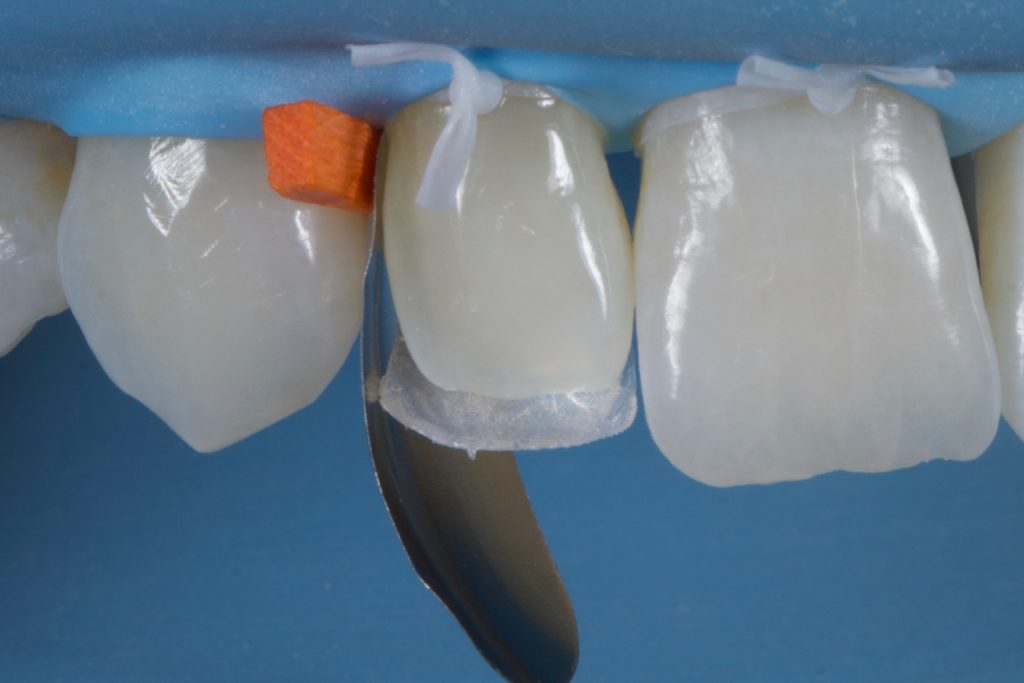
Figure 11
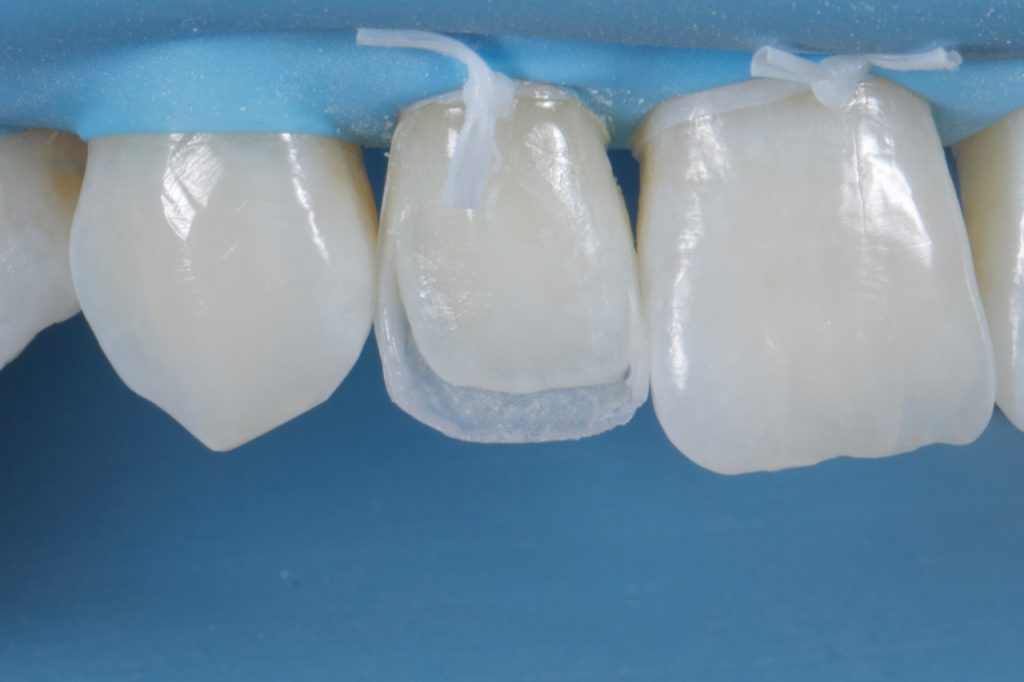
Figure 12
When layering dentine and deciding on internal anatomy, it is important first to observe the natural adjacent teeth. There is a common tendency to try to create the most defined internal mamelon structure with a lot of space for incisal translucency as we learn to do on hands-on courses. However, if the adjacent teeth do not exhibit this anatomy the composite bonding will not look natural. If the adjacent teeth are worn, or just very plain, the operator must try to recreate this with the dentine placement. This key stage is something that is often overlooked to the detriment of the case. In this case there was marked opalescence towards the incisal edge so, following placement of a single dentine mass (A3D shade, Filtek™ Supreme XTE universal restorative from 3M™ Oral Care), care was taken during shaping and prior to curing, to leave space for further effect shades. Fig 13-14
A packable blue effect composite, chosen to mimic opalescence, was then placed in the space between the dentine and the incisal edge (BT, Filtek™ Supreme XTE, 3M™ Oral Care). Fig 15-16 It is important to pack this in well and remove excess by brushing over the incisal edge. It is important to remove excess in this direction as if it were brushed towards the gingival aspect, excess material may be left in the mid and apical third of the tooth, inadvertently lowering the value in this area. Once satisfied with placement, the masses are cured for 20s.
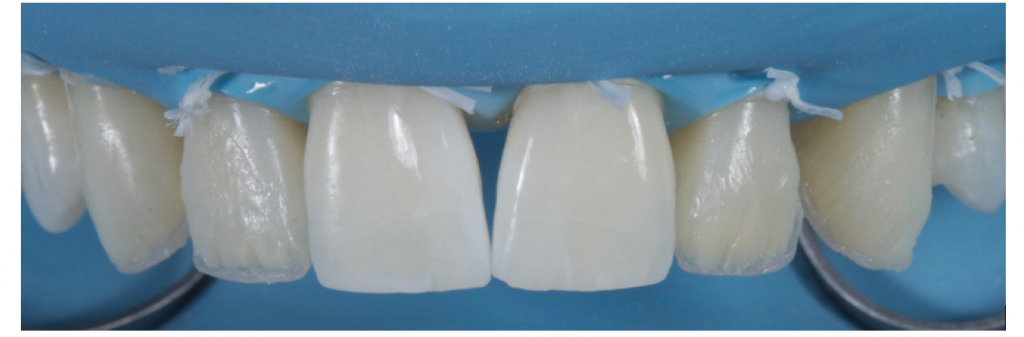
Figure 13
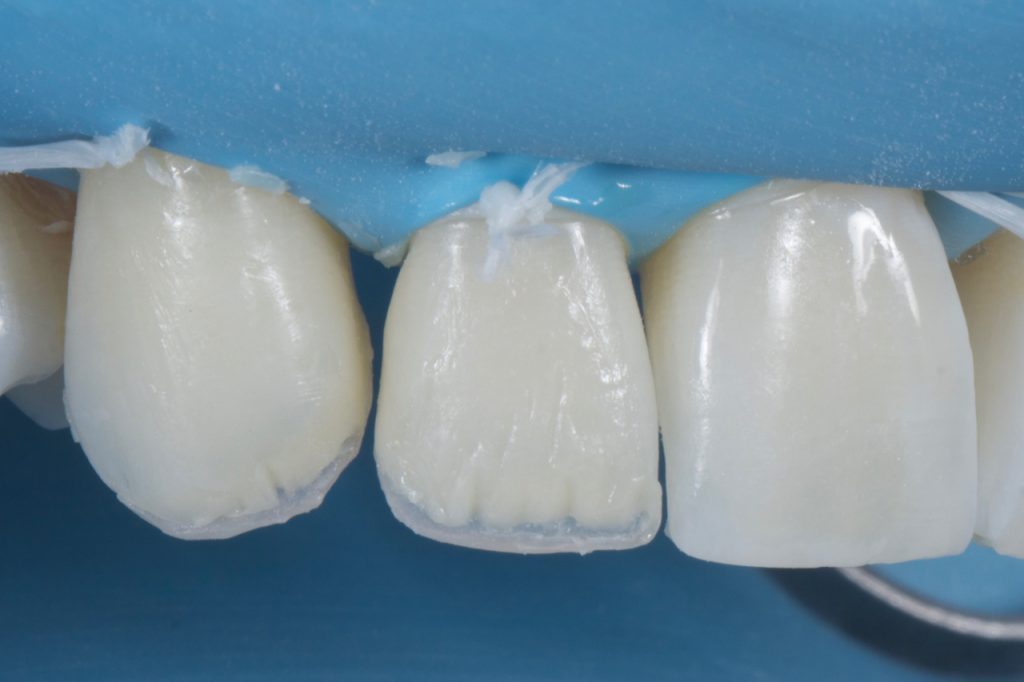
Figure 14
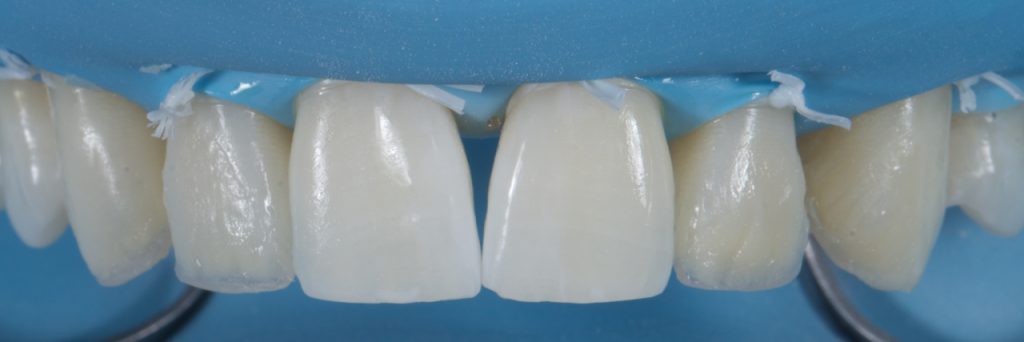
Figure 15
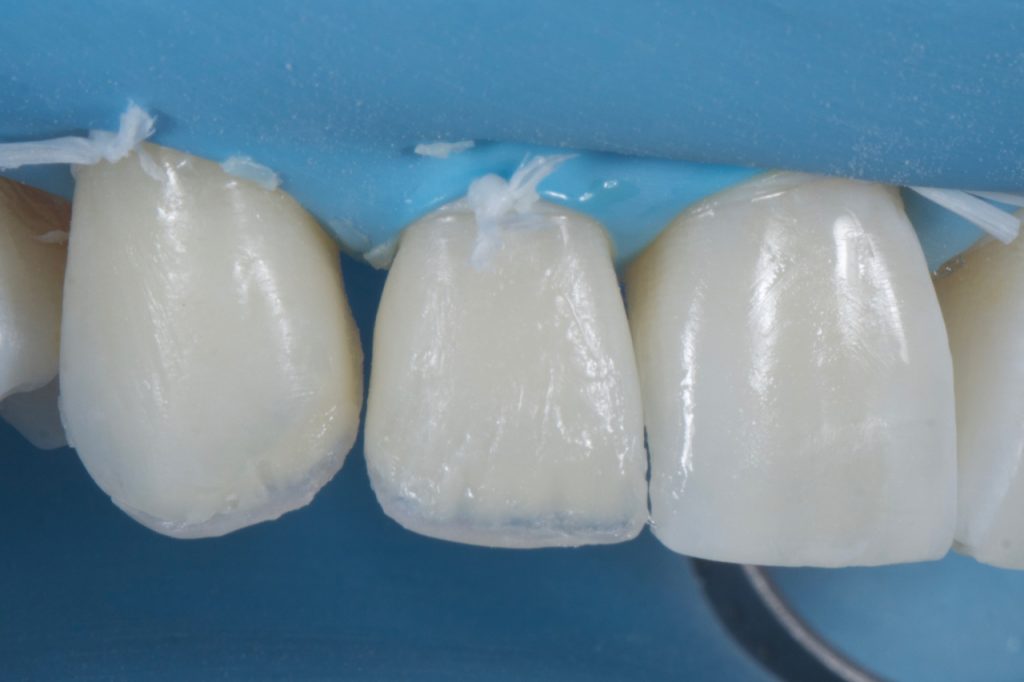
Figure 16
One of the main factors that dictate how natural a restoration looks is anatomy. In fact, a well-shaped, polished and textured single shade restoration will often look far superior to a multi-layered restoration with poor anatomical form and polish. When placing the final enamel layer, the final shape should be visualised and care must be taken to start shaping the primary anatomy at this point.
Many operators grossly overbuild with the final enamel layer relying on the final shaping with disks and burs to achieve the ideal anatomy. While this approach is not always disastrous, cutting back is very time-consuming and wasteful with material. Ideally, enamel will be layered and shaped pre-cure, close to the ideal final shape and anatomy, with some overbuilding by 5-10% to allow for material removal during the final polishing steps. A flat brush (Brush #3, Cosmedent) is an invaluable tool in shaping the facial and interproximal areas, defining the mesial and distal line angles, as well as achieving a smooth pre-polished finish before initial curing. Fig 17-18 The same enamel mass was selected as used to build the mesial and distal walls. Prior to polishing a final 40s cure was carried out through an oxygen inhibition layer (food grade glycerine).3 This removes the superficial sticky oxygen inhibition layer which, in the author’s experience, can hinder the polishing process by contamination the first disks used in the polishing protocol.
At this point in the appointment, fatigue sets in for both the operator and patient. If possible, the author likes to carry out final shaping and polishing at a subsequent visit. This allows for fresh eyes and limits any potential errors that could arise from rushing the shaping and polishing process. It also allows the teeth to rehydrate and if any colour corrections are needed this can be done before significant time has been spent on achieving final natural anatomy.
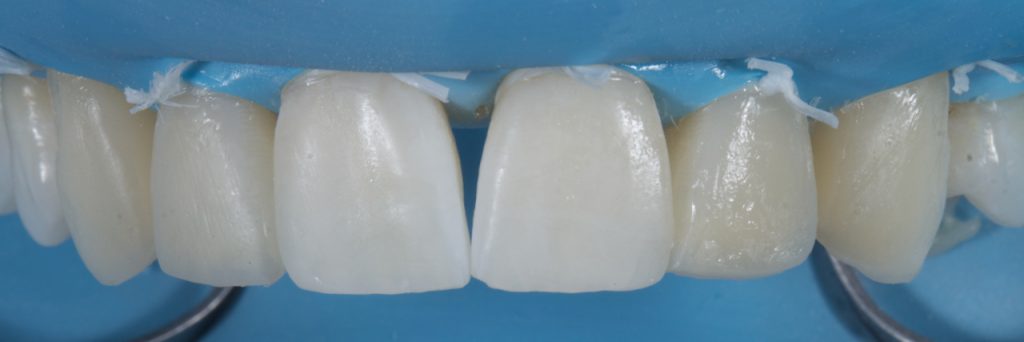
Figure 17
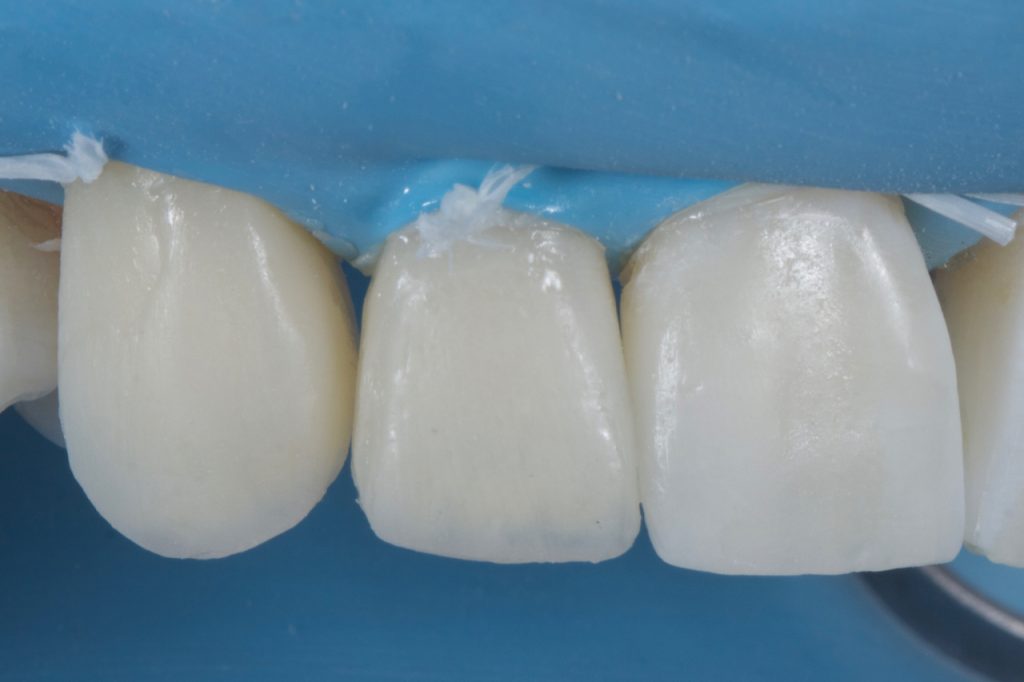
Figure 18
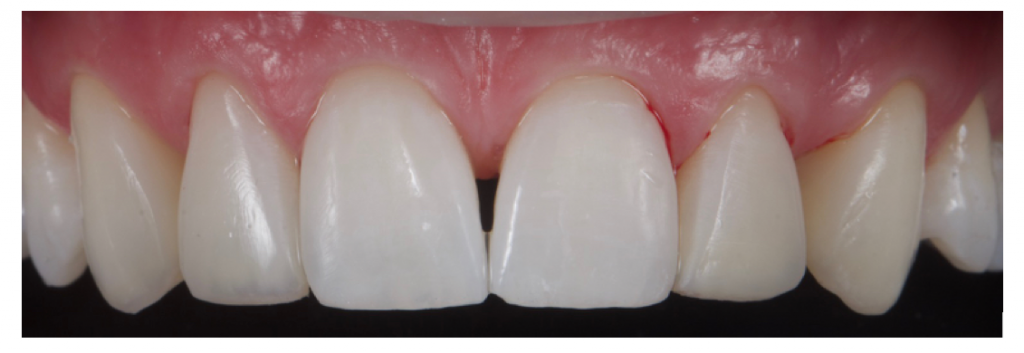
Figure 19
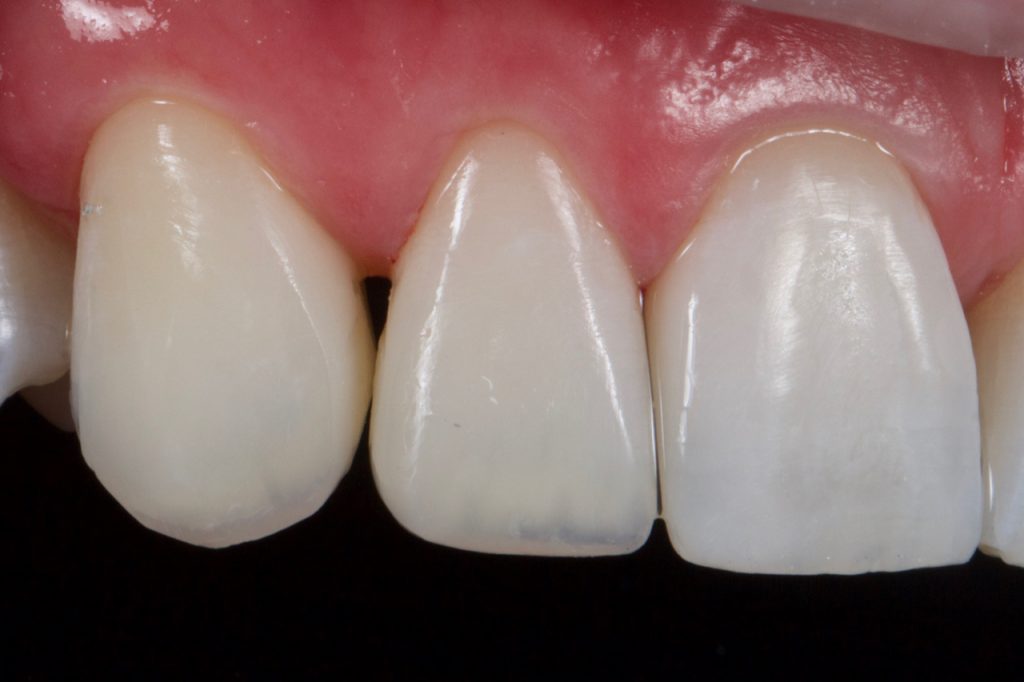
Figure 20
A coarse disk (Sof-Lex™ contouring and polishing discs, 3M™ Oral Care) is used to roughly shape the primary anatomy I and occlusion is checked. A review appointment was booked for two days later.
Two days later colour was observed and found to be satisfactory and the patient was happy with the general ‘shape’. A course flame shaped bur was used at slow speed in a speed increasing handpiece to mark out secondary and tertiary anatomy. This was then softened with a silicone carbide impregnated point working with medium pressure in an opposing direction (Astropol F, Ivoclar Vivadent). Final lustre was achieved with Aluminium oxide cups (HiLustrePLUSTM, Kerr) at high speed and low pressure with water. Fig 21-22
The patient was very satisfied with the result especially as, when viewed from a social distance with normal hydration, there was no obvious diastema present between the teeth. Fig 23
The above case study illustrated how composite can be used in a minimally invasive way to achieve a maximum aesthetic outcome, especially in a situation, which may further benefit from orthodontic alignment further down the line.
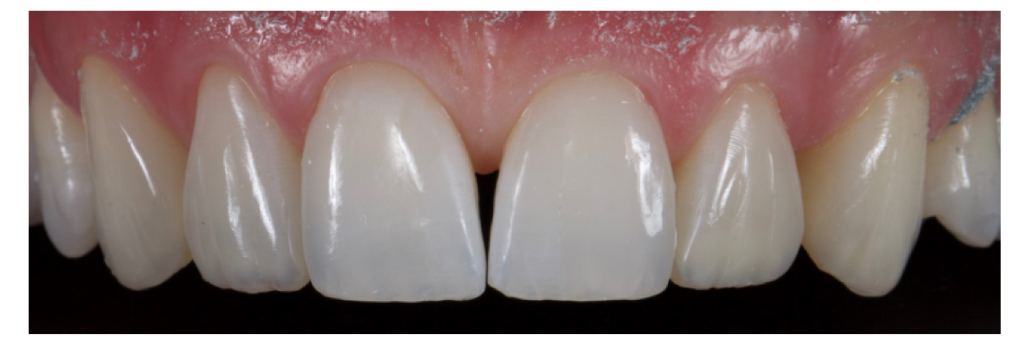
Figure 21
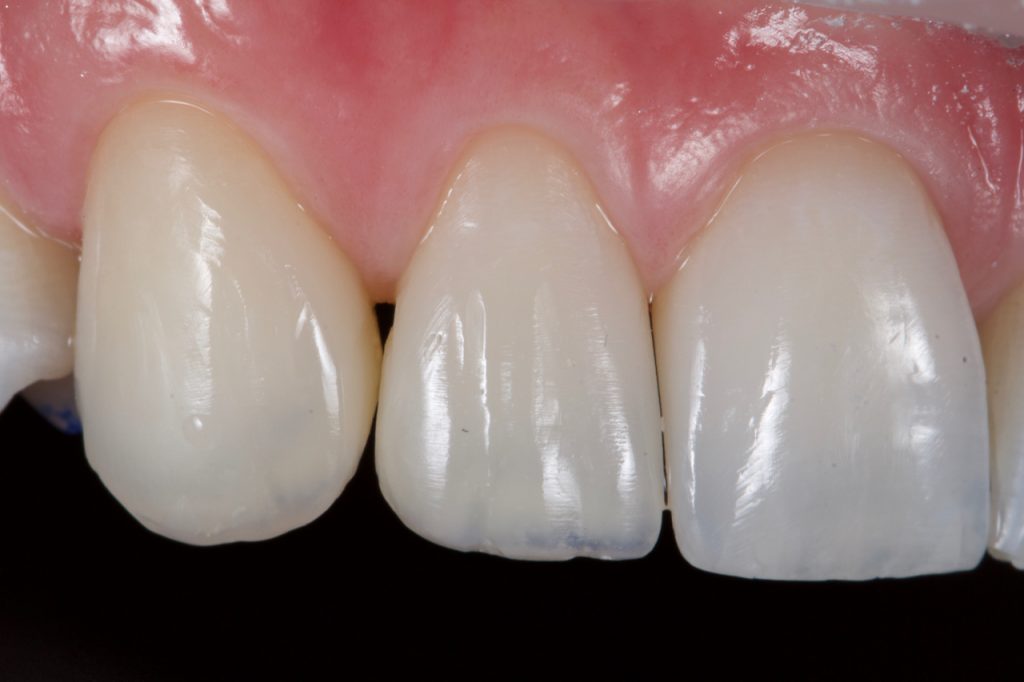
Figure 22
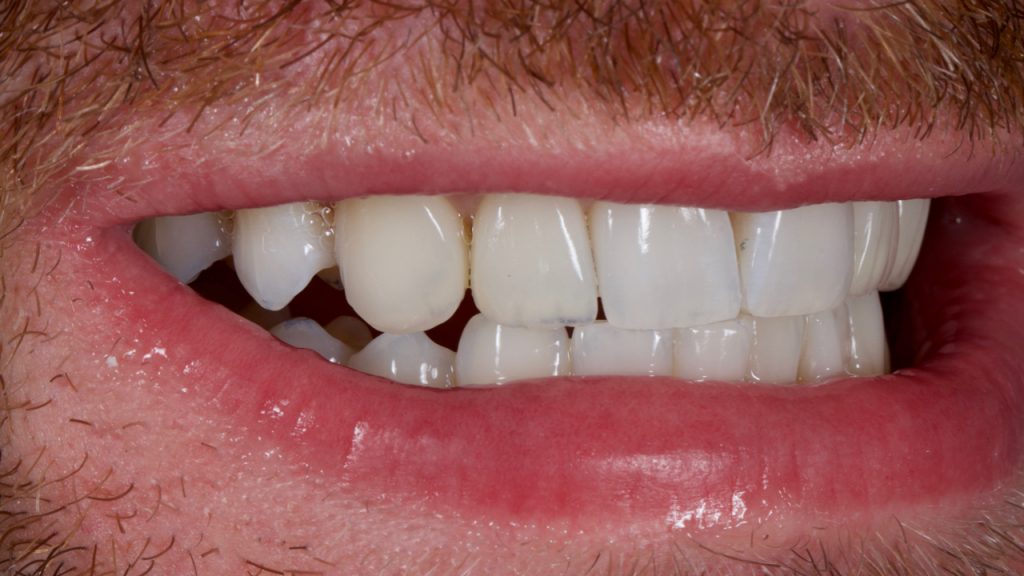
Figure 23
For anyone wishing to further develop their skills in this area please contact Delta Dental at info@deltadentalacademy.co.uk for more details.
For more information, call 0845 602 5094 or visit www.3M.co.uk/Dental
3M, Scotchbond and Sof-Lex are trademarks of the 3M Company.
Author bio:
Richard graduated with Honours from the University of Glasgow in 2011 and works in private practice in both central London and Bristol. He was the winner of Best Young Dentist UK at the 2014 Dentistry Awards and in 2018 Richard was recognised as an Accredited Member of the British Academy of Cosmetic Dentistry, the youngest dentist ever to have achieved this accolade. www.drfield.co.uk Instagram @DrRichardField
References
- Brodbelt RH, O’Brien WJ, Fan PL, Translucency of dental porcelains. J Dent Res. 1980 Jan; 59(1):70-5.
- Flavia Pardo Salata NAHSAN, Rafael Francisco Lia MONDELLI, Eduardo Batista FRANCO, Fabiana Scarparo NAUFEL, Julio Katuhide UEDA, Vera Lucia SCHMITT, and Wagner BASEGGIO, Clinical strategies for esthetic excellence in anterior tooth restorations: understanding color and composite resin selection, J Appl Oral Sci. 2012 Mar-Apr; 20(2): 151–156.
- Hyun-Hee Park, In-Bog Lee, Effect of glycerin on the surface hardness of composites after curing. J Korean Acad Conserv Dent. 2011 Nov;36(6):483-489.