A lab-driven, minimally-invasive technique that delivered a highly aesthetic result
Featured Products Promotional FeaturesPosted by: Dental Design 20th September 2020

Jonathan Fitzpatrick is a dentist at Millersneuk Dental Practice, Glasgow with a keen interest in minimally invasive cosmetic dentistry. Here, he describes a case where restorative treatment was the culmination of an ethical and efficient plan to improve a patient’s smile.
Background
The patient was a regular attender in his early 30s, with some abrasion, attrition and erosion on his upper anterior teeth (see Figures 1, 2). Examinations and radiographs had revealed that all was fine and in order, and that he was in good dental and oral health.
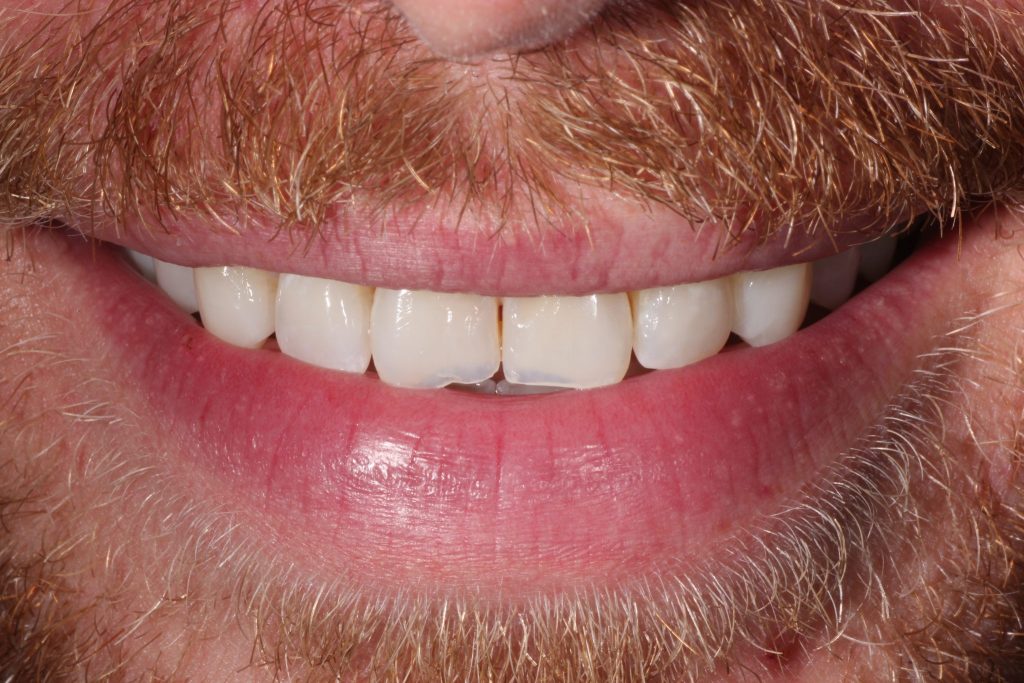
Figure 1
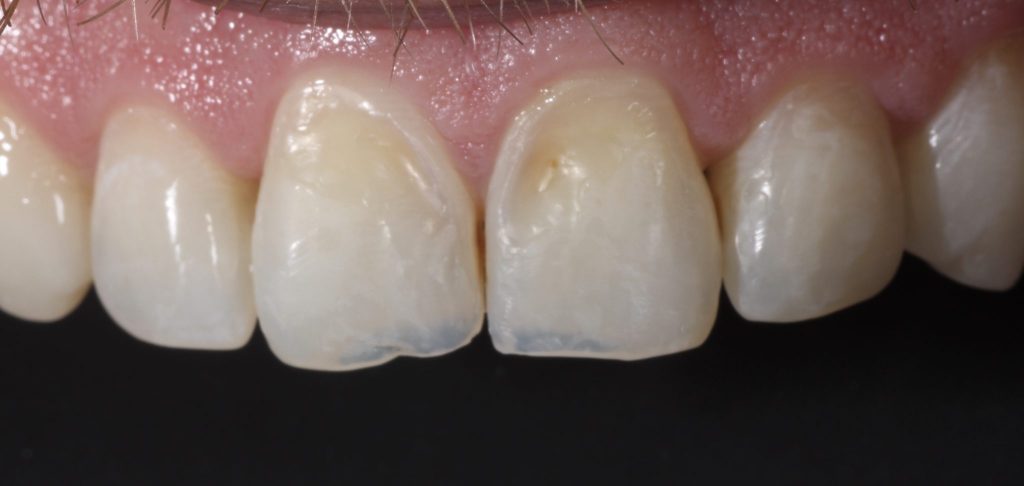
Figure 2
One of the main reasons for the wear was the position of his teeth, so orthodontic treatment was provided to improve the crowding on the upper centrals, which had to be de-rotated. This had been provided using Invisalign clear aligners for around four months. Aligning the teeth also allowed me to deliver composite restorations in a minimally-invasive way. Prior to commencing the restorative portion of the treatment plan, the patient also had tooth whitening using at-home trays from Boutique Whitening.
Treatment pathway and technique
After the orthodontic and whitening treatments were complete, a full set of photos were taken and a digital scan using the TRIOS scanner. These were sent to Matrix Dental Laboratory, my preferred lab with whom I have a great relationship. The technician printed me a pre-op model (see Figures 3, 4), then a digital wax-up of what the final result would look like (see Figures 5, 6). This is fantastic from a predictability point of view and also key as a sales tool to get patient approval before going ahead.
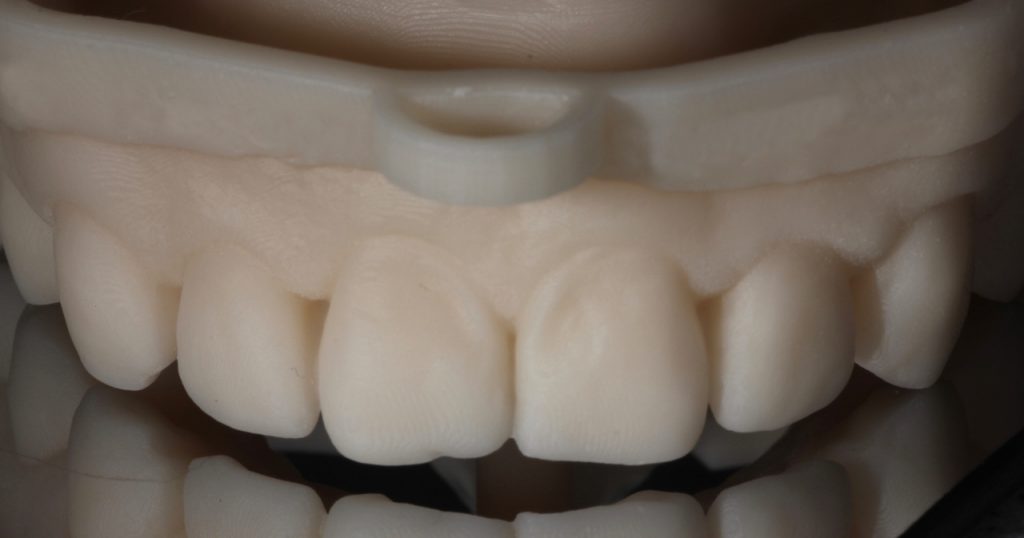
Figure 3
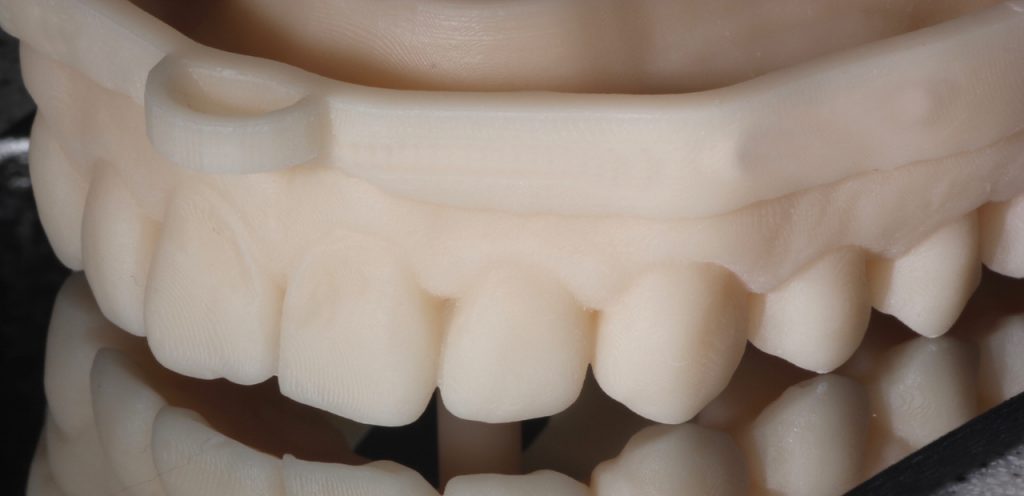
Figure 4
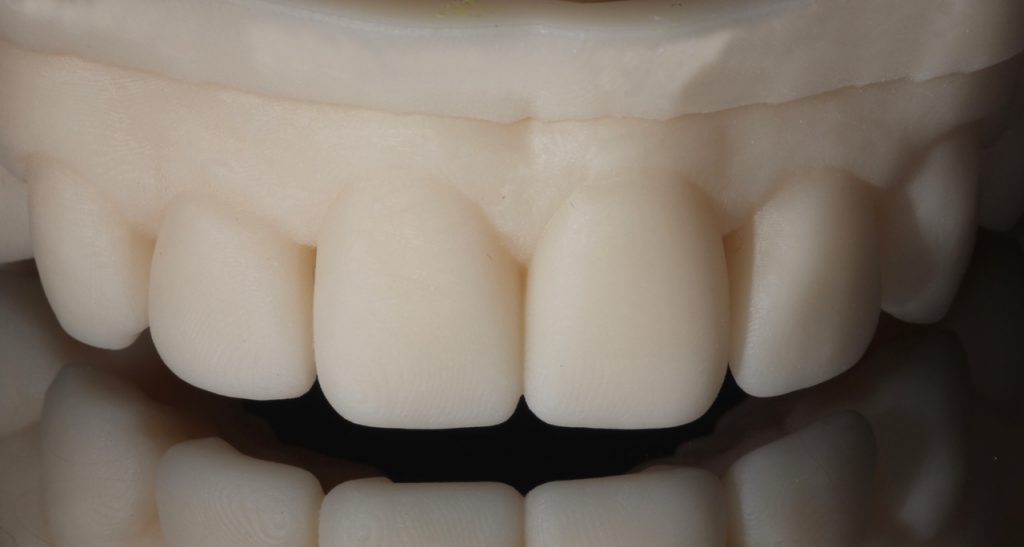
Figure 5
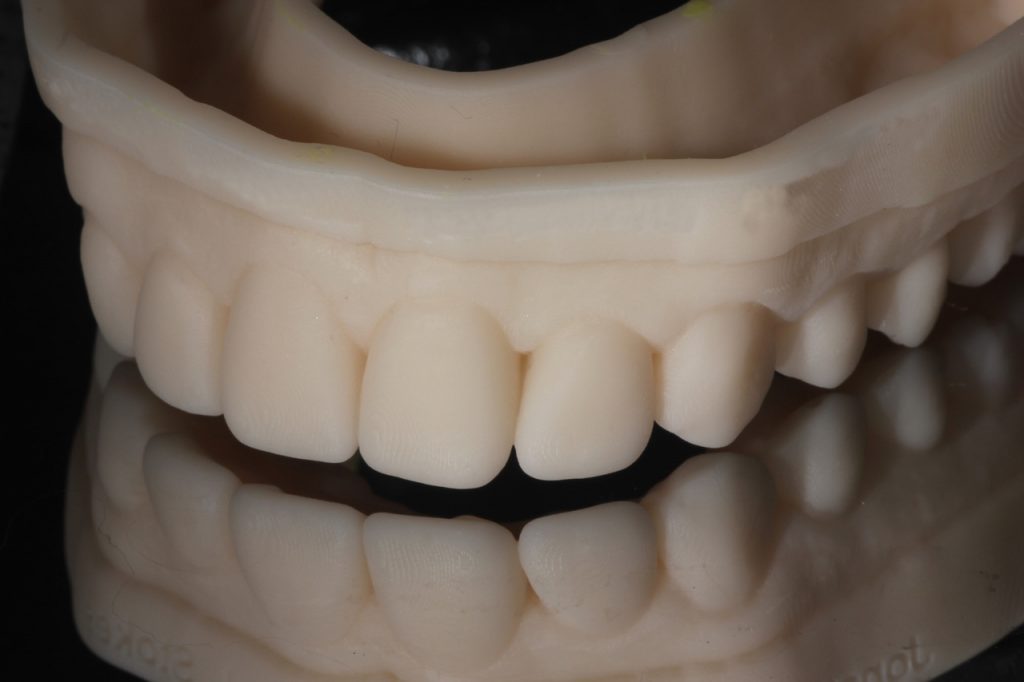 Figure 6
The lab also made a clear stent which would be the template for the bonding procedure (see Figures 7,8). With the trial smile approved and the patient happy, I could then start the bonding itself using a minimally-invasive and time-efficient technique.
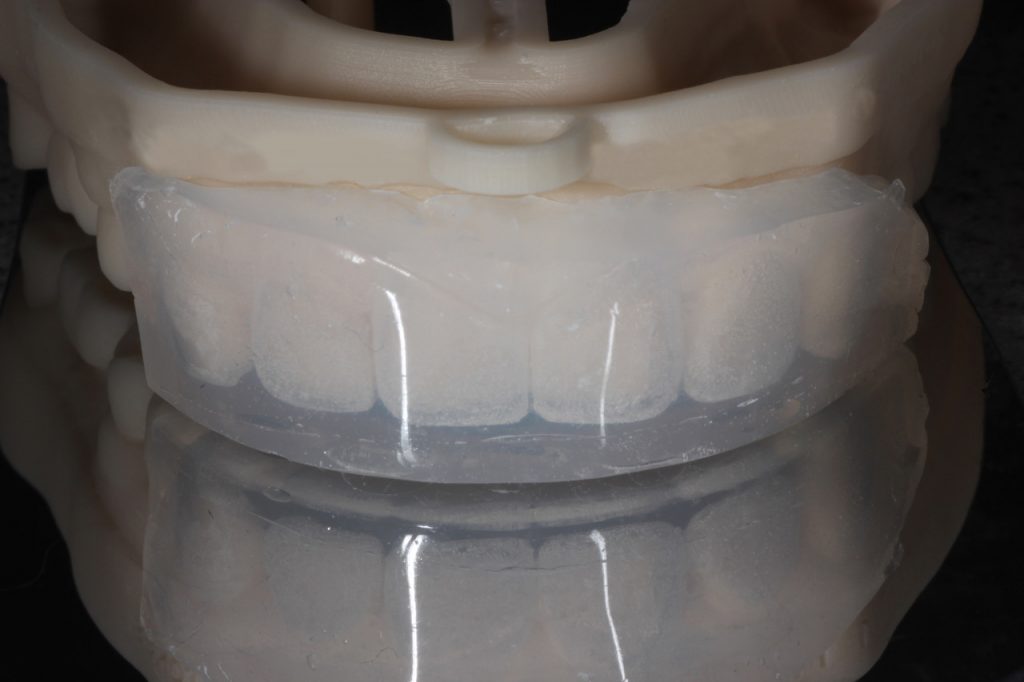
Figure 7
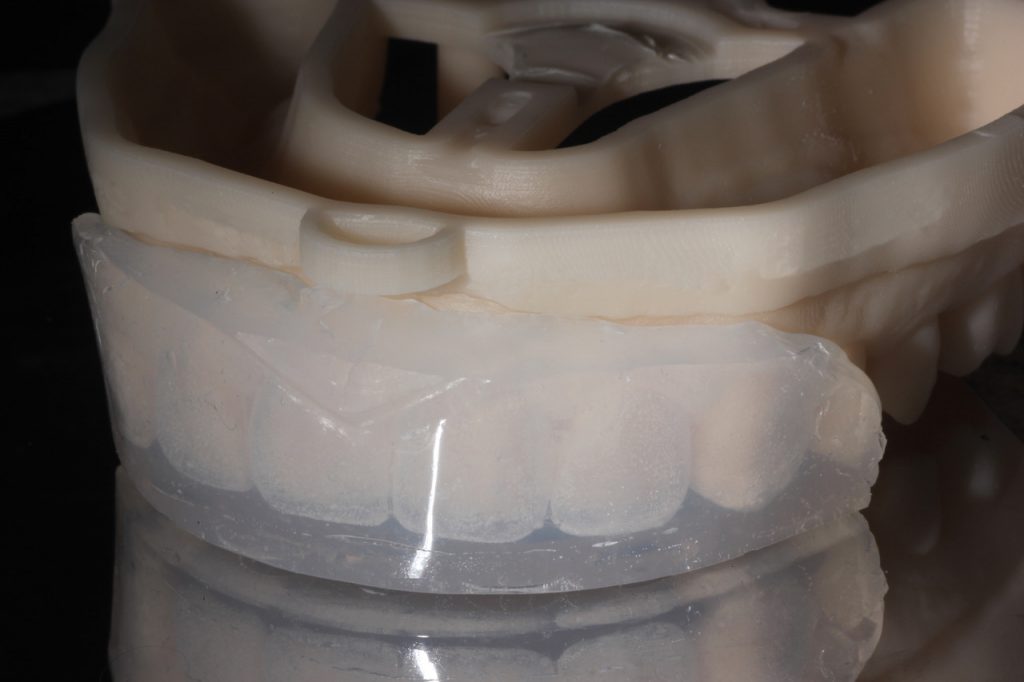
Figure 8
First, I covered every second tooth that was getting bonded with PTFE tape. Etch and bond were then applied to the alternate, uncovered teeth. The custom-made stent was filled with heated composite – I use BRILLIANT EverGlow™ universal composite from COLTENE – then cured.
When the stent was taken out, this left half the teeth treated with composite, with a bit of gross excess, which would need to be tidied up (see Figure 9). The PTFE tape was removed, put over those that already had composite on to ensure that they didn’t stick together, then the process was repeated.
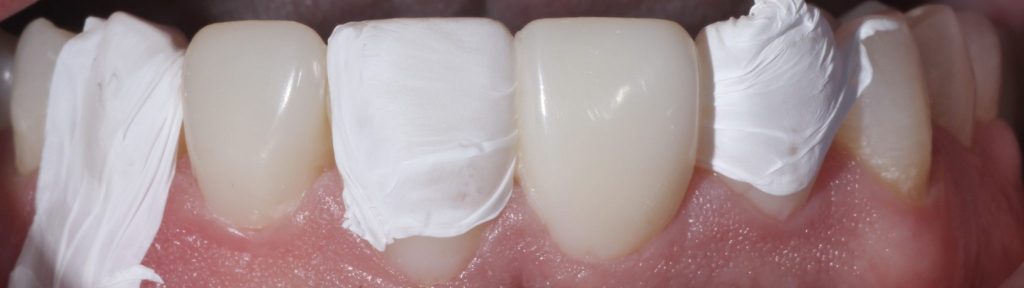
Figure 9
The tidy up was completed using burs and discs. As part of my polishing protocol, I always use the blue disc from the DIATECH ShapeGuard kit (from COLTENE) last, as this gives me the highest shine.
Appraisal
My patient was delighted with the result (see Figure 10). I’d used a lab-driven minimally-invasive technique to deliver the composite in just one appointment – no local anaesthetic, no tooth preparation and no pain. He returned for a final polish two weeks later as I find that this gives a true high-gloss finish.
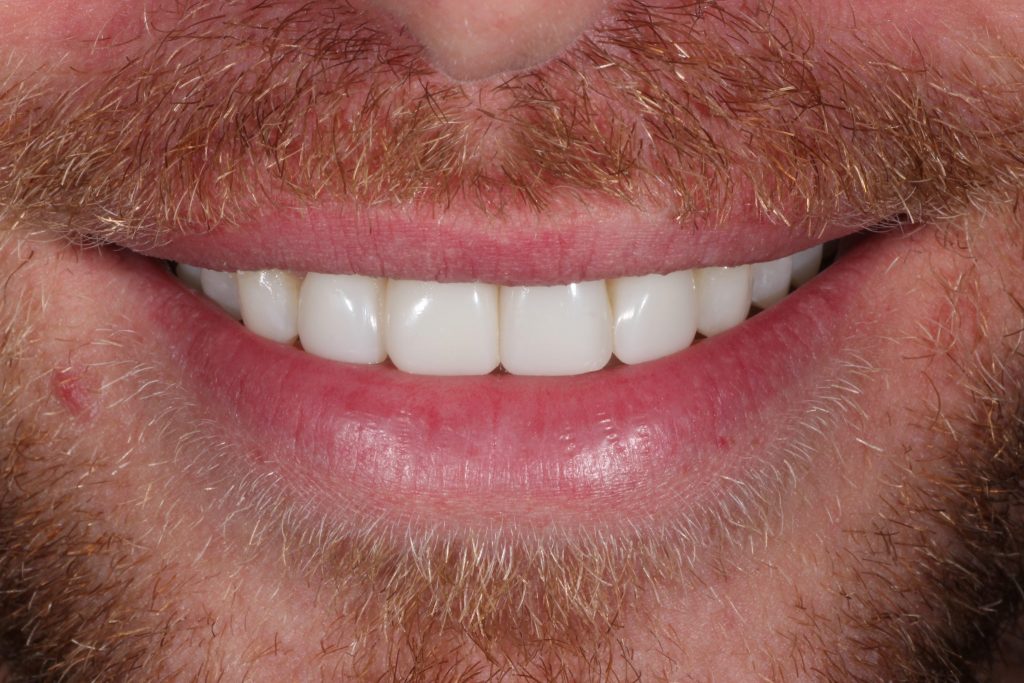
Figure 10
My patients are always pleased with the long-term aesthetics of their restorations with BRILLIANT EverGlow™. The material has the ability to blend in and mirror the optical properties of a natural tooth extremely well, it handles fantastically, is efficiently manipulated, and also holds its shape.
To find out more visit www.coltene.com,
email info.uk@coltene.com or call 01444 235486.