Dr Wahab Shakir talks through a staged custom fibre post technique. It relines a parallel post with heated composite to match the canal shape, reducing resin volume and C-factor, improving adaptation and minimising shrinkage stress compared with a standard fibre post alone. This supports a metal-free post and core with favourable stress distribution and preserves ferrule-dependent fracture resistance compared with cast metal posts.
Over-flared canals create a mismatch between post and dentine, increasing luting resin thickness and the configuration factor (C-factor) in the post space, raising shrinkage stress, gap formation and microleakage. Relining a fibre post with composite reduces the cement layer, shifts the main bonding interface towards the composite to dentine interface, improving sealing and stress distribution. Preheating enhances flow, conversion and mechanical properties while bonding well to the fibre ParaPost.
Steps 1 to 4: Post space preparation and isolation
Drill the post hole to a length and width matching canal depth:
- Maintain at least 4 to 5 mm of gutta-percha apically to preserve the apical seal.
- Enlarge the canal with the colour-coded drills until the post space approximates the canal diameter at working depth, avoiding unnecessary removal of radicular dentine.
- Eliminate undercuts and smooth sharp line angles so the custom post can be withdrawn and resealed without locking.
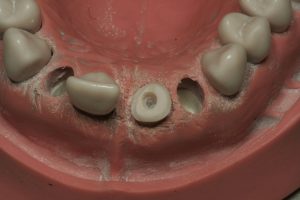
Fig 1: The prepared post space on the model, showing the canal opening at working depth.
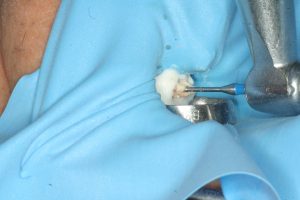
Fig 2: In-situ preparation under rubber dam isolation.
A smooth, tapered space reduces stress concentrations and gives uniform resin thickness. Coat the canal walls with a thin film of glycerine and dry the excess. This separating medium lets the relined post be removed after initial cure for extraoral completion.
Steps 5 to 8: Conditioning the post and creating the composite sleeve
Check the fit, remove the fibre post, then wipe with alcohol and silanate it. Confirm it reaches length without binding, with space for relining. Alcohol and silane increase bondability, improving adhesion of composite and resin cement to glass-fibre posts.
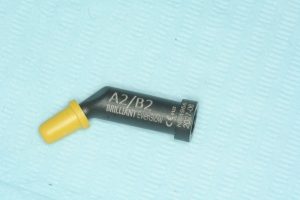
Fig 3: BRILLIANT EverGlow composite (Coltene), preheated to enhance flow and adaptation.
Heat composite to 50 degrees centigrade and adapt putty around the post end. Preheated composites show greater fluidity and wetting, enhancing adaptation and conversion, which translate into higher microhardness and flexural strength. The heated plug gives intimate contact with the canal walls, minimising voids, and subsequent luting resin.
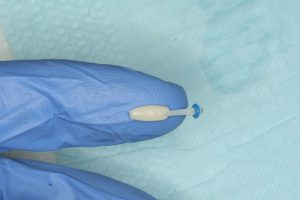
Fig 4: The fibre post relined with a custom composite sleeve adapted to the canal form.
Insert to working length and light cure for 10 seconds. This partial cure stabilises the shape without locking the composite to dentine, thanks to the glycerine barrier. Staged curing reduces shrinkage stress by prolonging the pre-gel phase. Remove the assembly and fully light cure extraorally for maximum conversion without C-factor shrinkage pulling away from the dentine.
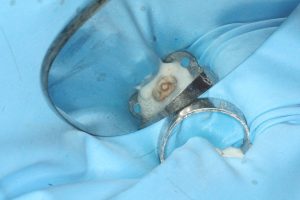
Fig 5: The prepared canal isolated under rubber dam, ready for try-in of the custom post.
Steps 9 to 12: Try-in, flowable addition and adhesive optimisation
Cleaning and etching the composite and post improve retention of further layers. Re-applying glycerine permits a second in-situ adaptation step while still allowing removal for final extraoral curing.
- Roughen the composite with a diamond bur, etch for 20 seconds with active motion, dry, then place unfilled resin to improve compatibility with the bonding system and core material.
- Syringe a thin layer of flowable composite onto the post and reseat for a light cure to refine the fit and fill micro-voids. Keep flowable thin to avoid excess shrinkage; the two-stage build minimises additional resin.
- Remove the post, light cure once more, then re-etch, wash, dry and place unfilled resin.
Fig 6: Flowable composite applied to refine the fit and fill micro-voids.
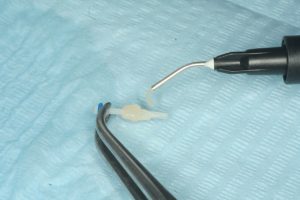
Fig 7: The custom post tried in under rubber dam, ready for cementation.
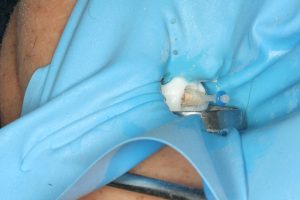
Rinse the canal with copious water and use ultrasonics to remove glycerine and debris, improving dentine cleanliness and hybrid-layer formation. Dry well with paper points.
Adhesive cementation, core build-up and ferrule
Apply Parabond conditioner and adhesive (A and B), massaged into the canal and tooth surface with excess removed, enabling chemical and micromechanical bonding to root dentine. Pre-treatment is critical because bond strength to root dentine is lower than to coronal dentine, given the high C-factor and difficult access.
Fig 8: The custom post seated in the canal during cementation.
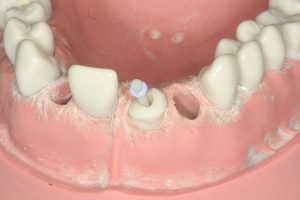
Fig 9: Post fully seated, with excess material expressed under gentle vibration.
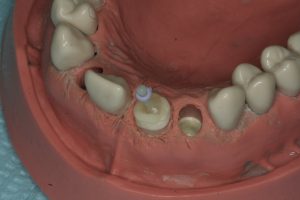
Cement the post with ParaCore under vibration. ParaCore acts as both a dual-cure cement and core material, simplifying the sequence and allowing light transmission through glass-fibre posts for deeper polymerisation. Gentle vibration expresses excess material and reduces voids, improving adaptation along the post.
Fig 10: Core built up over the luted post using the same resin system.
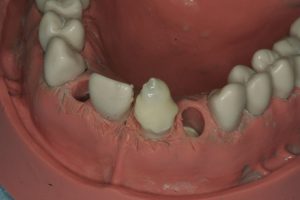
Build up the core with ParaCore or composite. The same resin system creates a homogenous post and core complex, associated with favourable stress distribution and reduced catastrophic root fracture compared with metal posts. Dual-cure materials ensure polymerisation even where light access is limited.
Fig 11: The core prepared, with a clear collar of sound tooth structure for the ferrule.
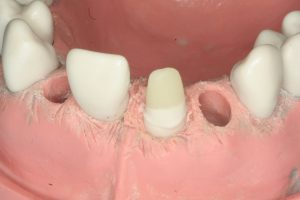
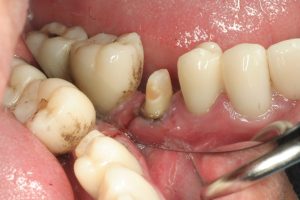
Fig 12: Close view of the ferrule, at least 1.5 to 2.0 mm of circumferential tooth structure.
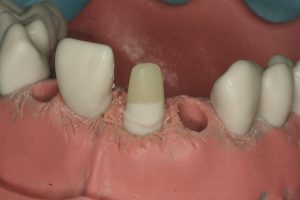
Prepare the tooth with an adequate ferrule. A circumferential ferrule of at least 1.5 to 2.0 mm of sound tooth structure significantly increases fracture resistance, independent of post system. Greater ferrule height leads to less failure on lateral loading and more favourable fracture patterns, whereas its absence is linked to early failure.
Biomechanical outcome and clinical implications
The protocol yields a metal-free glass-fibre custom post that closely matches the canal anatomy, limiting luting resin thickness and reducing C-factor-driven shrinkage, marginal gaps and leakage compared with a thin parallel post in a wide canal. These posts have an elastic modulus closer to dentine and, with an adequate ferrule, show improved fracture resistance and more reparable failure modes than cast metal posts, supporting a more conservative restoration.
Fig 13: The finished post and core preparation alongside the adjacent dentition.
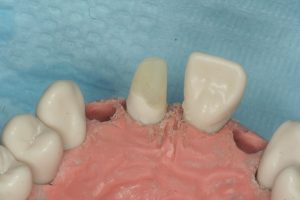
Fig 14: The definitive custom post and core in situ, viewed intraorally.
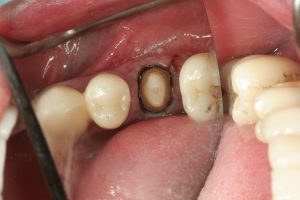
Fig 15: The definitive post and core from a second intraoral angle.
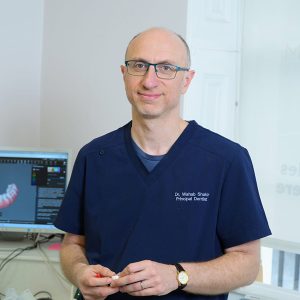 Author bio: Dr Wahab Shakir, BDS PGCert PGDip MClinDent (Cosmetic and Restorative Dentistry) is Principal Dentist of Museum Dental Suites and a postgraduate lecturer for Tipton Training Academy. He qualified at Newcastle University before moving into private practice in London, he has an MClinDent, PG Certificates and PG Diploma in Restorative and Operative Dentistry from Tipton Training, the latter earning him the Best Dentist Award. He has a particular interest in cosmetic dentistry, minimally invasive techniques, and the management of TMD and tooth wear, with a strong emphasis on prevention and conserving natural tooth structure.