Achieving optimal results in full-arch implant treatment
Featured Products Promotional FeaturesPosted by: Dental Design 24th February 2020
Dr Martin Wanendeya demonstrates through a case study how he achieved excellent aesthetics and function with an FP1 dental implant restoration in his patient’s upper arch.
A male patient presented with several mobile teeth and a loose partial denture in his upper arch that he had retained for a while. He also had existing dental implants in the upper right region that had been placed recently.
The main problem was that the partial denture was being held in place with a cement-retained implant crown in the UR5. This meant that the implant crown kept coming off and the denture was becoming loose – the patient had already been through a cycle where the denture had detached and was reattached several times. In addition, peri-implantitis had developed on and around an implant-supported denture that had been placed in the patient’s lower arch. He was unable to chew or eat properly, so he came to the practice to explore his options.
Treatment options were discussed with the patient, which included a new denture, an anterior bridge and posterior implant, an implant-retained overdenture, or a fixed implant bridge. The patient was keen on having a fixed implant bridge, so planning was carried out to determine where the ideal tooth positions would be based on the patient’s remaining dentition and his smile.
Placement of four dental implants in the upper arch was planned for, as was treatment for peri-implantitis and removal of the implant in the lower arch. The patient also decided to see how he would get on with a new replacement denture in his lower arch.
Treatment planning
Treatment planning involved taking an impression and using this to make a shell. This is a device that enables clinicians to visualise the tooth position and shape, as well as the gingival margin. In this case, an approach was planned where – rather than lift a flap, remove the hard and soft tissue, and provide the patient with a fixed denture (i.e. a pink and white prosthesis) – a combination of augmentation, precision placement and soft tissue manipulation would be carried out. This would ensure a result where there would be white teeth emerging from the patient’s natural gum.
Implant placement
On the day of surgery, the remaining teeth in the upper arch were extracted and the abutments removed from the existing implants. Four Ankylos® implants were placed immediately following extraction and Ankylos® Balance Base abutments fitted to all six implants in the upper arch that would support the prosthesis.
Using the WeldOne™ intraoral welding technique, a welded framework was then made and bent round the implants. This metal frame was cut, trimmed and shaped, before it was treated to become opaque. The shell was then picked up using a special handpiece that also maintained the screw-access hole in the prosthesis.
Following this, a connective tissue graft was harvested from the tuberosity and placed into the anterior region of the mouth in order to boost the soft tissue profile and improve appearance in these areas.[i] Bio-Oss® small granule was also placed into the extraction sockets so as to, again, enhance results.
A provisional bridge was then made and screwed onto the implants on the day of surgery. Sutures were placed around the UL2 and UR2 areas in order to hold the soft tissue in the ideal position, which were left to heal for two weeks.
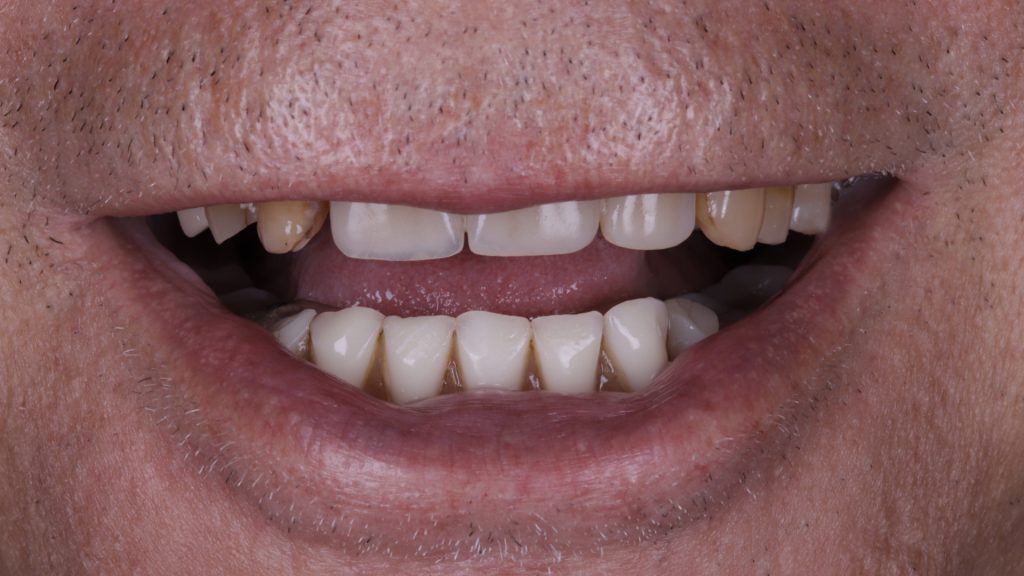
Figure 1 Full view of smile pre-implant surgery
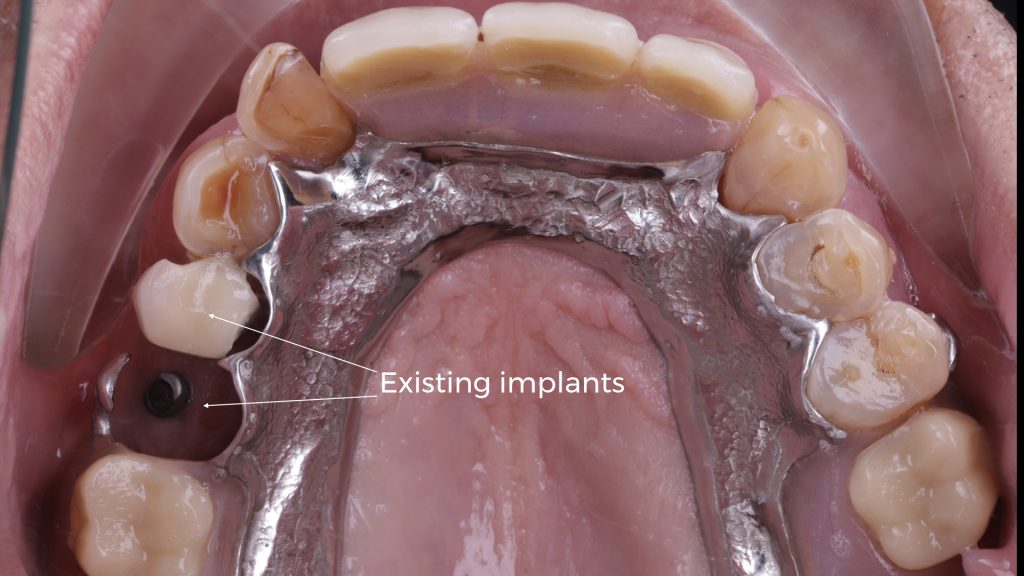
Figure 2 Upper arch with existing implants
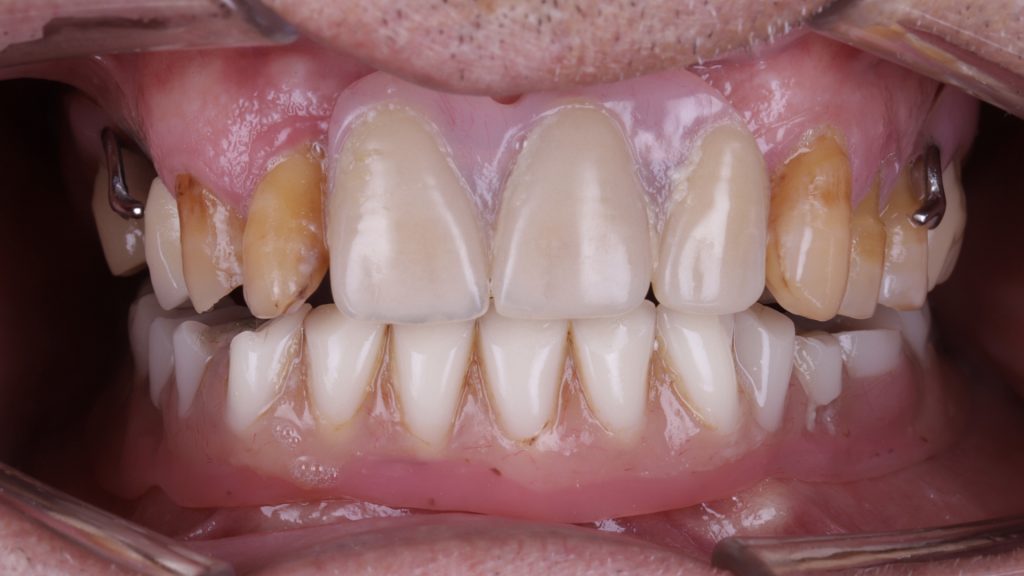
Figure 3 Dentures in lower and upper arch
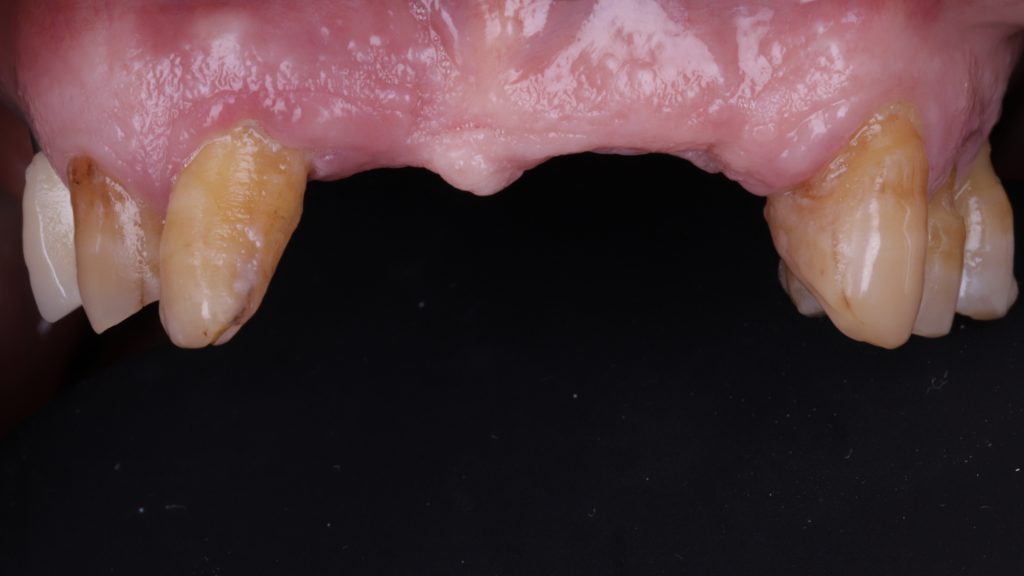
Figure 4 Denture removed in upper arch
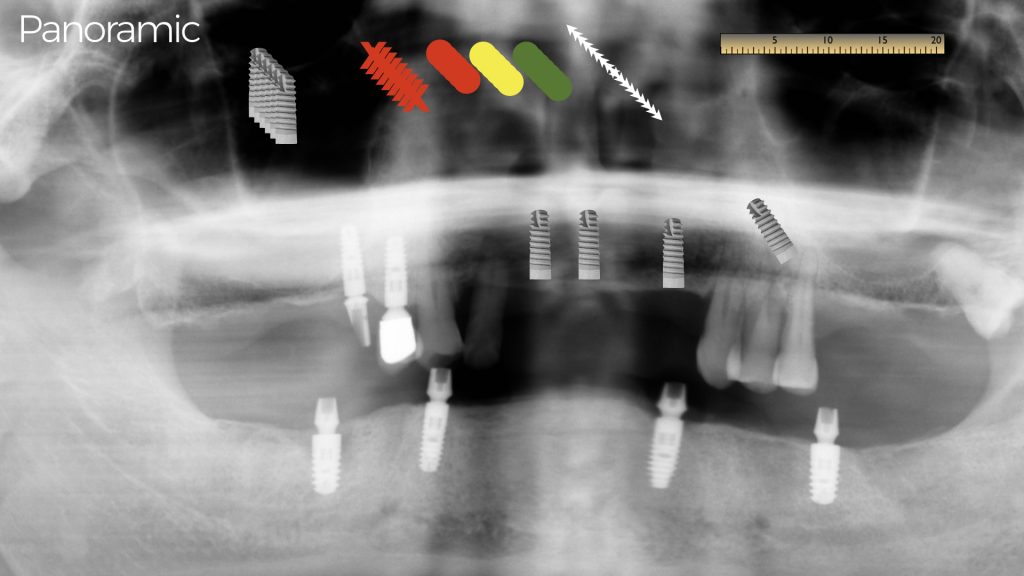
Figure 5 Implant treatment planning
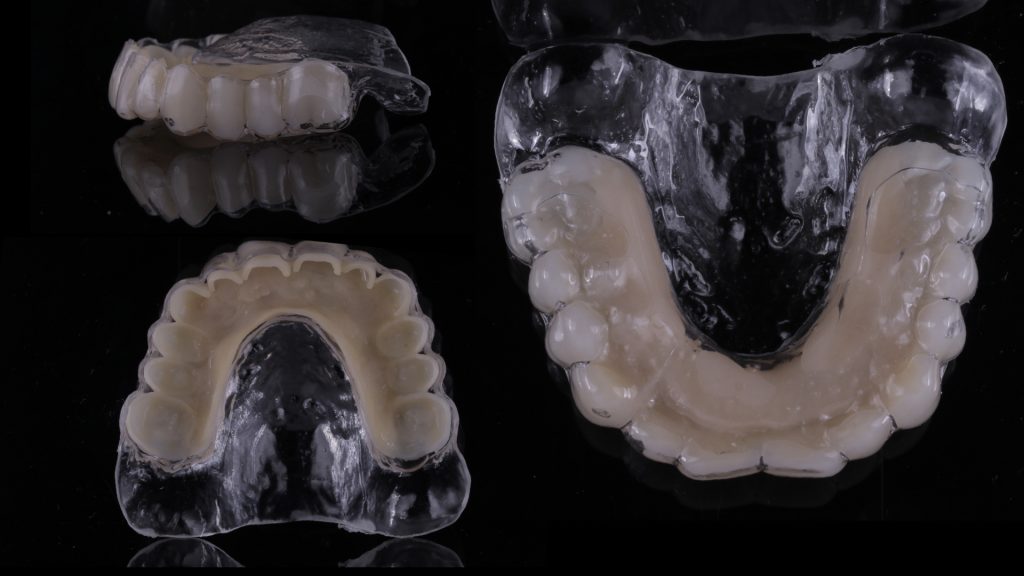
Figure 6 Shell for the temporary restoration
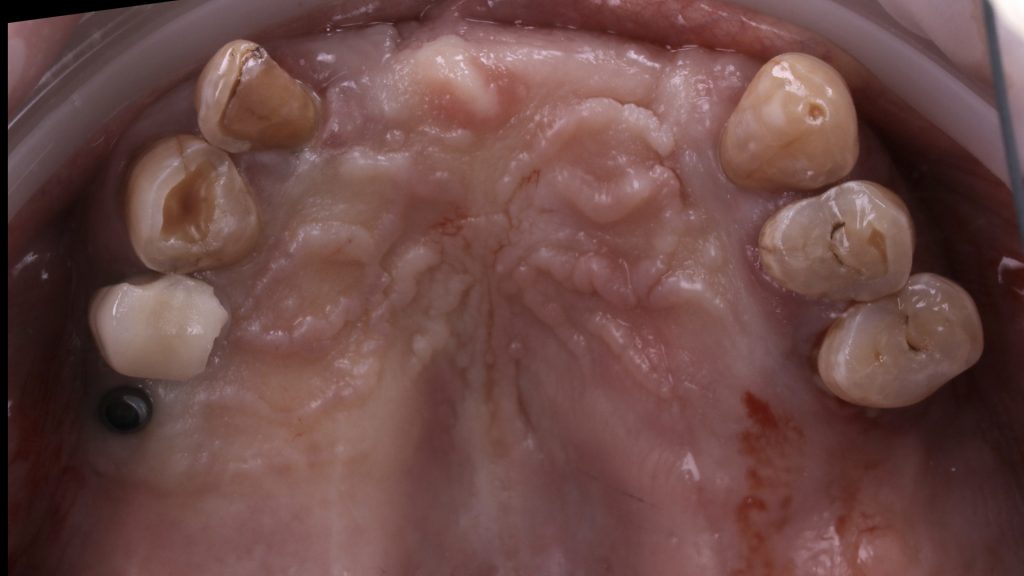
Figure 7 Upper arch pre-extraction
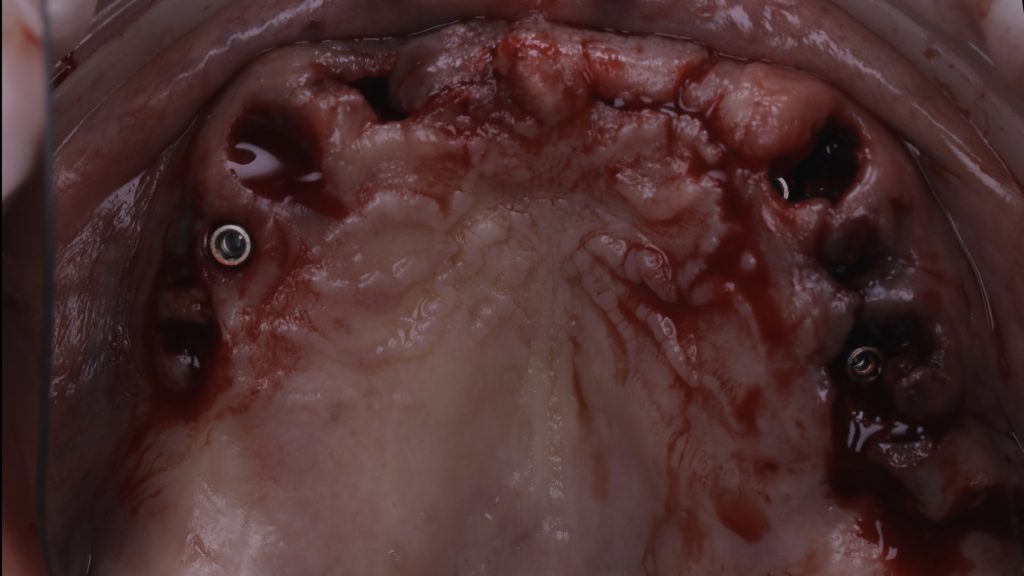
Figure 8 Implants placed in upper arch
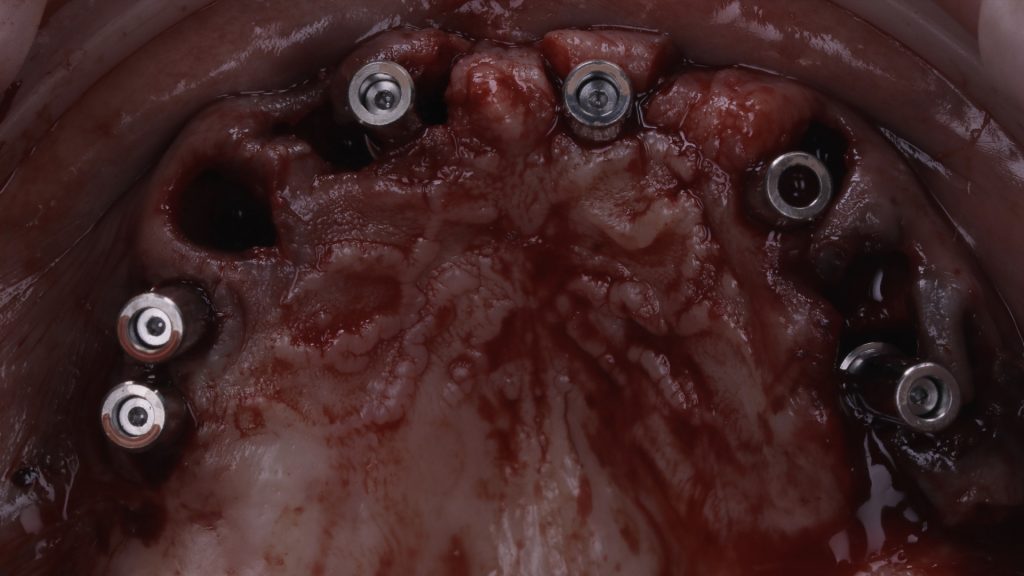
Figure 9 Implant abutments fitted
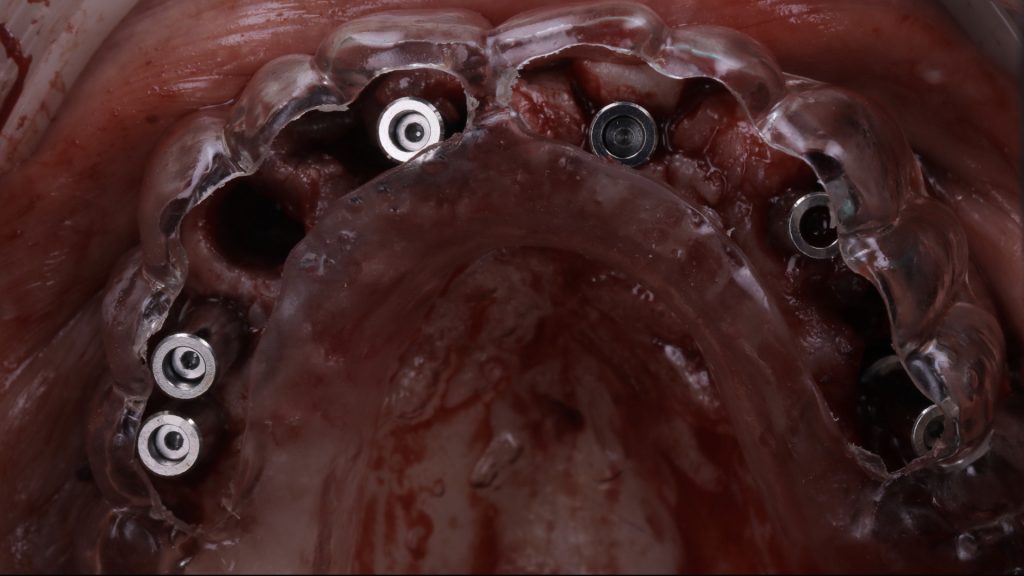
Figure 10 Try in of the prosthesis shell
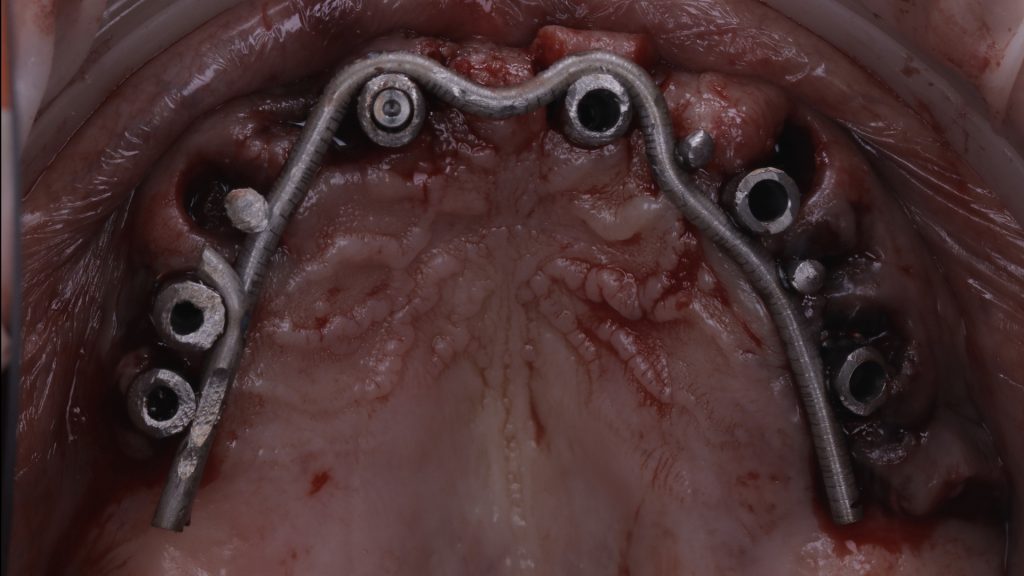
Figure 11 Intraorally welded framework
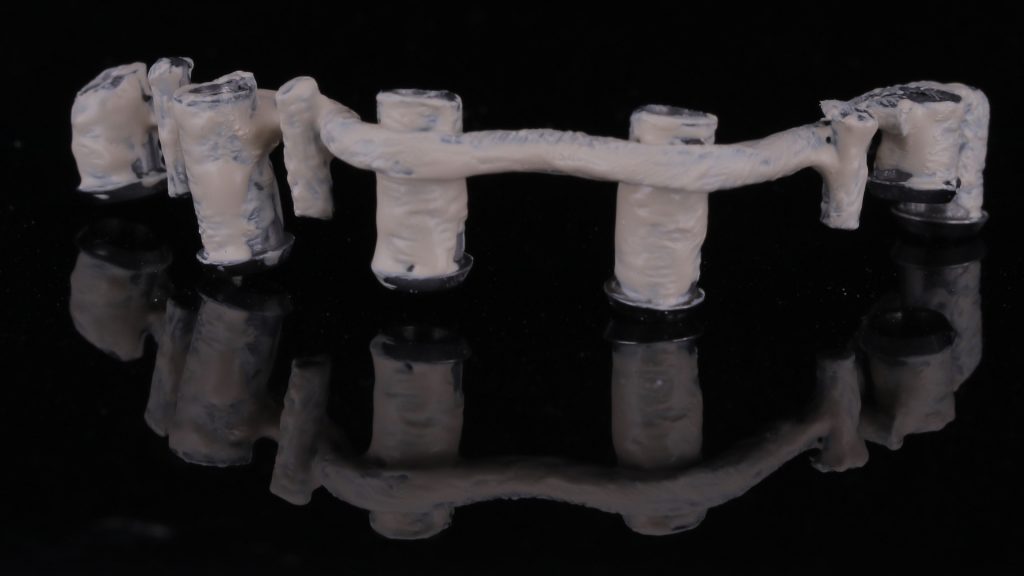
Figure 12 Opaque framework
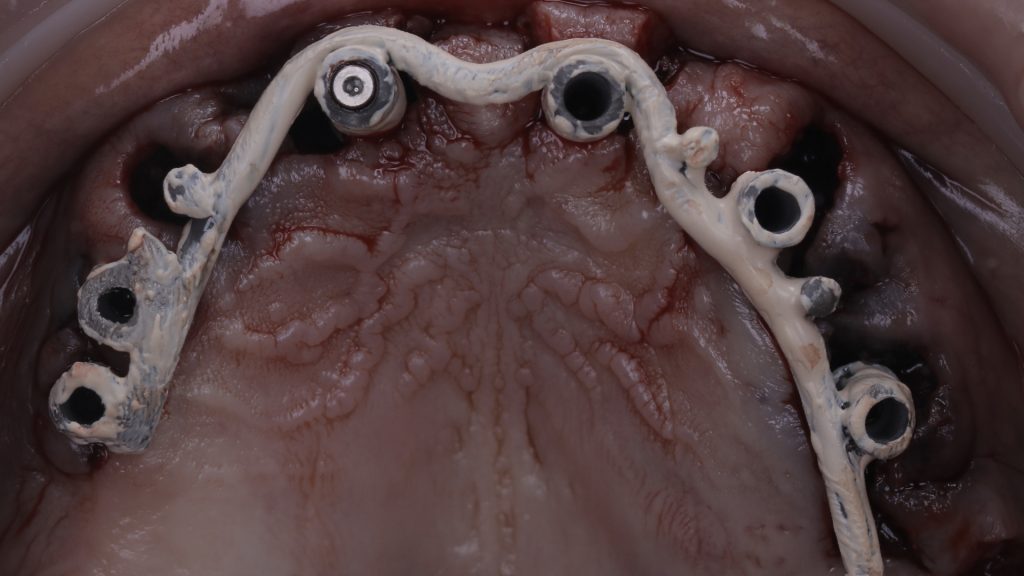
Figure 13 Try in of the opaque framework
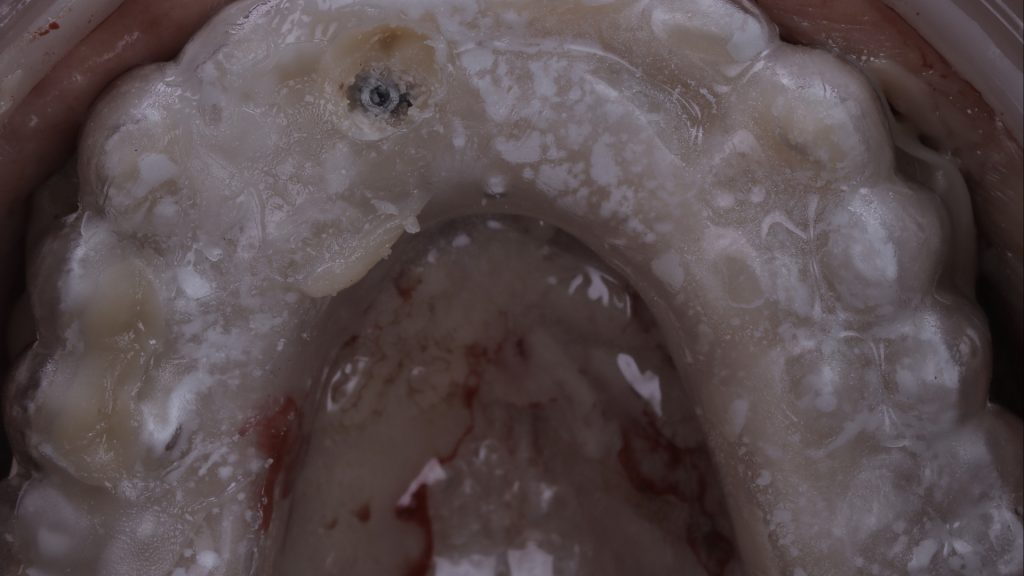
Figure 14 Try in of the prosthesis shell
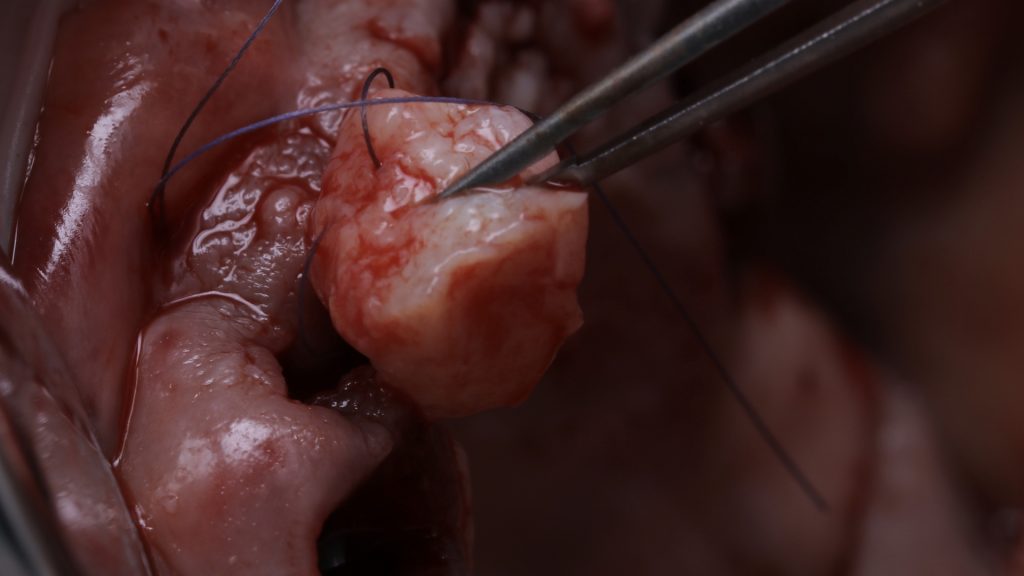
Figure 15 Suturing of soft tissue graft
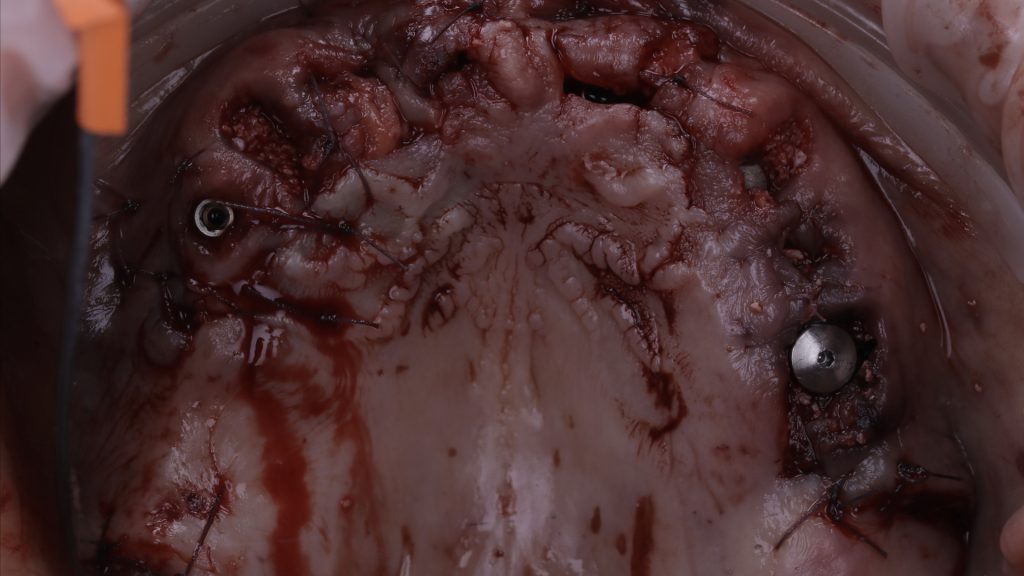
Figure 16 Soft tissue graft in the upper arch
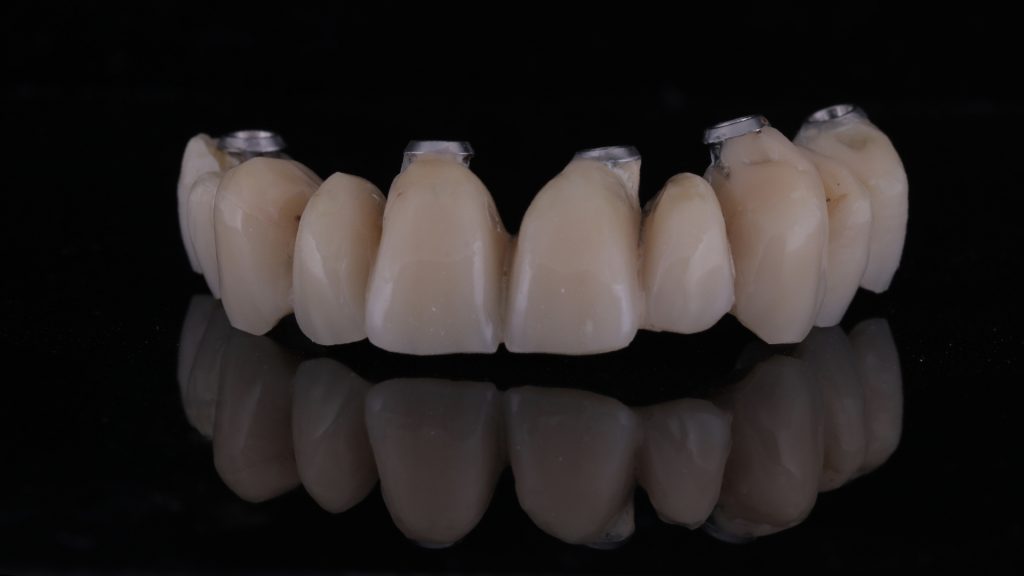
Figure 17 The provisional bridge
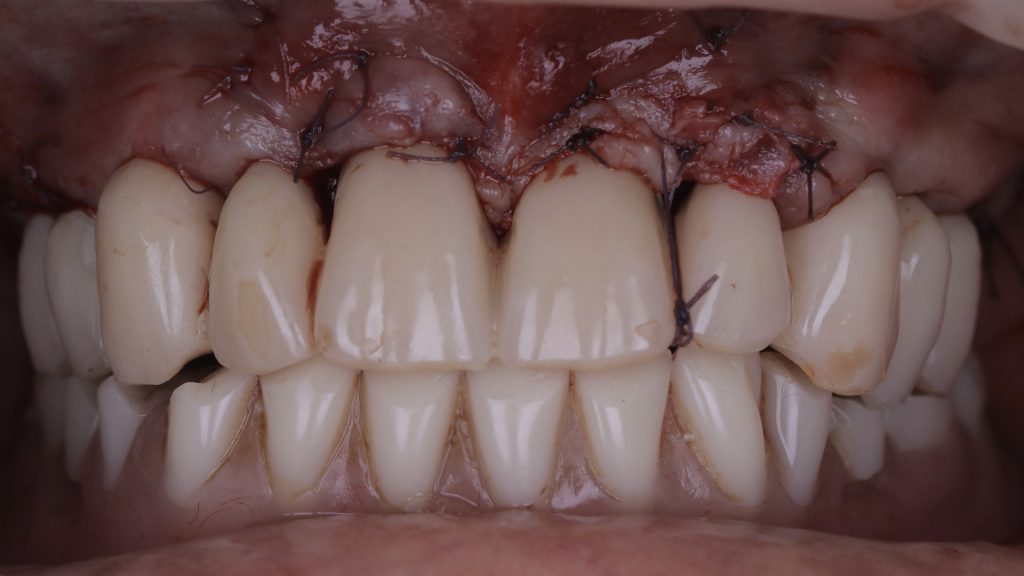
Figure 18 Temporary restoration fitted
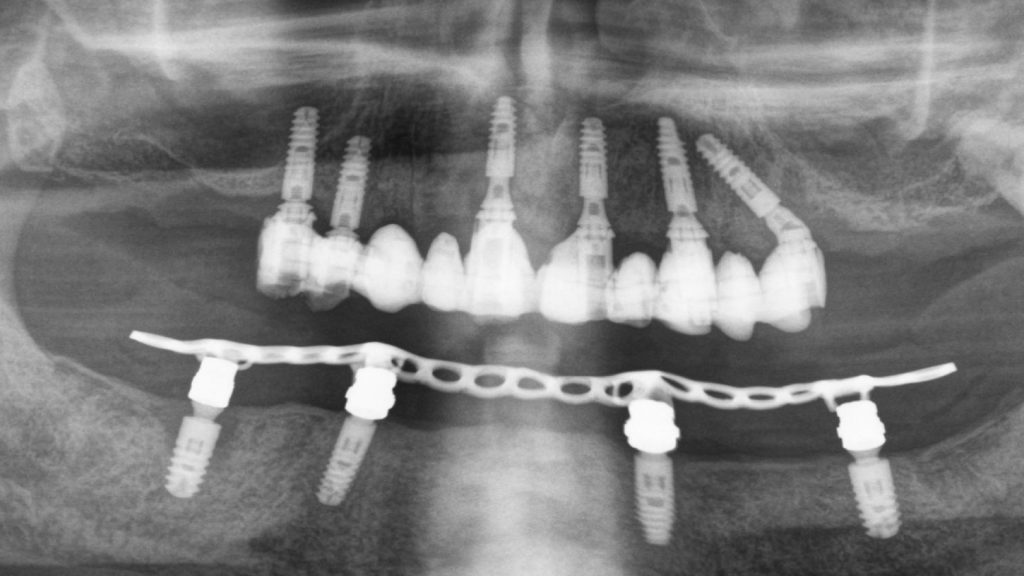
Figure 19 Radiograph following implant surgery
Implant restoration
Following approximately 3 to 4 months of further healing, the patient returned to the practice for the restorative phase of treatment. Once the patient had been assessed and found to have pink, healthy tissue, the provisional bridge was removed to prepare for the final restoration.
Elos Accurate® scan bodies were placed on each implant and a digital image taken using the TRIOS intraoral scanner, which was able to capture the soft tissue shape and implant positions. This scan was then sent to the Uniqa dental laboratory, where dental technicians – Alina and Khristo – copied the shape of the provisional restoration, produced a wax-up model and sent back a PMMA shell. Figure 28 shows the PMMA shell on the Elos® link abutments taken from the scan. This was then tried in the mouth, before aesthetics, phonetics and function were assessed.
The original intraoral scans were used to make an implant verification jig (IVJ) with a pattern resin. This was verified in the mouth and on this occasion, the IVJ fit without needing to be trimmed or shaped. Another pattern resin – primopattern from primotec – was then used to capture the soft tissue shape in the mouth. Figure 29 shows the two pattern resins in place, which were then given to the dental technicians to create a hard model.
From this model, a milled zirconia bridge was made and stained using MiYO stain. The bridge was then tried in the mouth and checked for fit, tissue shape and occlusion. The Elos® link abutments were removed and refitted. The restoration was sent back to the lab for final finishing before it was fitted. Figure 31 demonstrates excellent soft tissue integration following the final fit, while figure 32 shows both the new bridge in the upper arch and a new implant-supported denture that was fitted to the lower arch. As originally planned, the implant in the lower arch that had peri-implantitis was also removed.
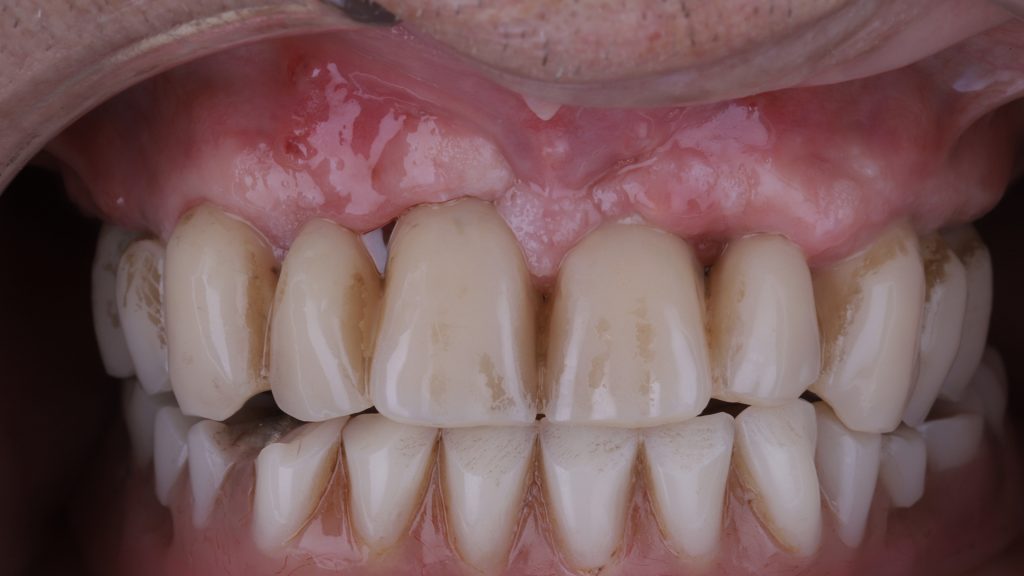
Figure 20 Soft tissue healing post-implant placement
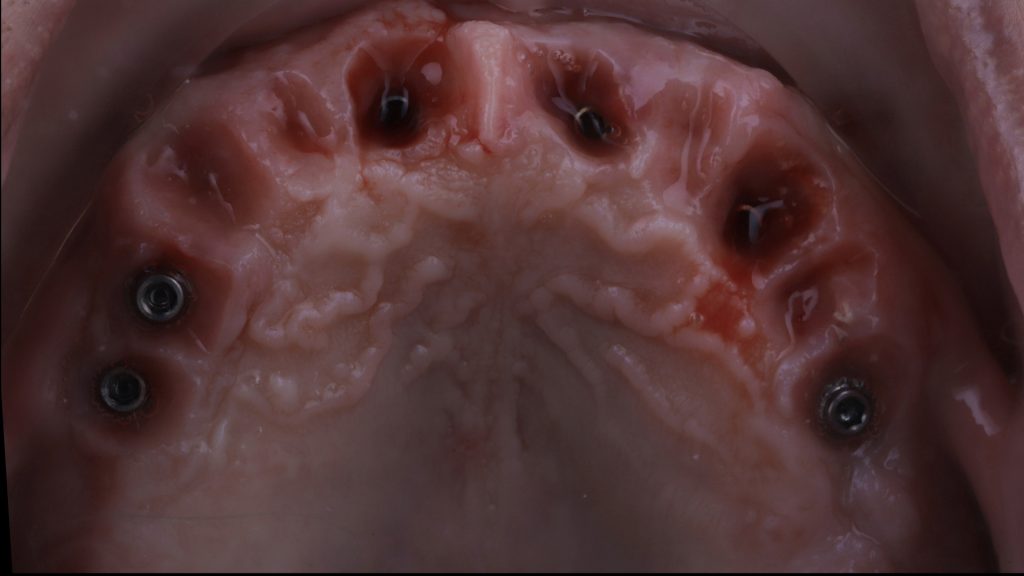
Figure 21 Provisional bridge removed
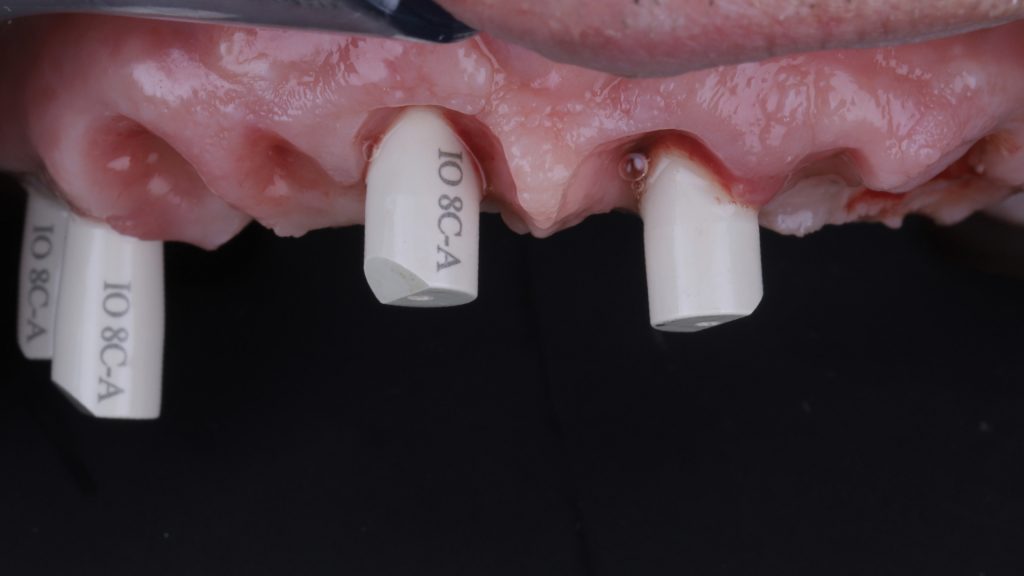
Figure 22 Scan bodies placed
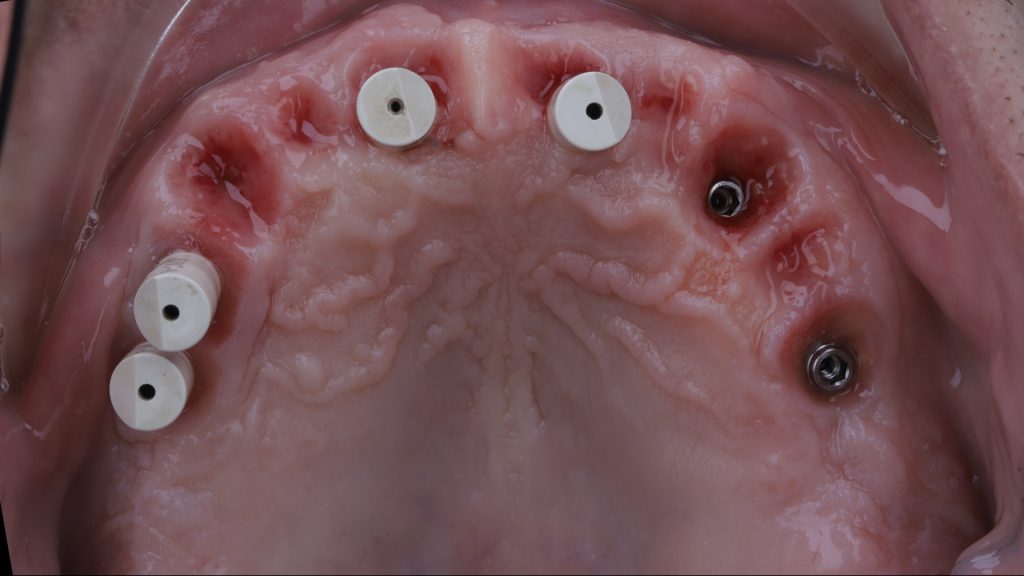
Figure 23 Upper arch with scan bodies in place

Figure 24 Intraoral scan of soft tissue and restoration
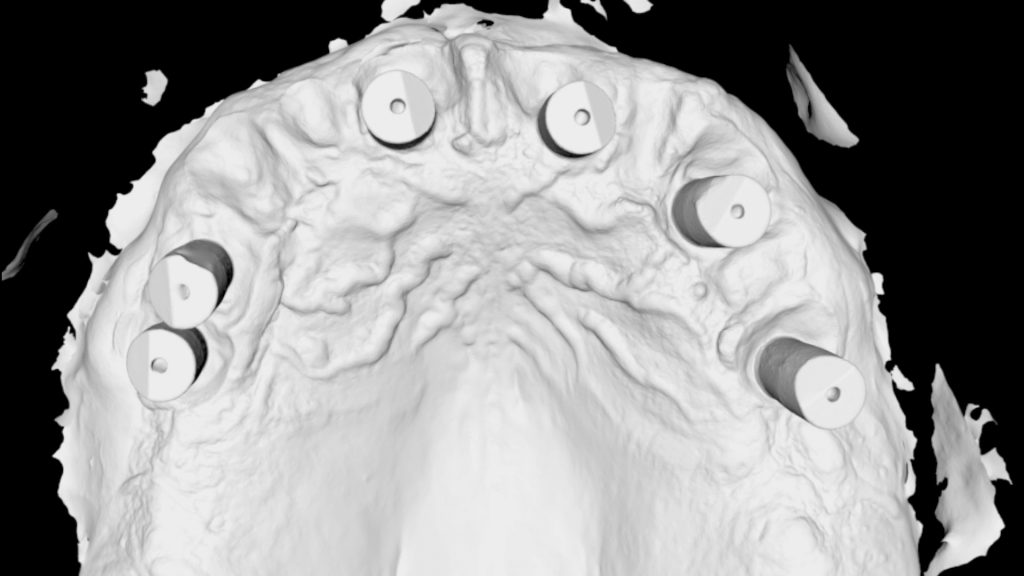
Figure 25 Intraoral scan of scan bodies in upper arch
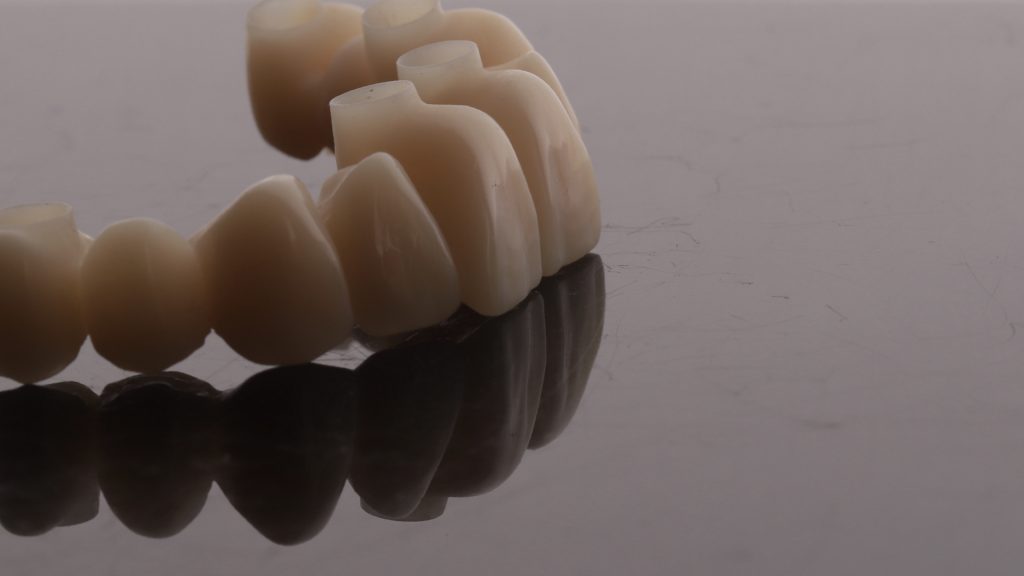
Figure 26 PMMA shell
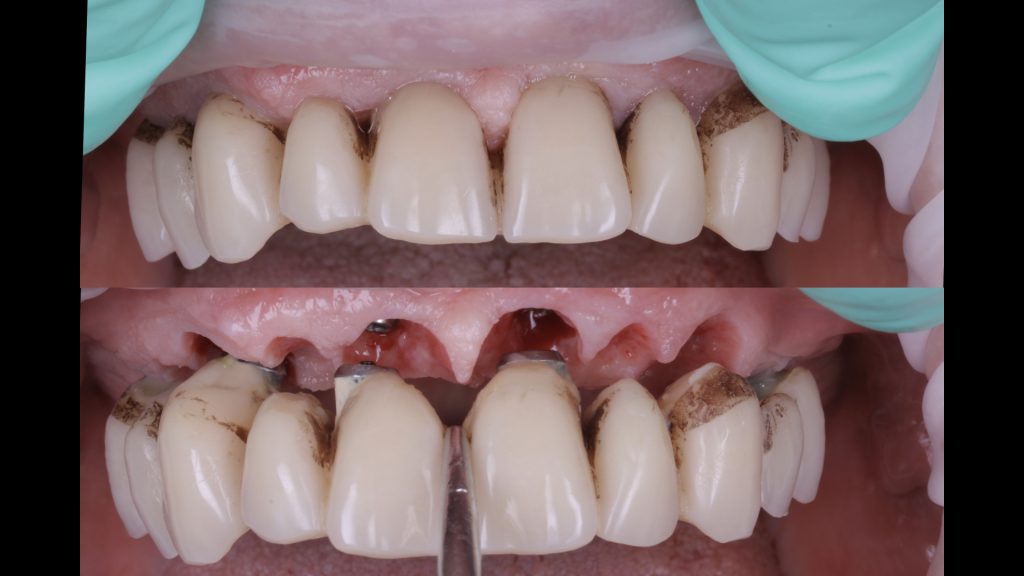
Figure 27 Removal of the temporary bridge
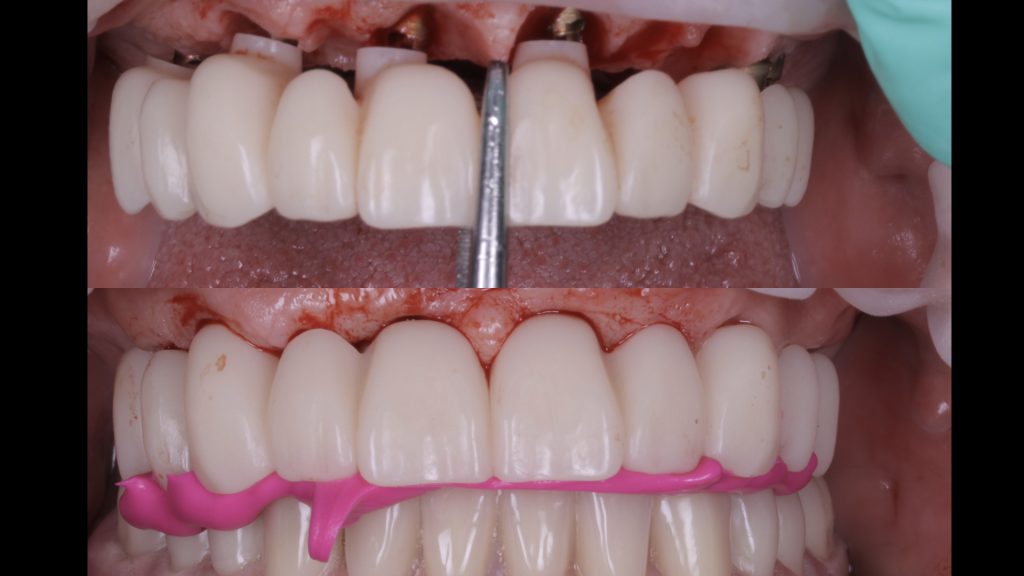
Figure 28 Try in of the PMMA shell
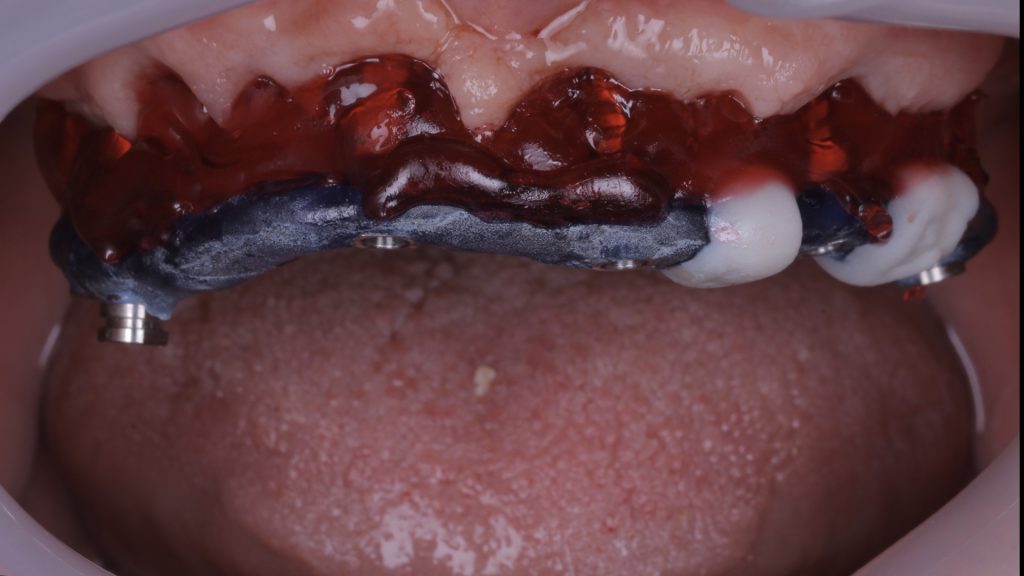
Figure 29 Pattern resins in place
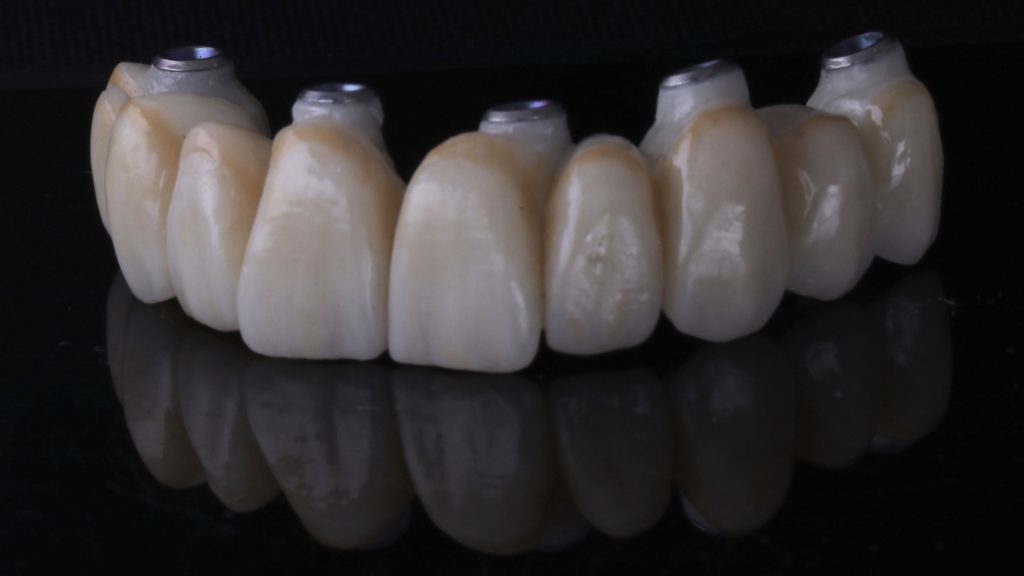
Figure 30 The final prosthesis
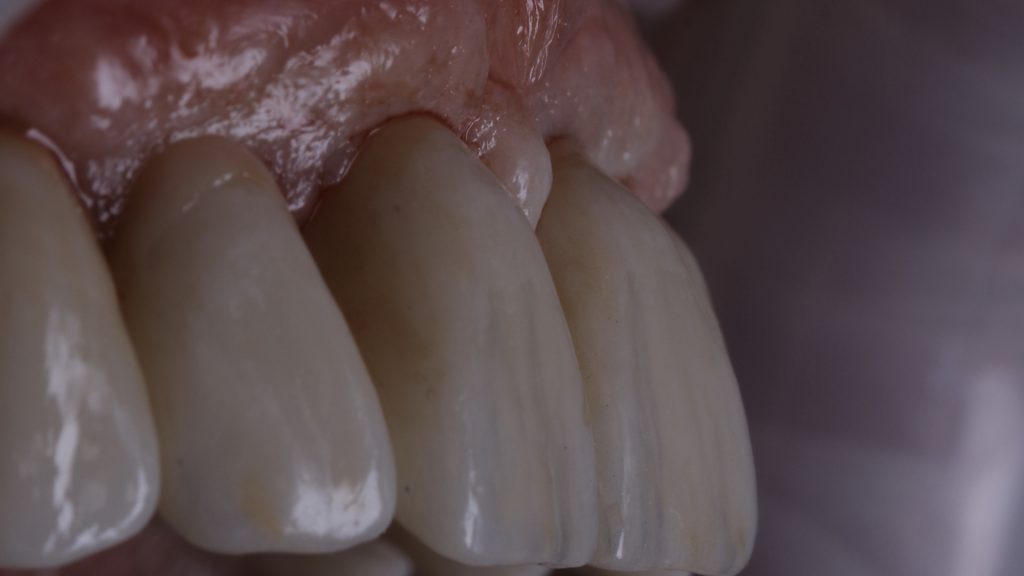
Figure 31 Soft tissue integration post-implant restoration
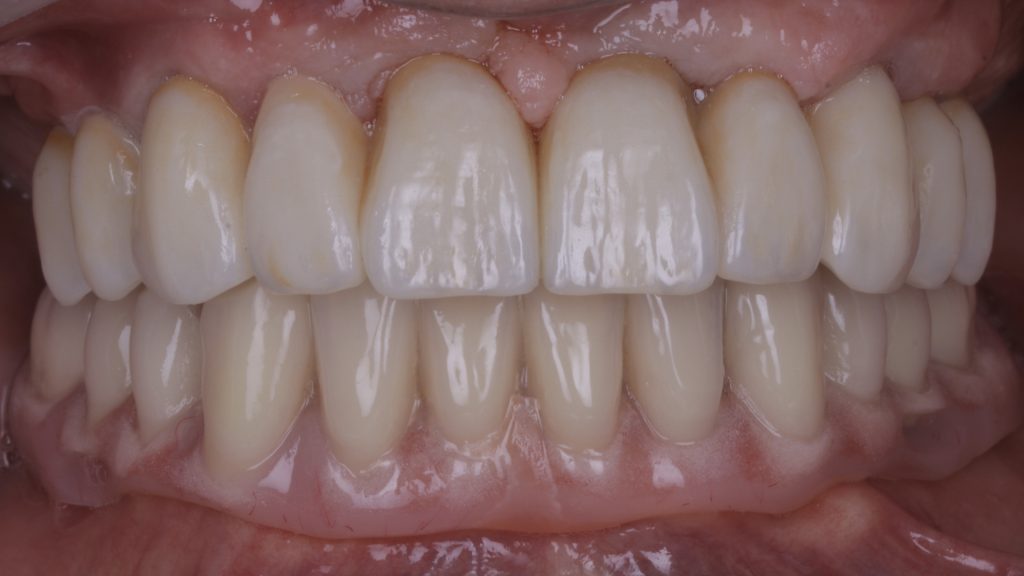
Figure 32 The final result
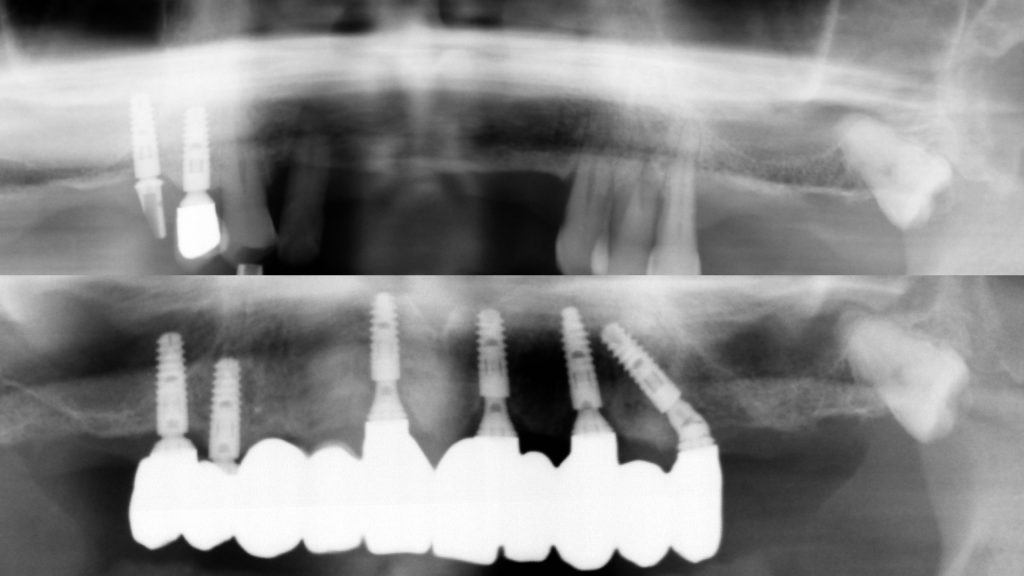
Figure 33 Pre- and post-implant restoration radiographs
Review
The patient was overjoyed with the final outcome. This case demonstrates that by following a minimally invasive approach to full-arch implant treatment, a natural-looking result can be achieved that is superior to traditional fixed dentures. Through meticulous treatment planning, soft tissue manipulation and prosthetic design, patients can benefit from a highly aesthetic and functional FP1 restoration.[ii], [iii] Practitioners can learn to carry out treatment predictably with The FP1 Course – an innovative new programme that explores a muco-gingival approach to full-arch dentistry, incorporating both digital and analogue processes. For course dates and to book your place, visit The FP1 Course Facebook page at www.facebook.com/FP1Course/.
For more information visit www.tendental.com or call on 020 33932623
Author bio:
Dr Martin Wanendeya heads the award-winning Ten Dental+Facial team alongside colleague, Dr Nikhil Sisodia. Martin is a seasoned and knowledgeable implant surgeon with experience in the latest techniques.
[i] Hanser, T. and Khoury, F. (2016) Alveolar Ridge Contouring with Free Connective Tissue Graft at Implant Placement: A 5-Year Consecutive Clinical Study. The International Journal of Periodontics & Restorative Dentistry. 36(4): 465-473.
[ii] Liu, C-L. S. (2004) Use of a Modified Ovate Pontic in Areas of Ridge Defects: A Report of Two Cases. J Esthet Restor Dent. 16: 273-283.
[iii] Pozzi, A., Tallarico, M. and Moy, P. K. (2015) The Implant Biologic Pontic Designed Interface: Description of the Technique and Cone-Beam Computed Tomography Evaluation. Clinical Implant Dentistry and Related Research. 17(2): e711-e720.