Dr Selvaraj Balaji presents a complex case in which a three-unit implant-retained bridge was required in the aesthetic zone, utilising an existing dental implant and necessitating hard and soft tissue augmentation.
The patient, a 46-year-old male, first presented to the practice nine years ago when he received implant treatment for a missing UL2. He revisited two years ago, complaining of a failing UL1 and UR1 – both had undergone root canal treatment which had since failed. The biggest complicating factor in this case was the existing implant in the UL2 site. The patient also had a thin biotype and soft tissue recession around the natural teeth as well.
Treatment planning
Any treatment plan needed to extract the failing UL1 and UR1 and replace them. However, the UL2 made this complicated. As such, there were two key treatment options:
- Extract the UL1 and UR1 and place two implants in their places. This option would present challenges as there was an existing implant in the UL2. Three total implants could potentially compromise the bone and soft tissue between the implants. This would make this option unpredictable.
- Extract the UL1 and UR1 and place an implant only in the UR1. Following this, use the existing implant in the UL2 to create a three-unit implant-retained bridge.
All treatment options were discussed with the patient, including the option of no treatment (which was not advised in this case). The patient provided informed consent to proceed with treatment option two, as this would provide good functional and aesthetic outcomes.
Hard tissue grafting would be required in the UL1 socket, and soft tissue grafting would be needed for the UR1, UL1, and UL2 in order to support the restoration and to improve overall aesthetics and function. A digital workflow was used to plan the ideal position, angle, and depth of the dental implant, in relation to the existing implant and the planned restoration. This was used to inform a guided surgical approach, which aimed to optimise accuracy and predictability, and improve the overall patient experience. The diagnostic wax up, along with accompanying scans and images were sent to the dental lab to enable them to produce the surgical guide.

1 Initial presentation

2 Periapical radiograph showing implant in UL2
 3 UL1 / UR1 Cross Section CT
Treatment provision
After numbing the area with local anaesthetic, the first stage of treatment involved extracting the UR1 and UL1 with a flapless approach. The UR1 root was extracted by using the Benex Extraction System, which allows removal of the tooth without fracturing the buccal plate. Following this, guided implant placement was carried out on the UR1, this involved fitting the surgical guide in the mouth (which had been fabricated in the lab from a digital impression) and placing the implant through the guide to achieve the exact position, angle, and depth as planned.
A soft tissue graft was harvested from the palate, and added below the buccal flap to gain buccal volume and support the papilla. Additionally, a combination of autogenous bone and allograft was placed in the jump gap around the UR1 implant, with additional hard tissue socket grafting carried out on the UL1 using allograft/xenograft.
In order to maintain soft tissue contour, a chairside custom temporary healing abutment was created, and the site was left to heal for three months.
After three months, a lab-made provisional bridge was placed to further contour the soft tissue. Another three months later, the final three-unit implant-retained bridge was fitted, replacing the UR1, UL1, and UL2.
Myself and the patient are very happy with the treatment outcome in this case. The three-unit implant-retained bridge restored the patient’s function and aesthetics, without compromising the bone and soft tissue.

4 Extracted UL1

5 Extracted UR1 root

6 Post extraction site

7 UR1 implant placement

8 Soft tissue graft

9 Custom healing abutment placed

10 Hard tissue grafting in the jump gap around implant

11a Lab made provisional bridge

11b Lab made provisional bridge

11c Lab made provisional bridge

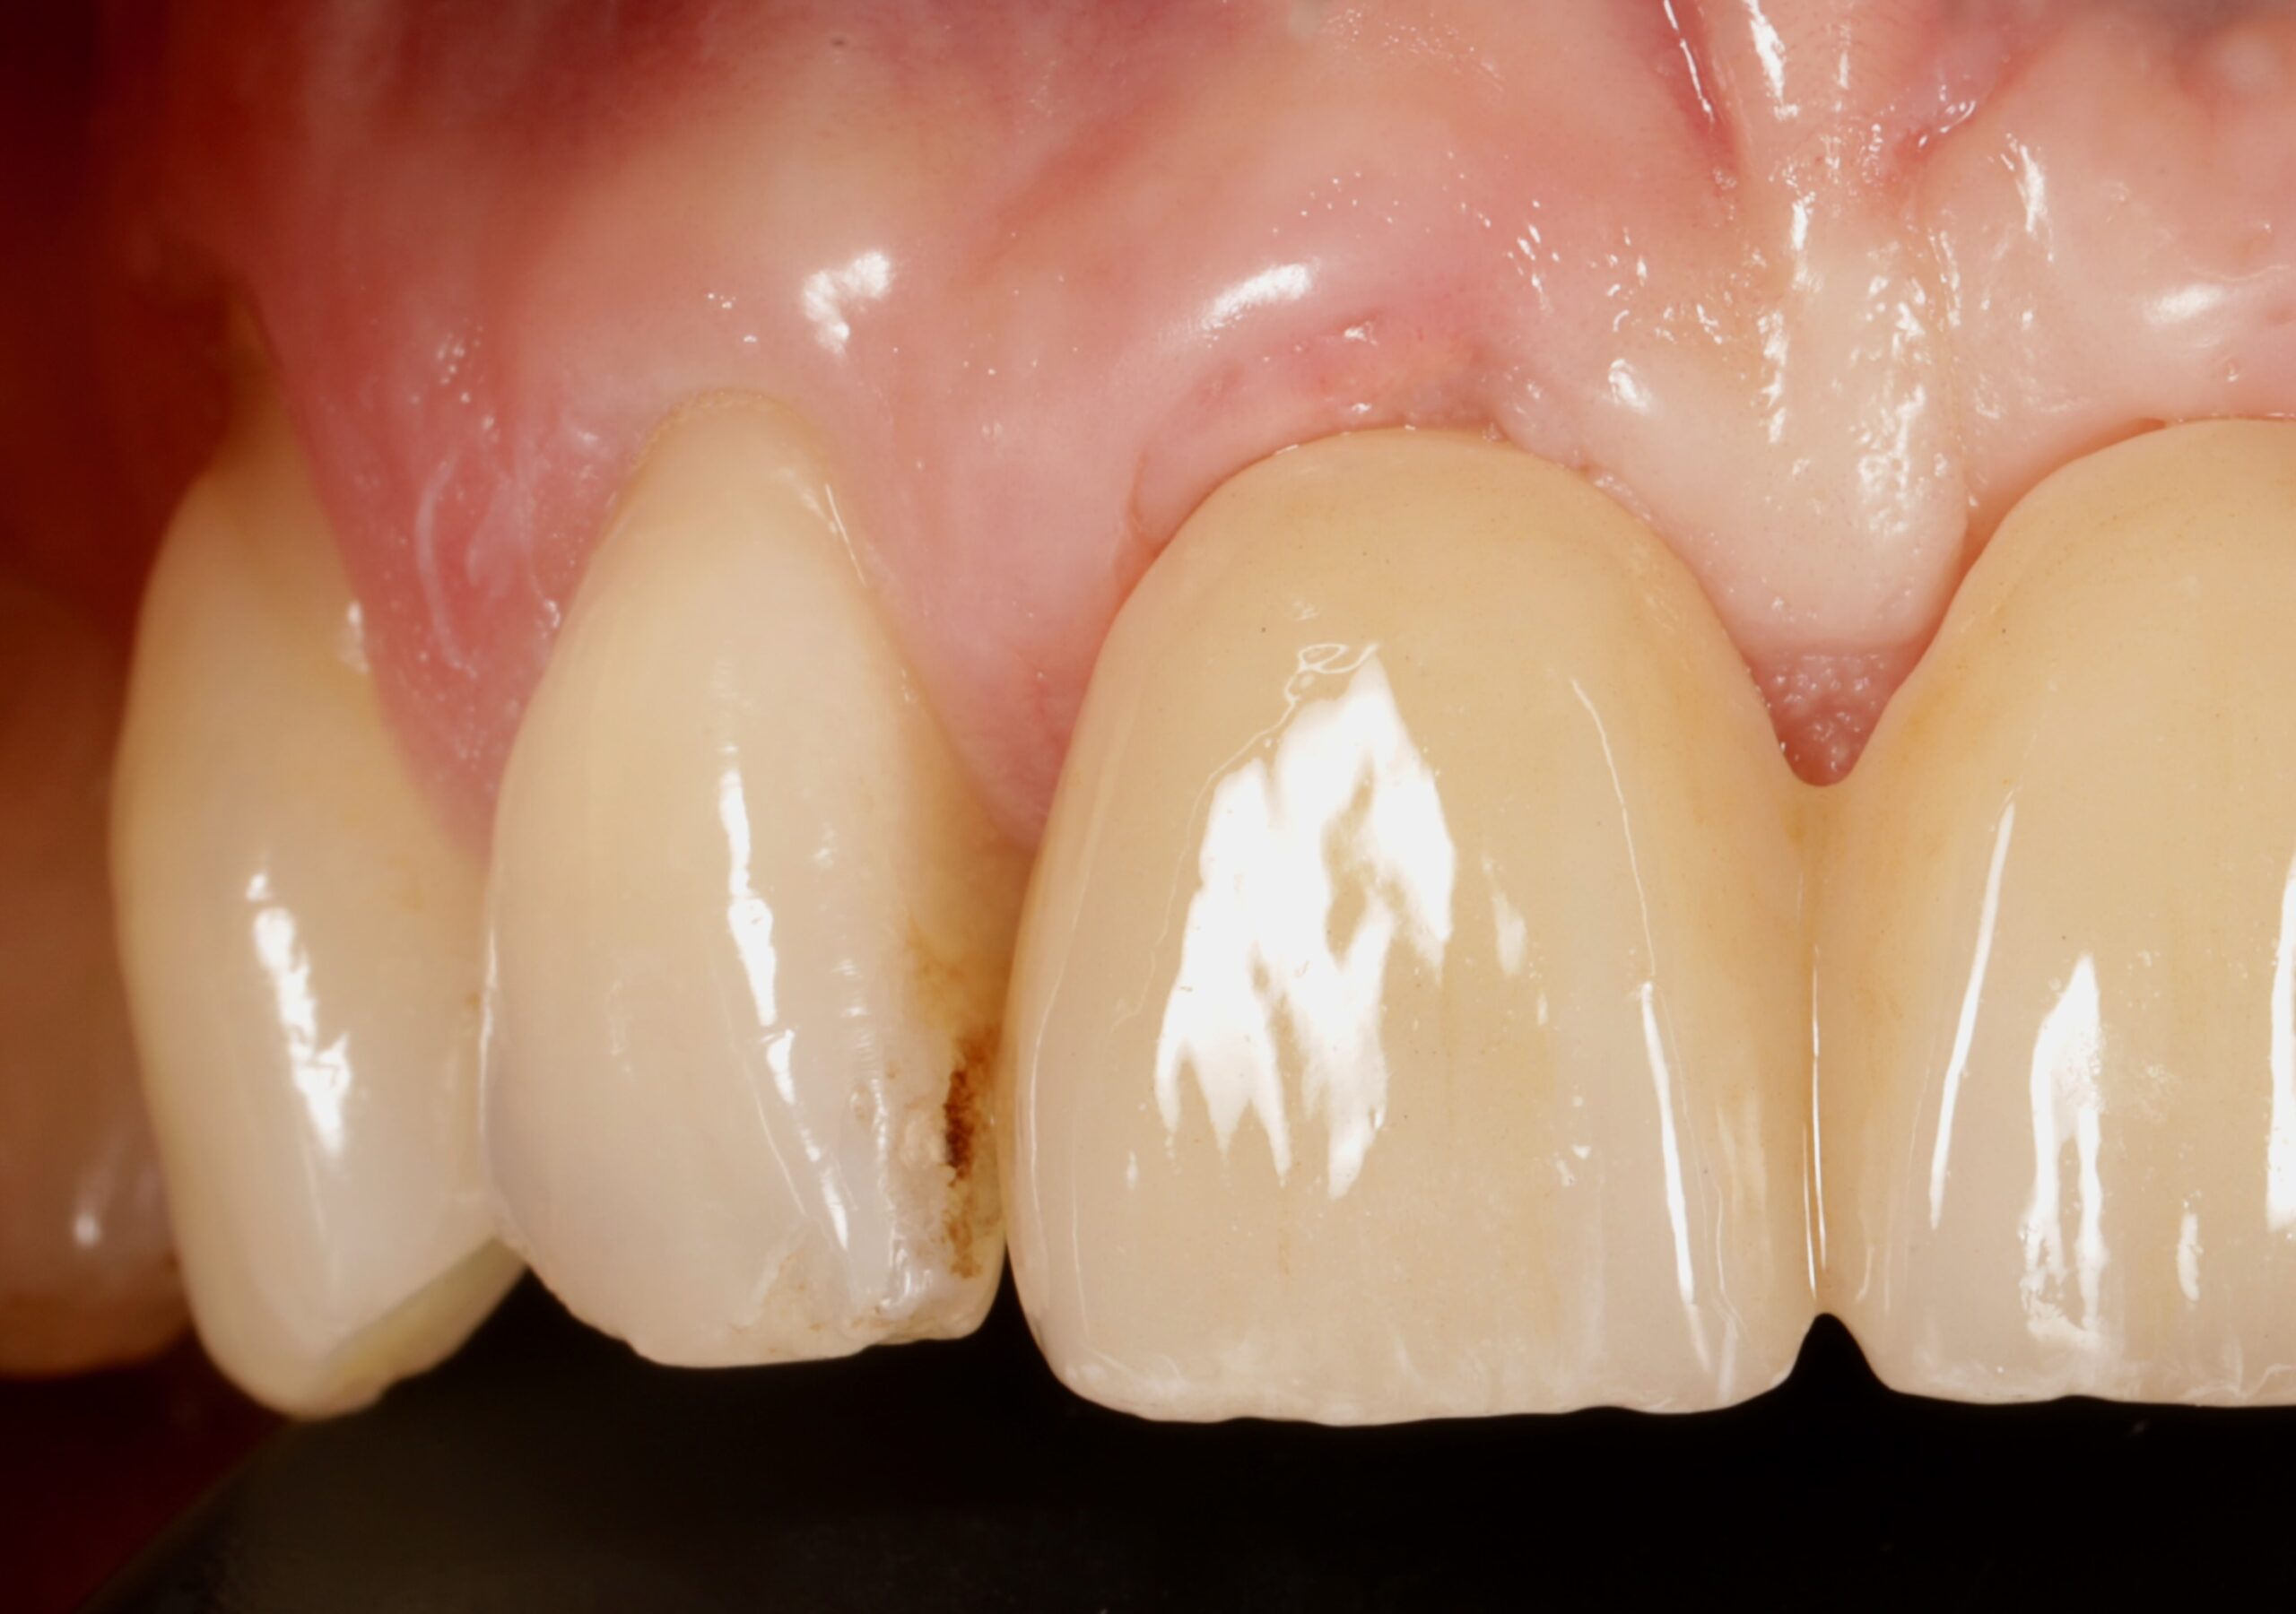
12a Soft tissue contour post healing

12b Soft tissue contour post healing
Discussion
The key complicating factor in this case was the existing dental implant in the UL2, placed nine years previously. This presented the decision whether to place two implants or one, ultimately deciding that placing one implant and providing a bridge would be the best outcome for the patient. Achieving a favourable soft tissue contour between the three teeth was another challenge, requiring hard and soft tissue grafting in order to best support the restoration.
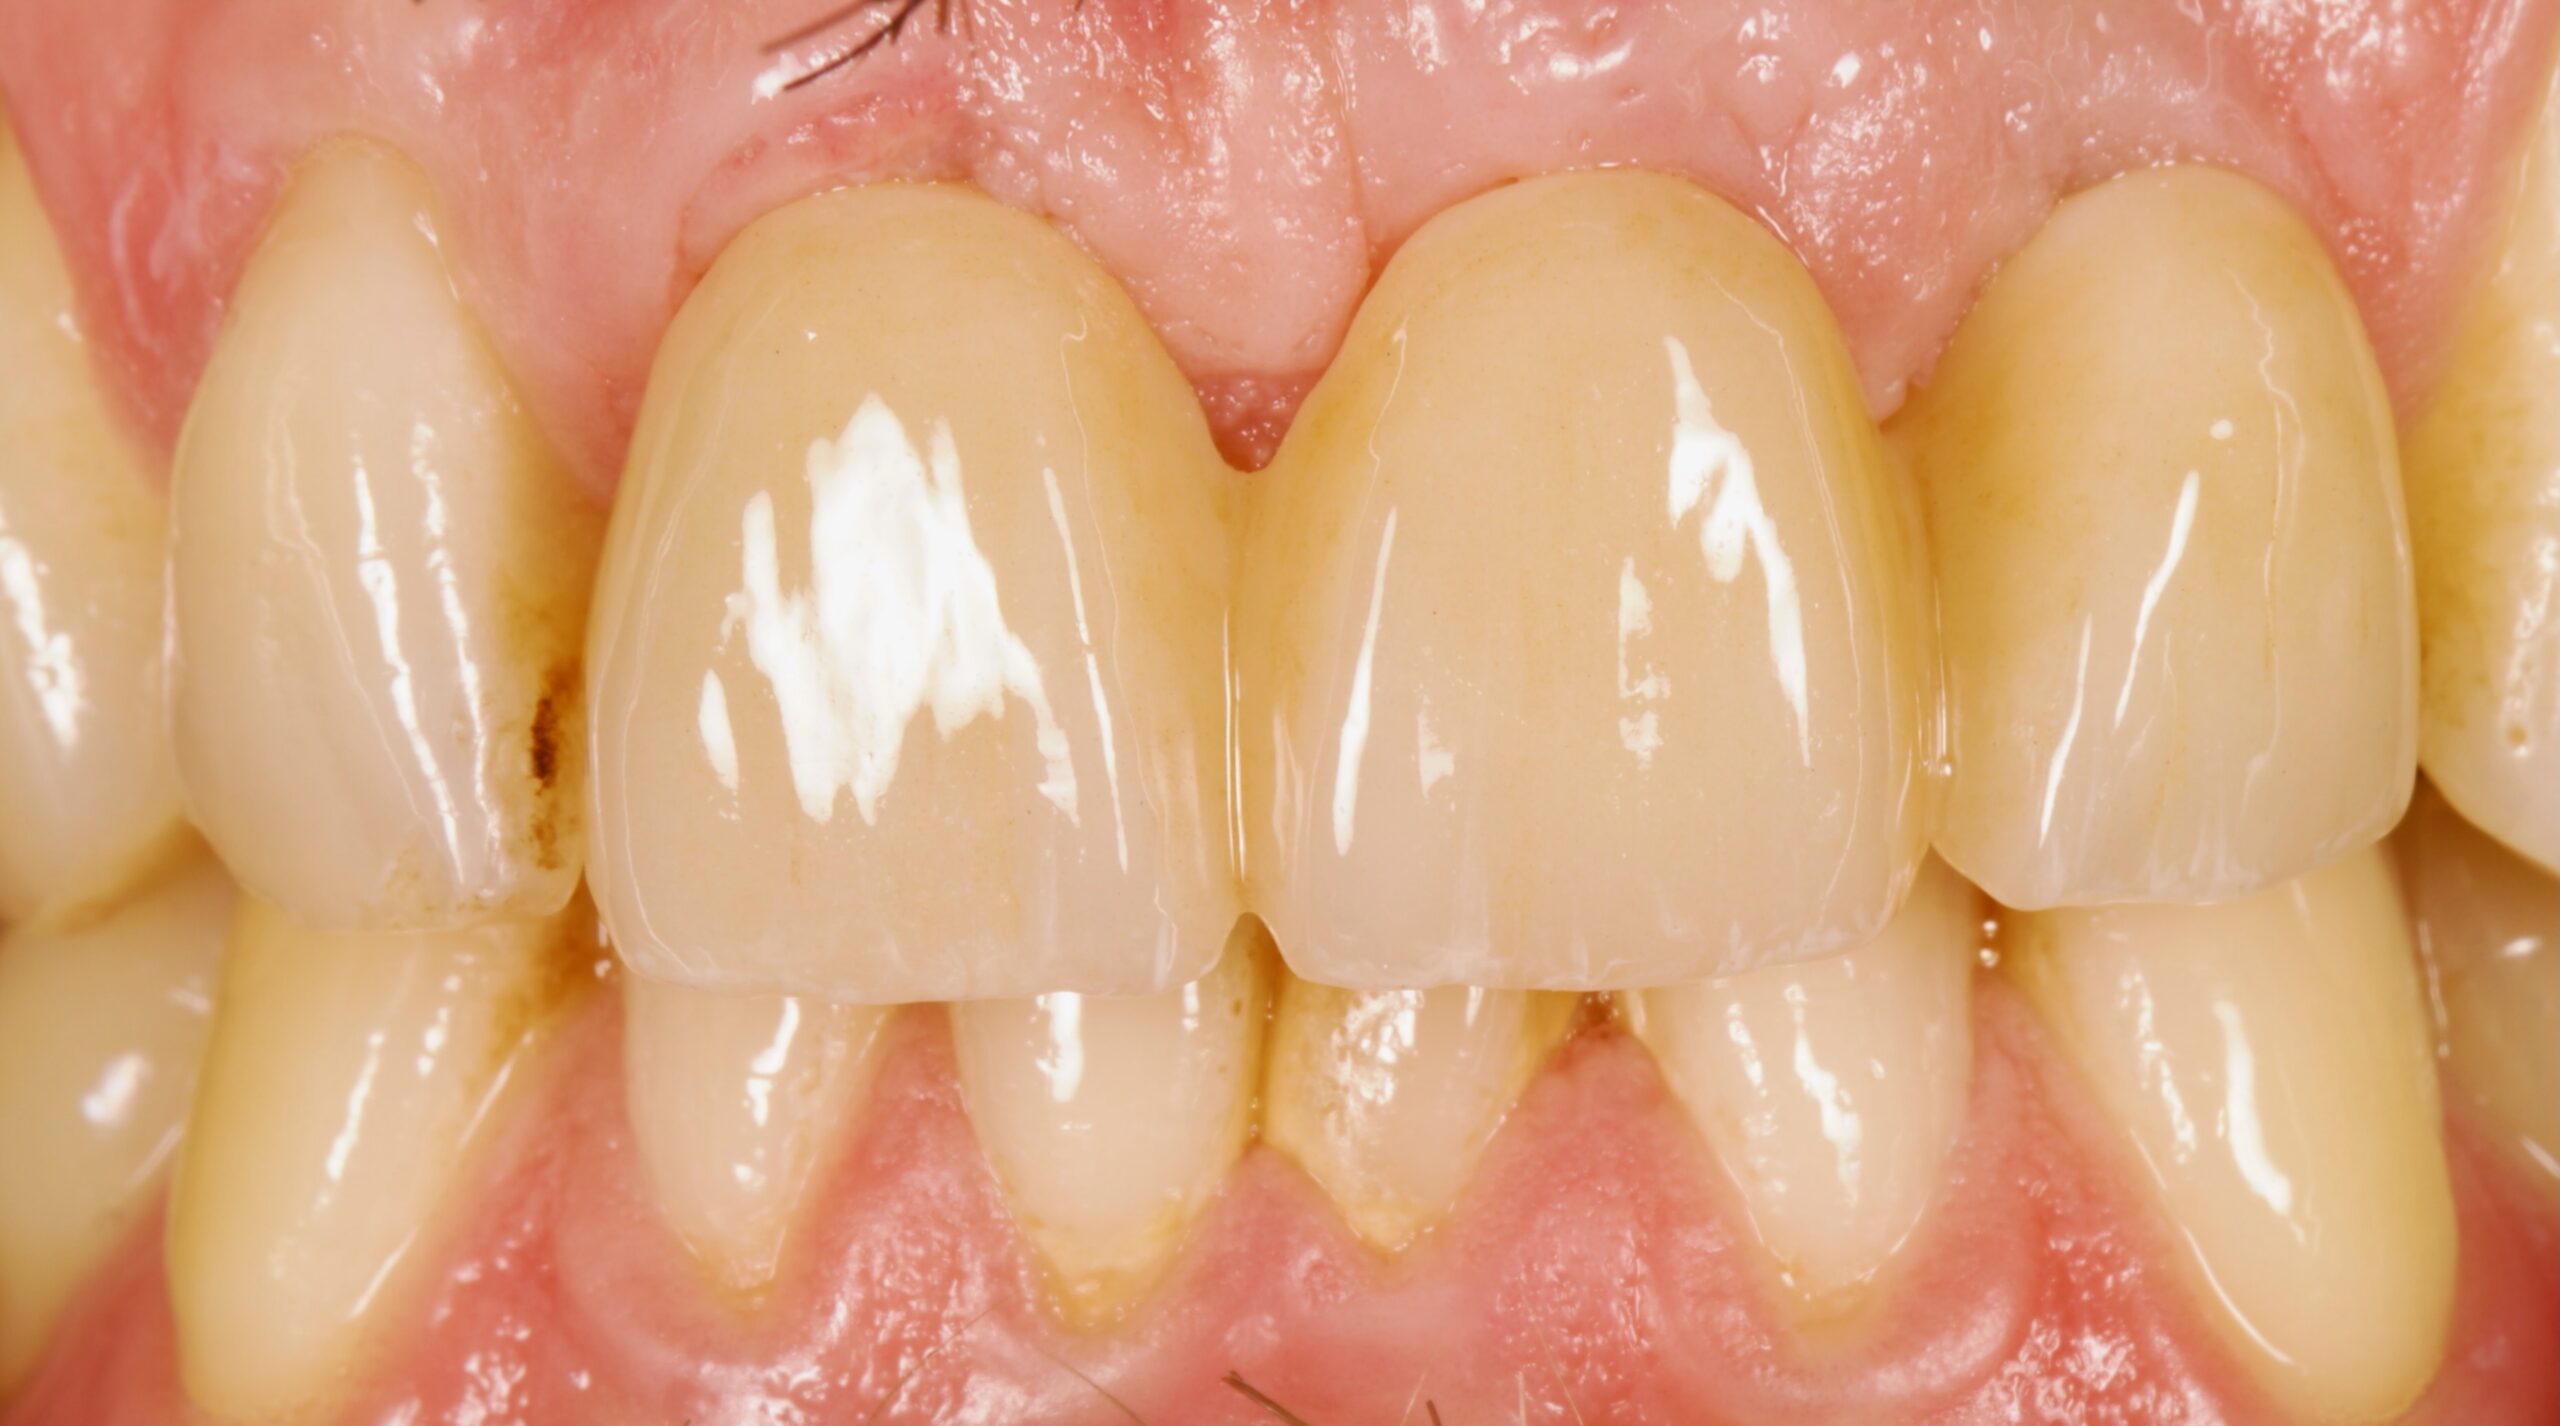
13a Final three-unit implant-retained bridge
13b Final three-unit implant-retained bridge
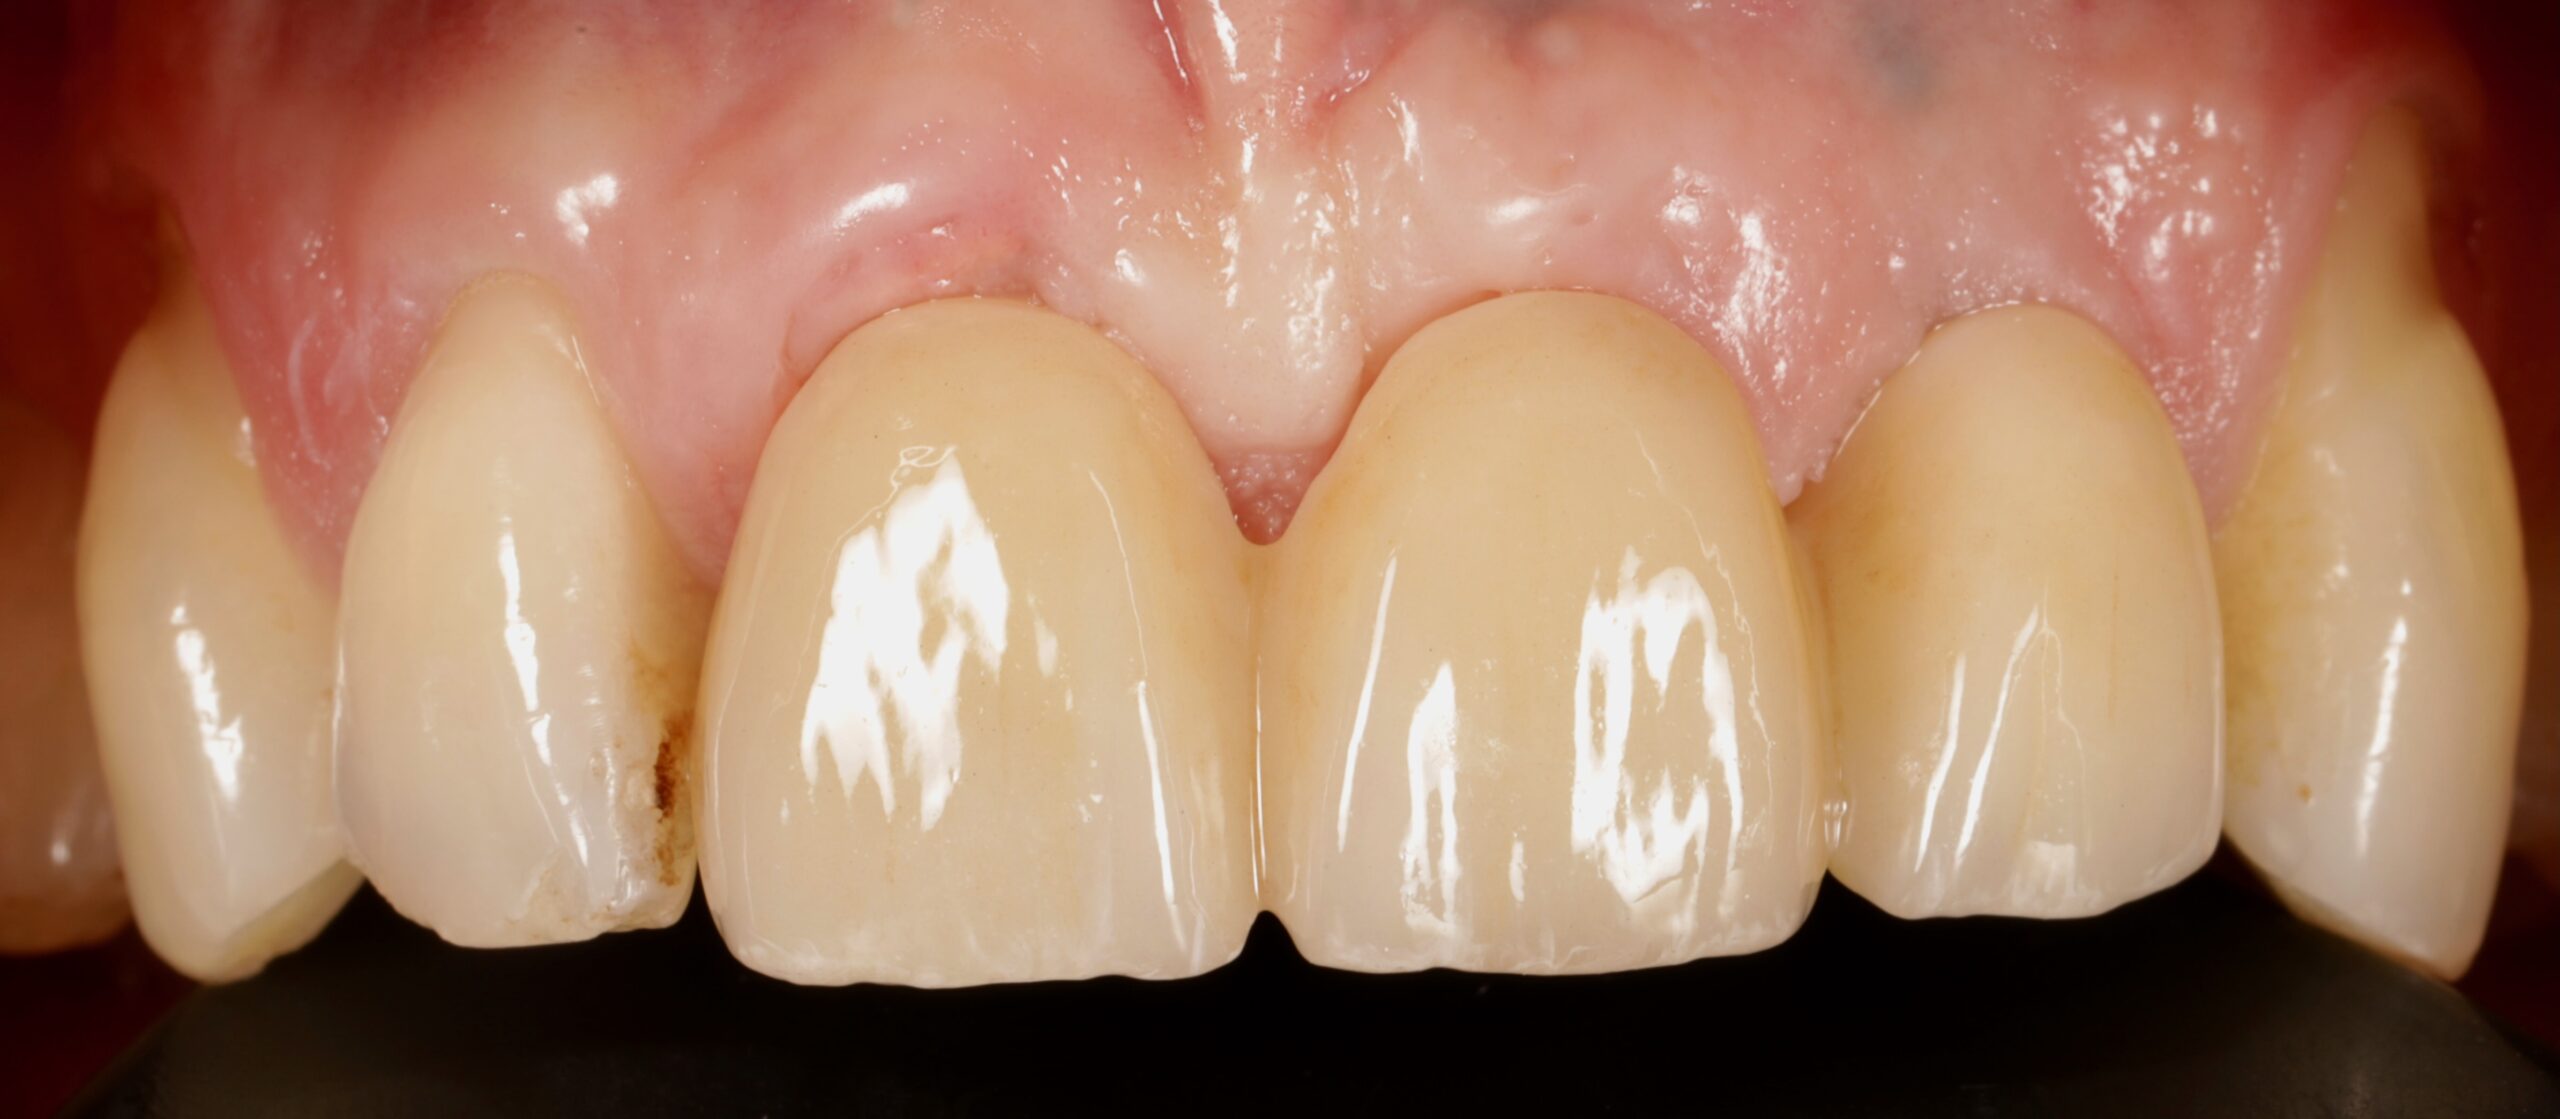
13c Final three-unit implant-retained bridge
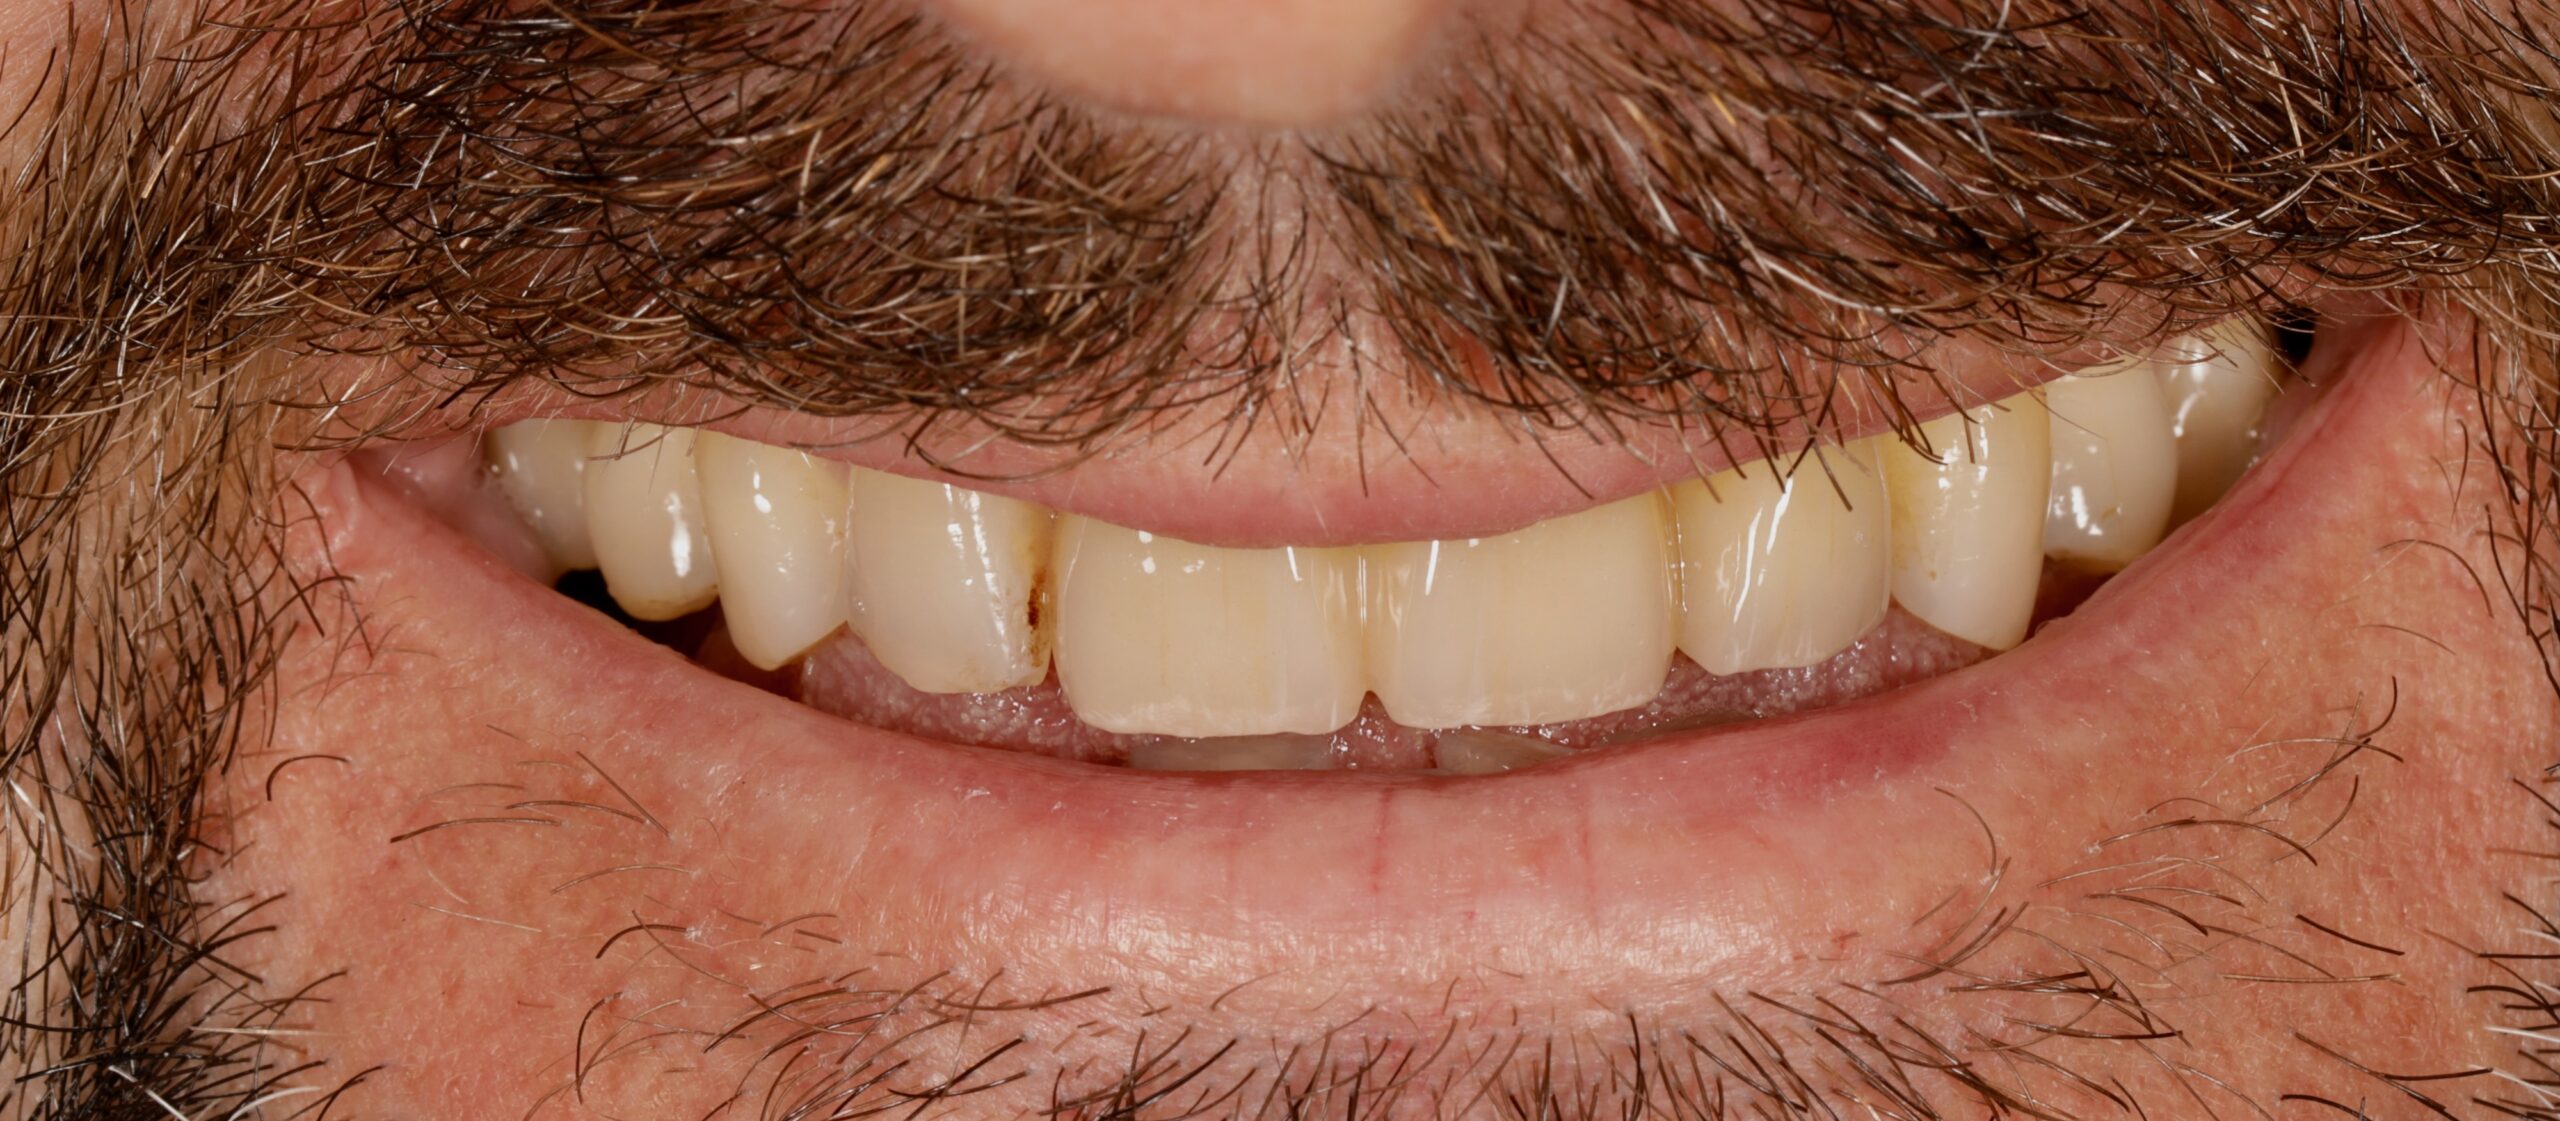
14 Post treatment smile
Dr Balaji provides industry-leading training courses on both hard and soft tissue management around dental implants with the ASHA Club.
For more information about how you could elevate your skills with the support of experts, please visit www.ashaclub.co.uk or call 07974 304269
Author bio:
Dr Selvaraj Balaji: BDS, MFDS RCPS(Gla), MFD SRCS(Ed), LDS RCS(Eng)
Since he obtained the BDS Degree, Dr Balaji has worked in Maxillo-facial units in the UK for several years and gained substantial experience in surgical dentistry. He is the principal dentist of The Gallery Dental Group which is made up of Meadow Walk Dental Practice and The Gallery Dental & Implant Centre. Dr Balaji is also the founder of the Academy of Soft and Hard Tissue Augmentation (ASHA) and runs courses, lectures and study clubs in the UK and around Europe for aspiring implantologists.